I am thinking that many of you found my little blog from my most popular post to date: Perfect Shades of Greige. Since paint colors seem to be such a hot topic (one I think a lot of people want to hear about), I wanted to write a post on my newest color obsession - navy!
Sewing Table Makeover | Myrtle House
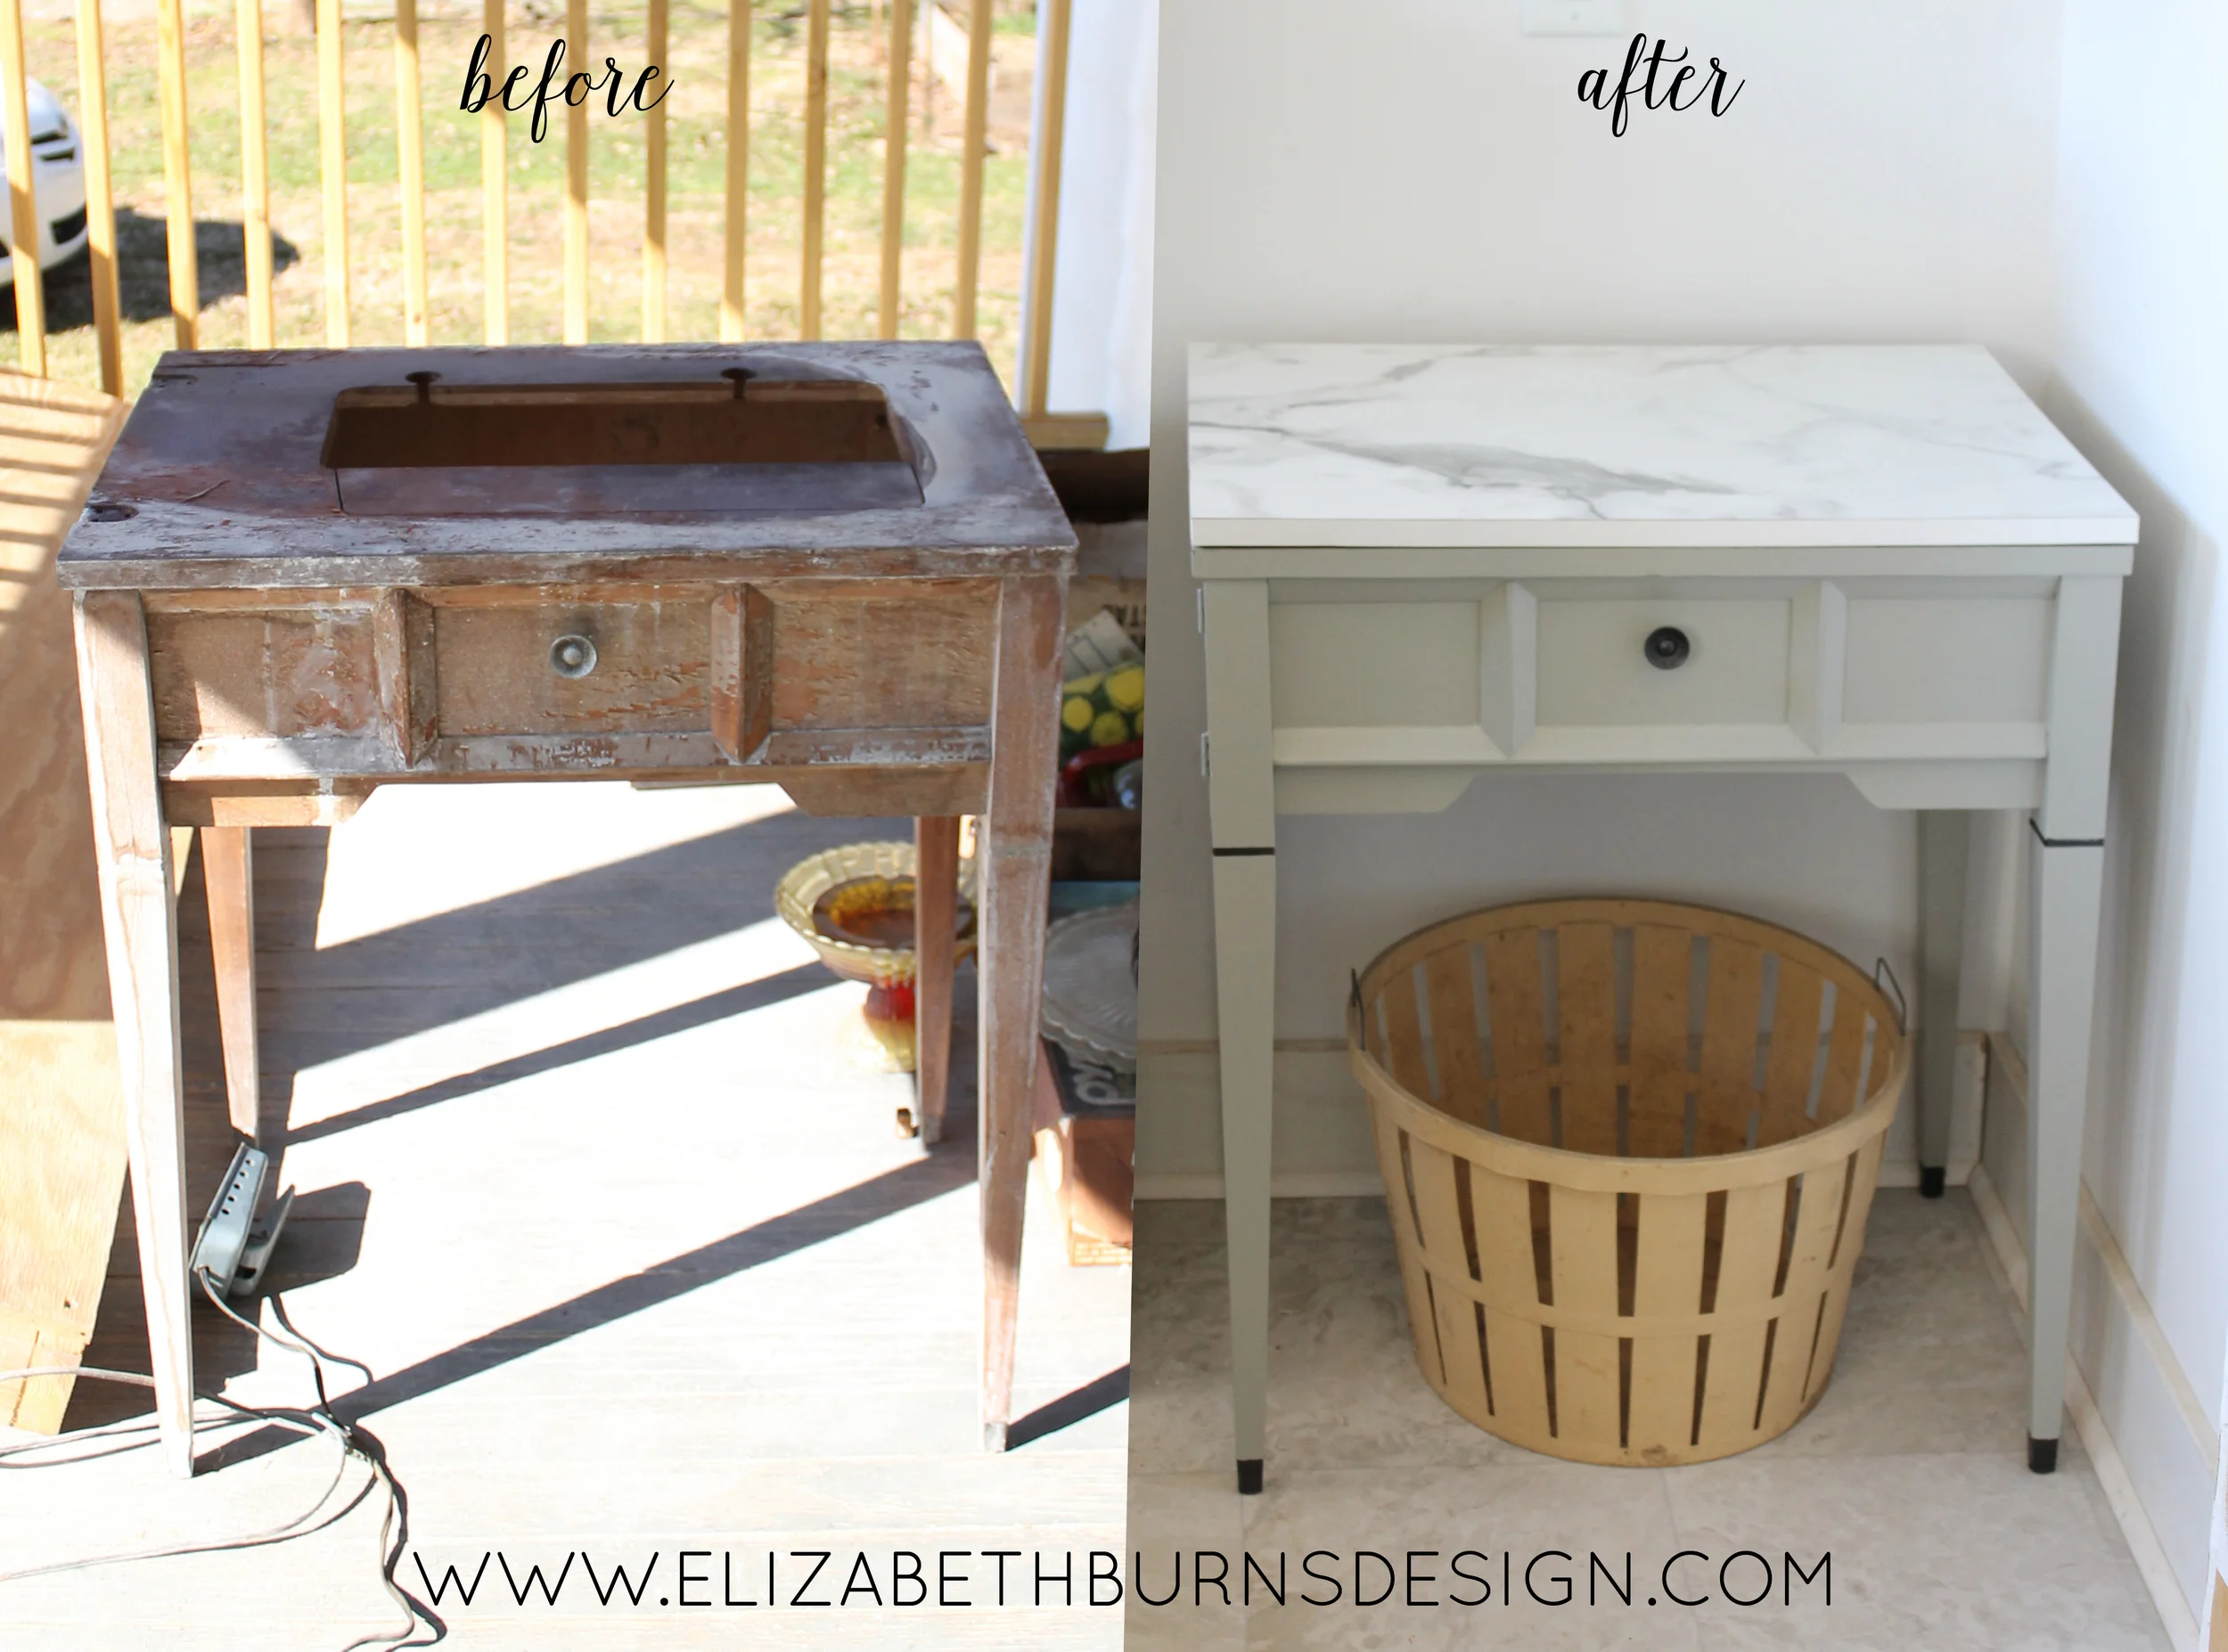
On Instagram, I have been going on and on about the pantry in the Myrtle House. Funny story about this room - once upon a time, it was going to be a powder room. Towards the end of the subcontractors' work, I came to my senses and realized that we didn't need 3.5 baths in a 1500 square foot house. So we changed the framing a bit and the door placement to create a walk-in pantry. The house was far enough along where the plumbing was already run to this area. Talk about a waste of a few hundred bucks! The pantry is not quite ready to show it's pretty face (still some touch up left) but I wanted to show you how cute this little sewing table makeover turned out. It is one of my favorite projects to date!


Sewing tables with the built-in sewing machine are pretty cool. My mom had one so I learned how to sew on it as a kid. Basically there is a leaf on the top that extends to create a table top and then the sewing machine hidden in the belly of the table rotates and locks into an upright position. You control the speed of the sewing machine by a lever you push in with your leg. A really neat design and innovative engineering. That being said, I am embarassed to admit that we abused the heck out of the sewing table Brian's grandmother had at the Myrtle House. Since it was so heavy, we used it to support our table saw and tile saw. Once when we didn't have a locking front door, we used it to barricade ourselves in for the night (keeping it classy). After two and a half years of abuse and neglect, this table had seen better days but I knew I wanted to incorporate him into the house since it was such an integral part of the renovation. So after a little love, he is now the prominent piece in our new pantry and will serve as a coffee bar table!
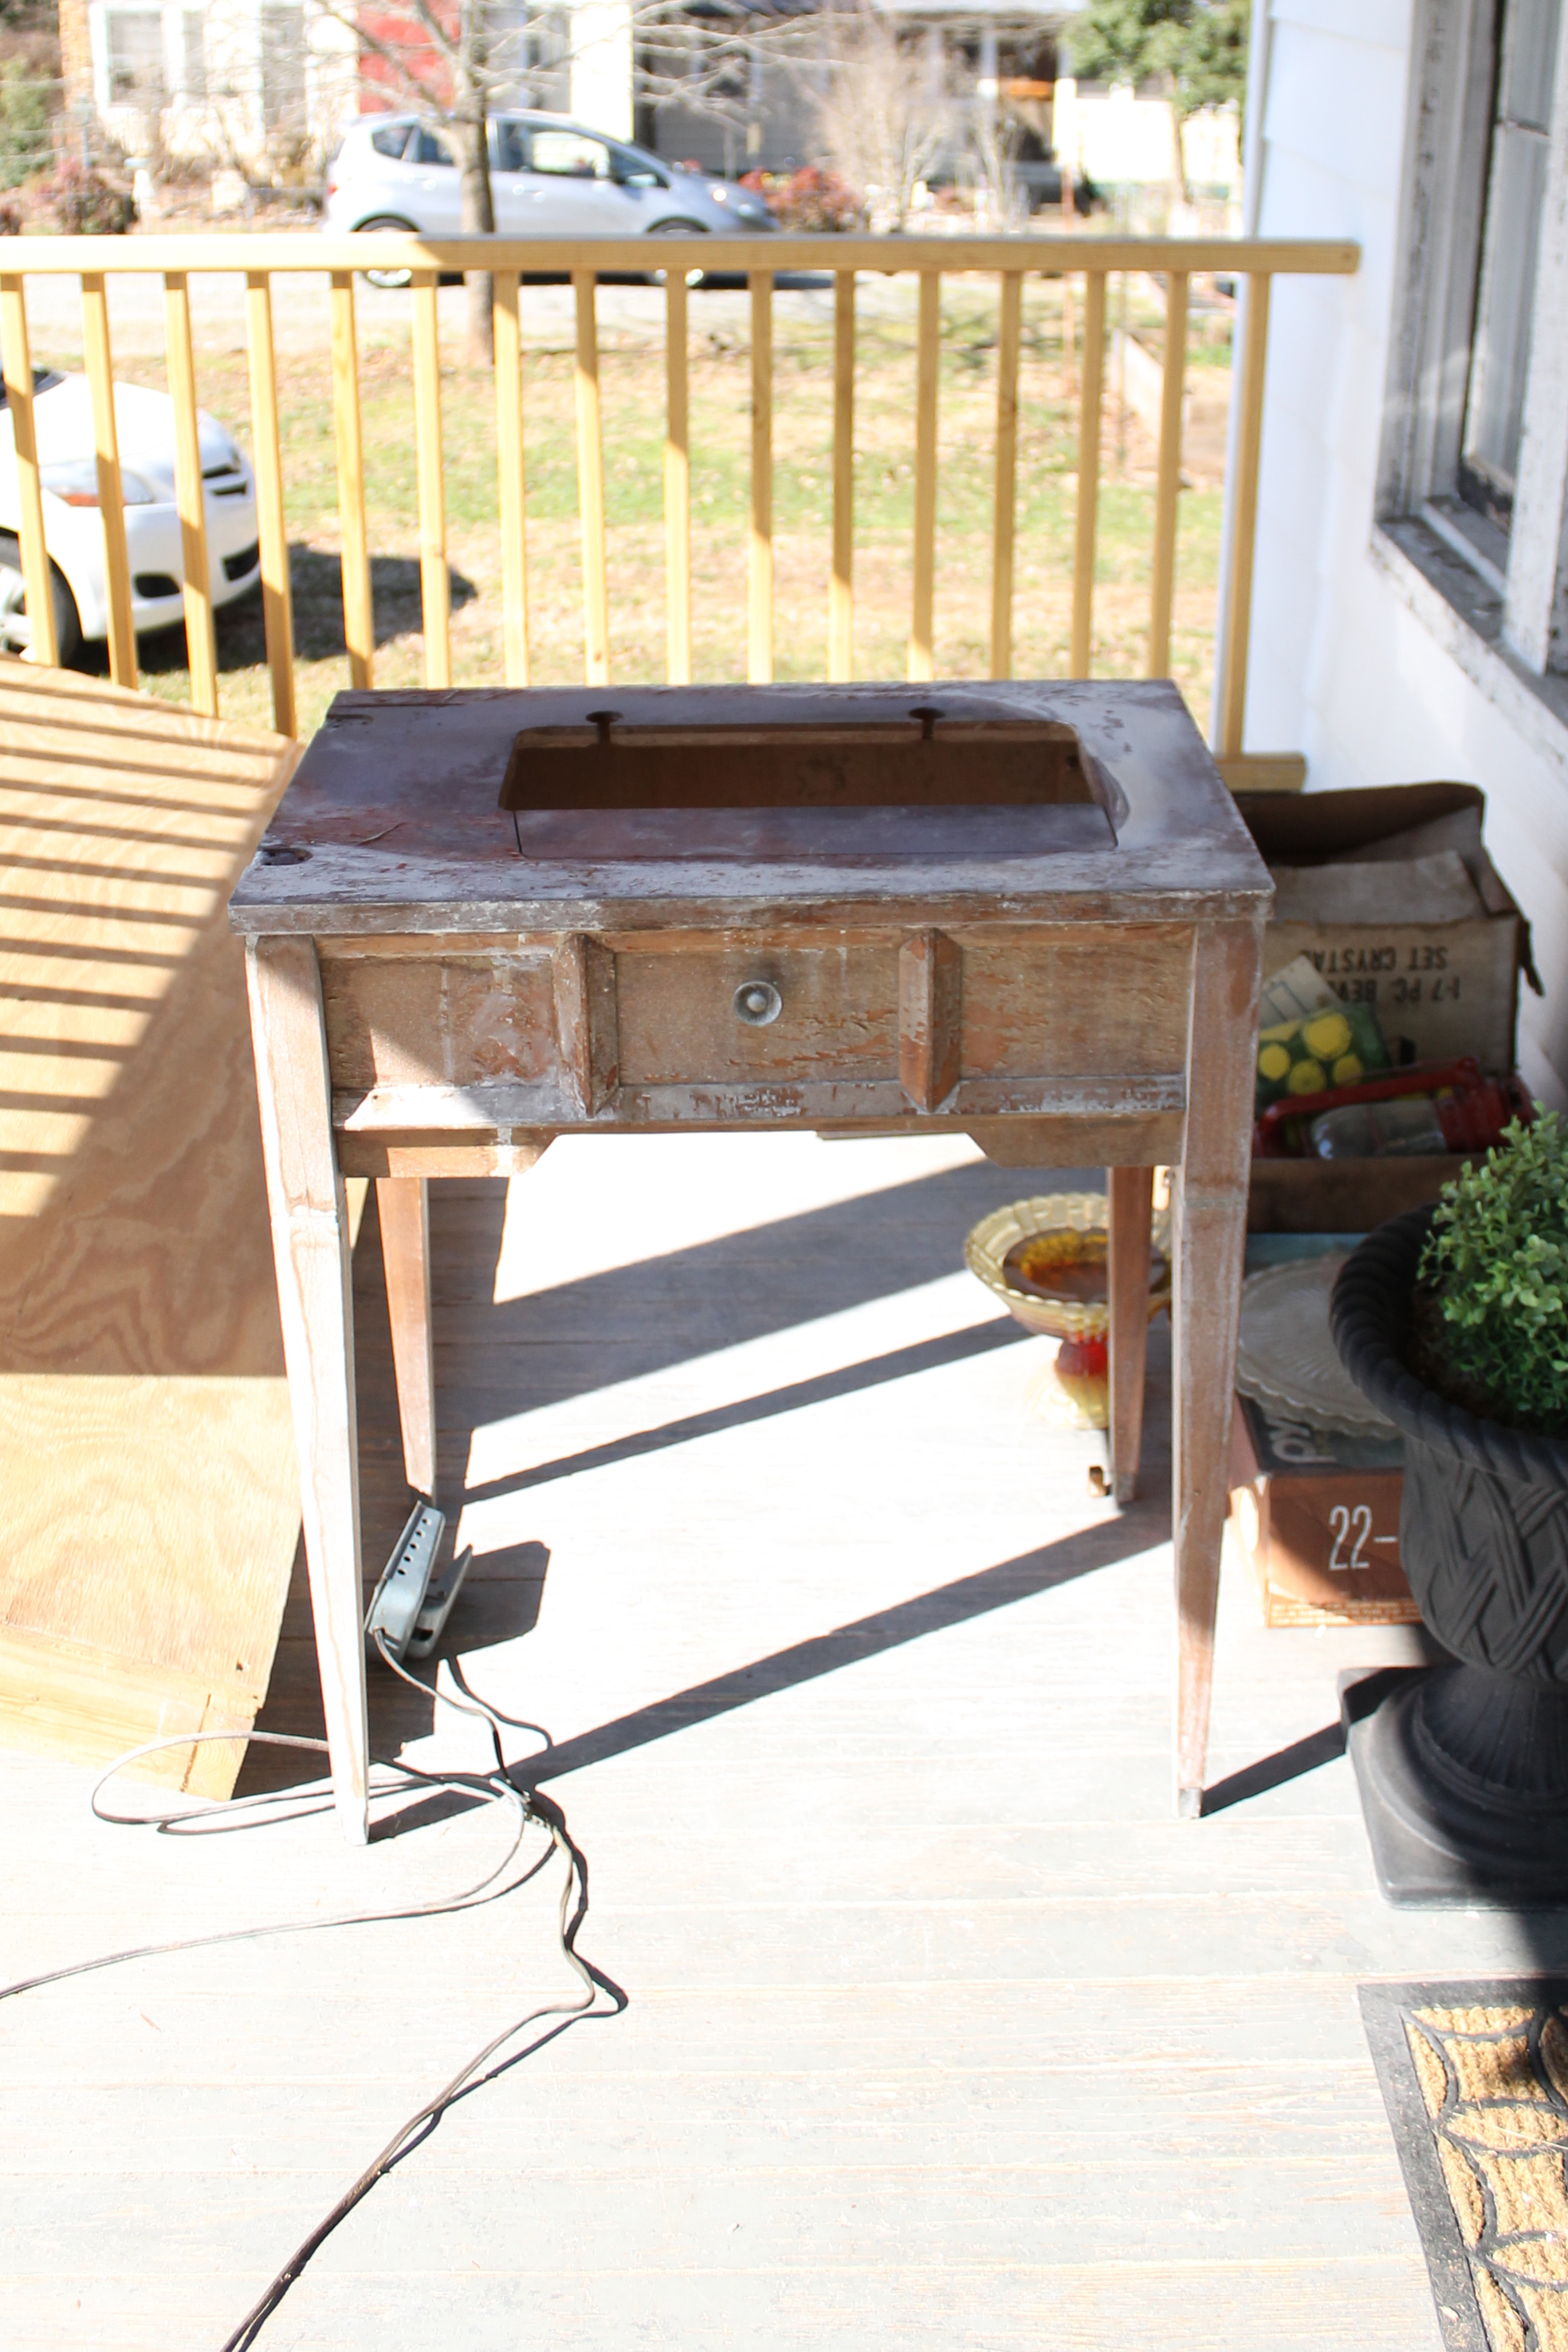

As we near the end of our renovation, the budget is getting tight. Who am I kidding, the budget was tight a year ago. We have been trying our best to recycle and repurpose anything and everything left in the house. When we installed our laminate counters, we cut out the sink hole and had a decent slab of laminate left. I threw it in a closet where it sat for weeks, but later discovered it was the perfect size to fit over the sewing table. We cut it down to size with a jigsaw, ironed on some white melamine edging, and boom - instant farble table. The best part to me is that this transformation literally cost nothing since I had all of the supplies (including the Sherwin Williams Mindful Gray cabinet paint) on hand.
So even if we murdered the poor little sewing table, I can sleep at night knowing that we kind of brought it back to life. I think it may be time for this reno to end - I am starting to personify furniture...
Modern Bathroom Design | Inspiration
After growing up during the 90s, I (like most millennials) have sworn off brass lighting, faucets, and hardware. Brass might as well have been a four-letter word in the housing industry for the majority of the last decade, especially in my book. When I saw those first flecks of gold pop up in trendy bathrooms a few years back, I thought the designers had lost their mind. People have worked so hard to rid their home of the brass! Put your house on the market with brass door knobs and you might as well have popcorn ceilings and tacky floral wallpaper; you can kiss that quick sale goodbye. I fought it off as long as I could, but even I have to admit, marble, gray, and gold look so dang good together. Satin nickel was starting to get a bit boring. And when I saw this light fixture at half price, I knew I was a goner and joined the dark side. So here is a little inspiration board for an inexpensive bathroom I threw together that embraces the brass tones (or champagne-bronze in this case).
Light | Vanity | Floor | Accent | Wall | Faucet
There are so many good deals on this board. The vanity is 20% off, the light fixture is 50% off, and those wood floor tiles? 75% off! Sure, the marble accent and faucet are a bit of a splurge, but they add SO much to the overall design. I think the warm tones of the gold and wood balance the coolness of the grays. Since I am officially out of bathrooms to design (at least for the moment :) please let me live vicariously through you. Go out and snag up these bargains to transform your bathroom into a gold-infused oasis. And send me pictures if you do!
I would love to hear from any real estate investors, renovators, or house flippers - would you put gold fixtures into a property you are selling or are potential buyers still scared off by brass?
Getting French | Myrtle House
One of my most very favorite things about the Myrtle House were the original French doors that connected the living room to the previous dining room. We switched things up (as we tend to do) and the old dining room was divided into the now office and guest bath to make this little house a 3 bed/3 bath abode. We did (surprisingly) keep the location of the French doors original, but that lovely, pinkish-brownish-orangeish paint color had got to go.

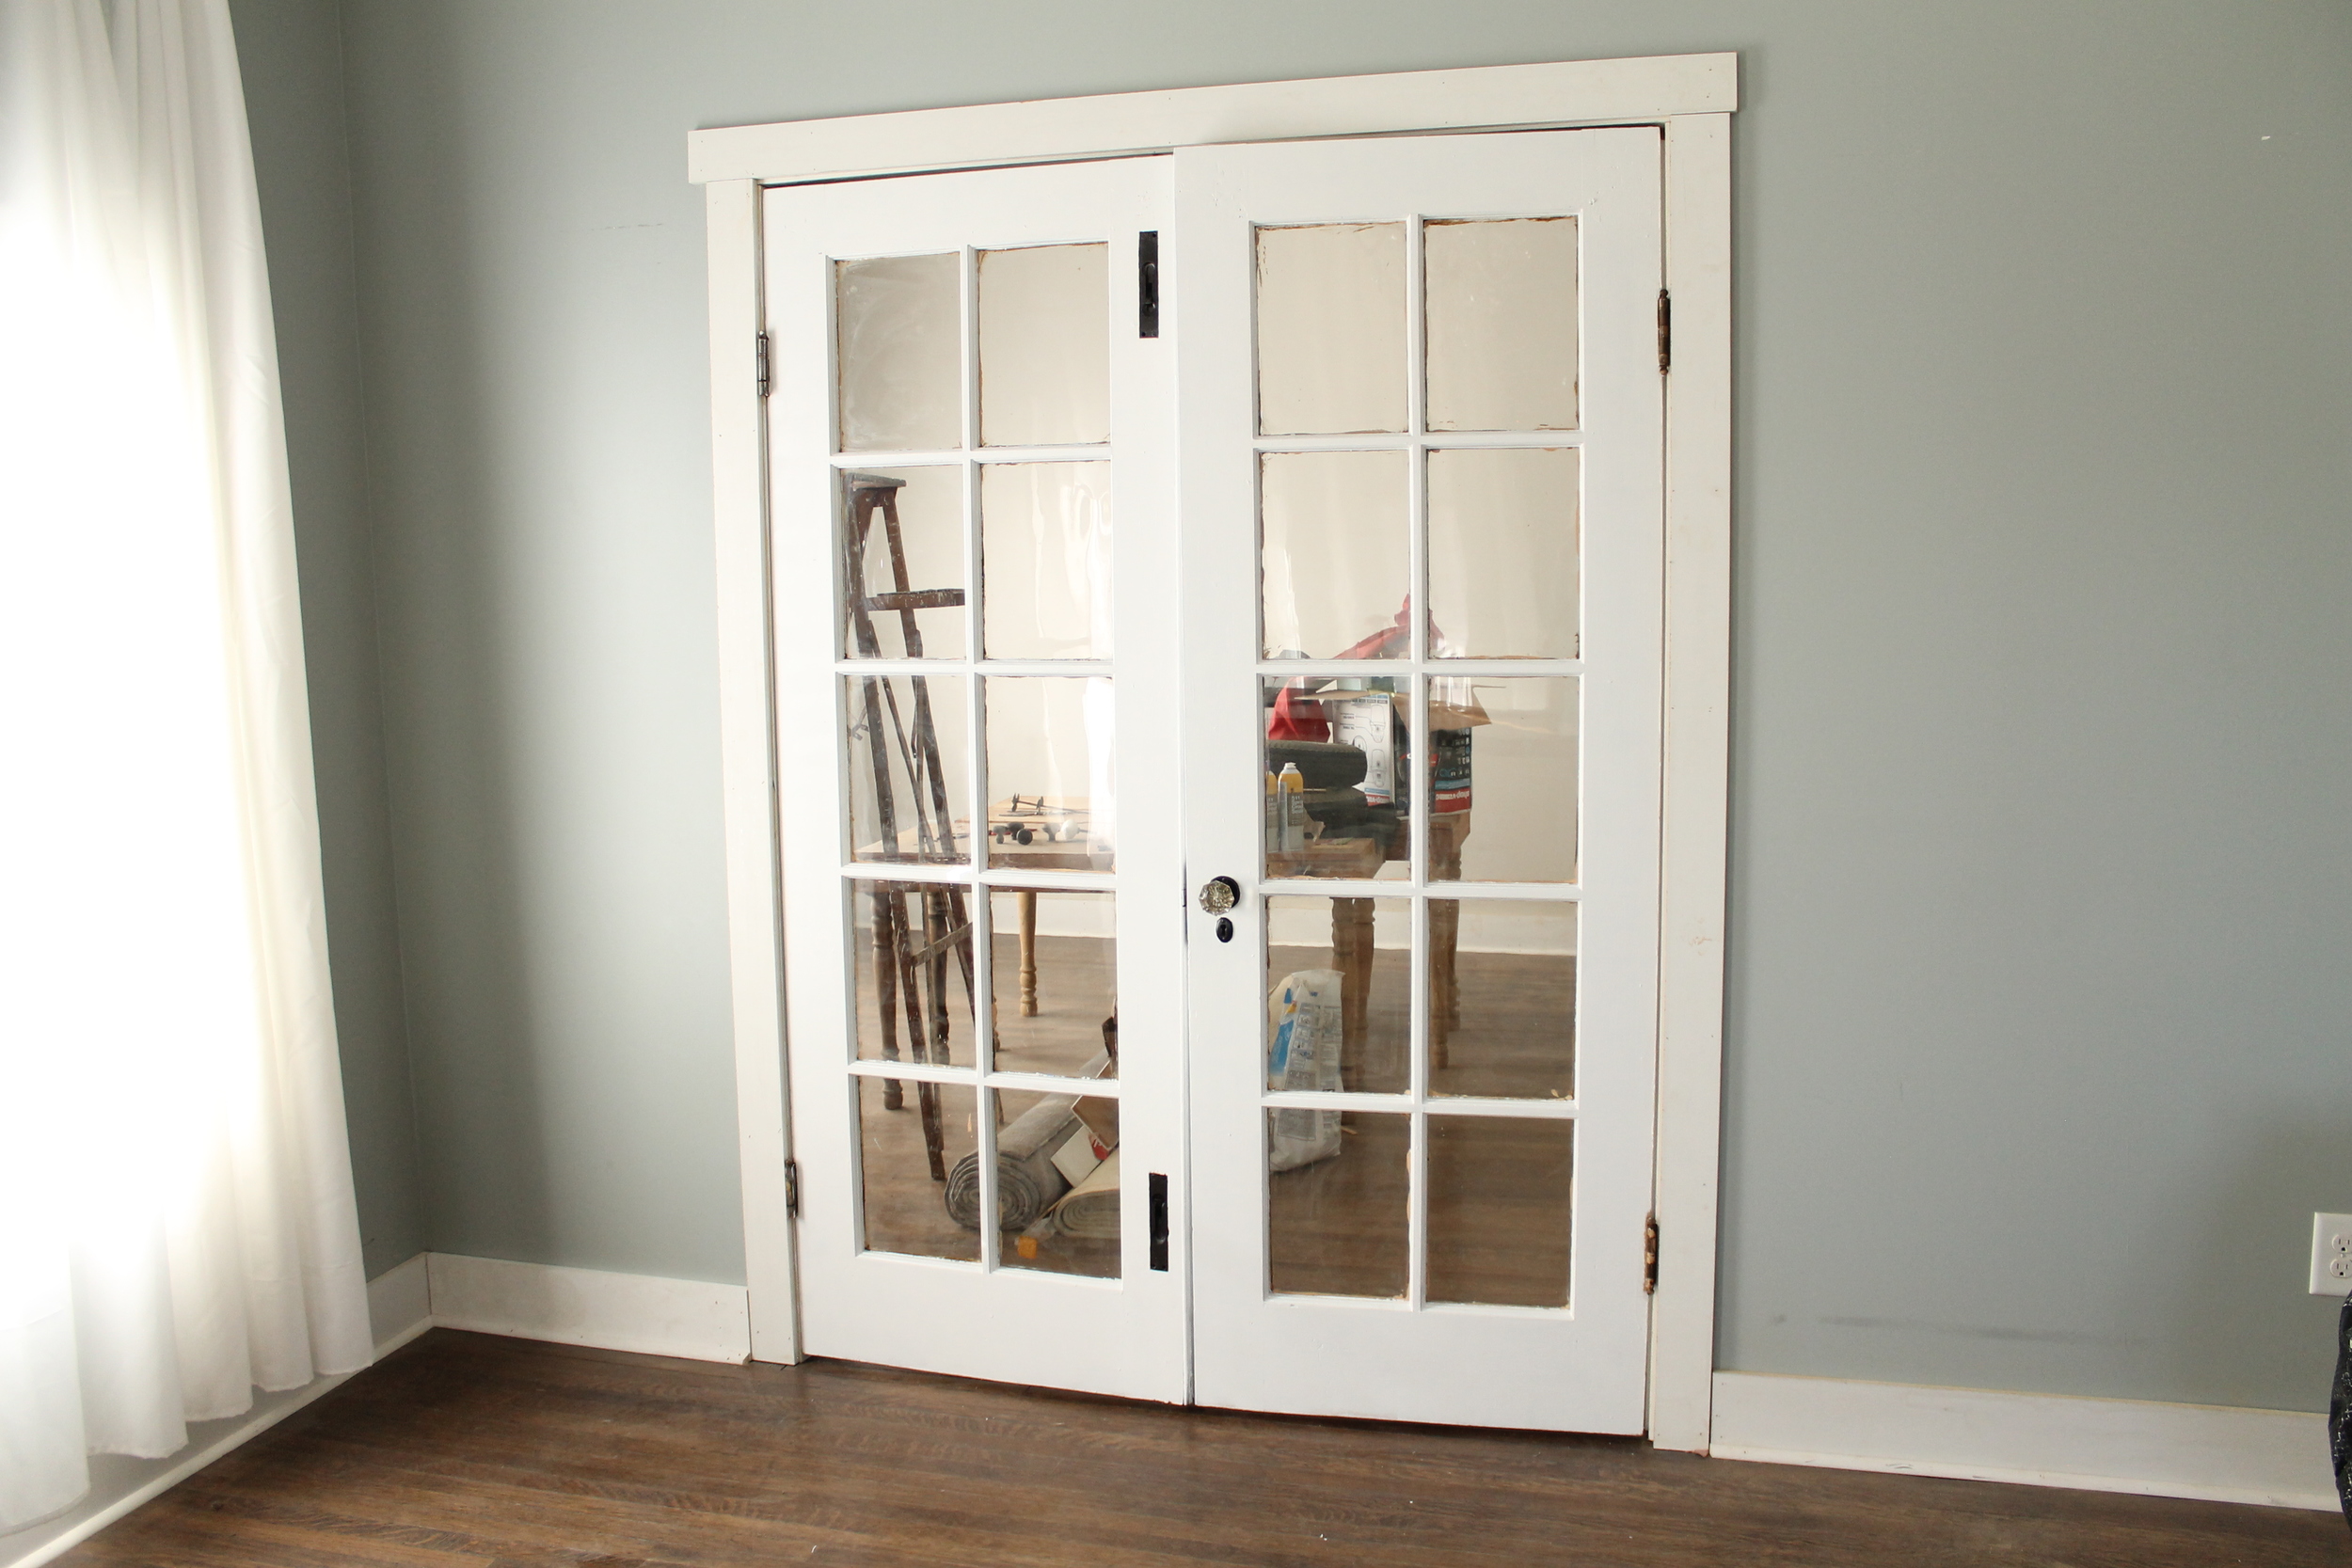
I knew that this wasn't going to be a quick one-coat kind of project. Since the windows were the same color and took four coats of paint, I resigned to the fact that this job would probably consume the entire weekend. And I was correct. :) BUT, it was totally worth it since that shade of who knows what is gone and replaced by a pearly white! And that hardware with the antique glass knobs now sparkle again after some careful spray painting.


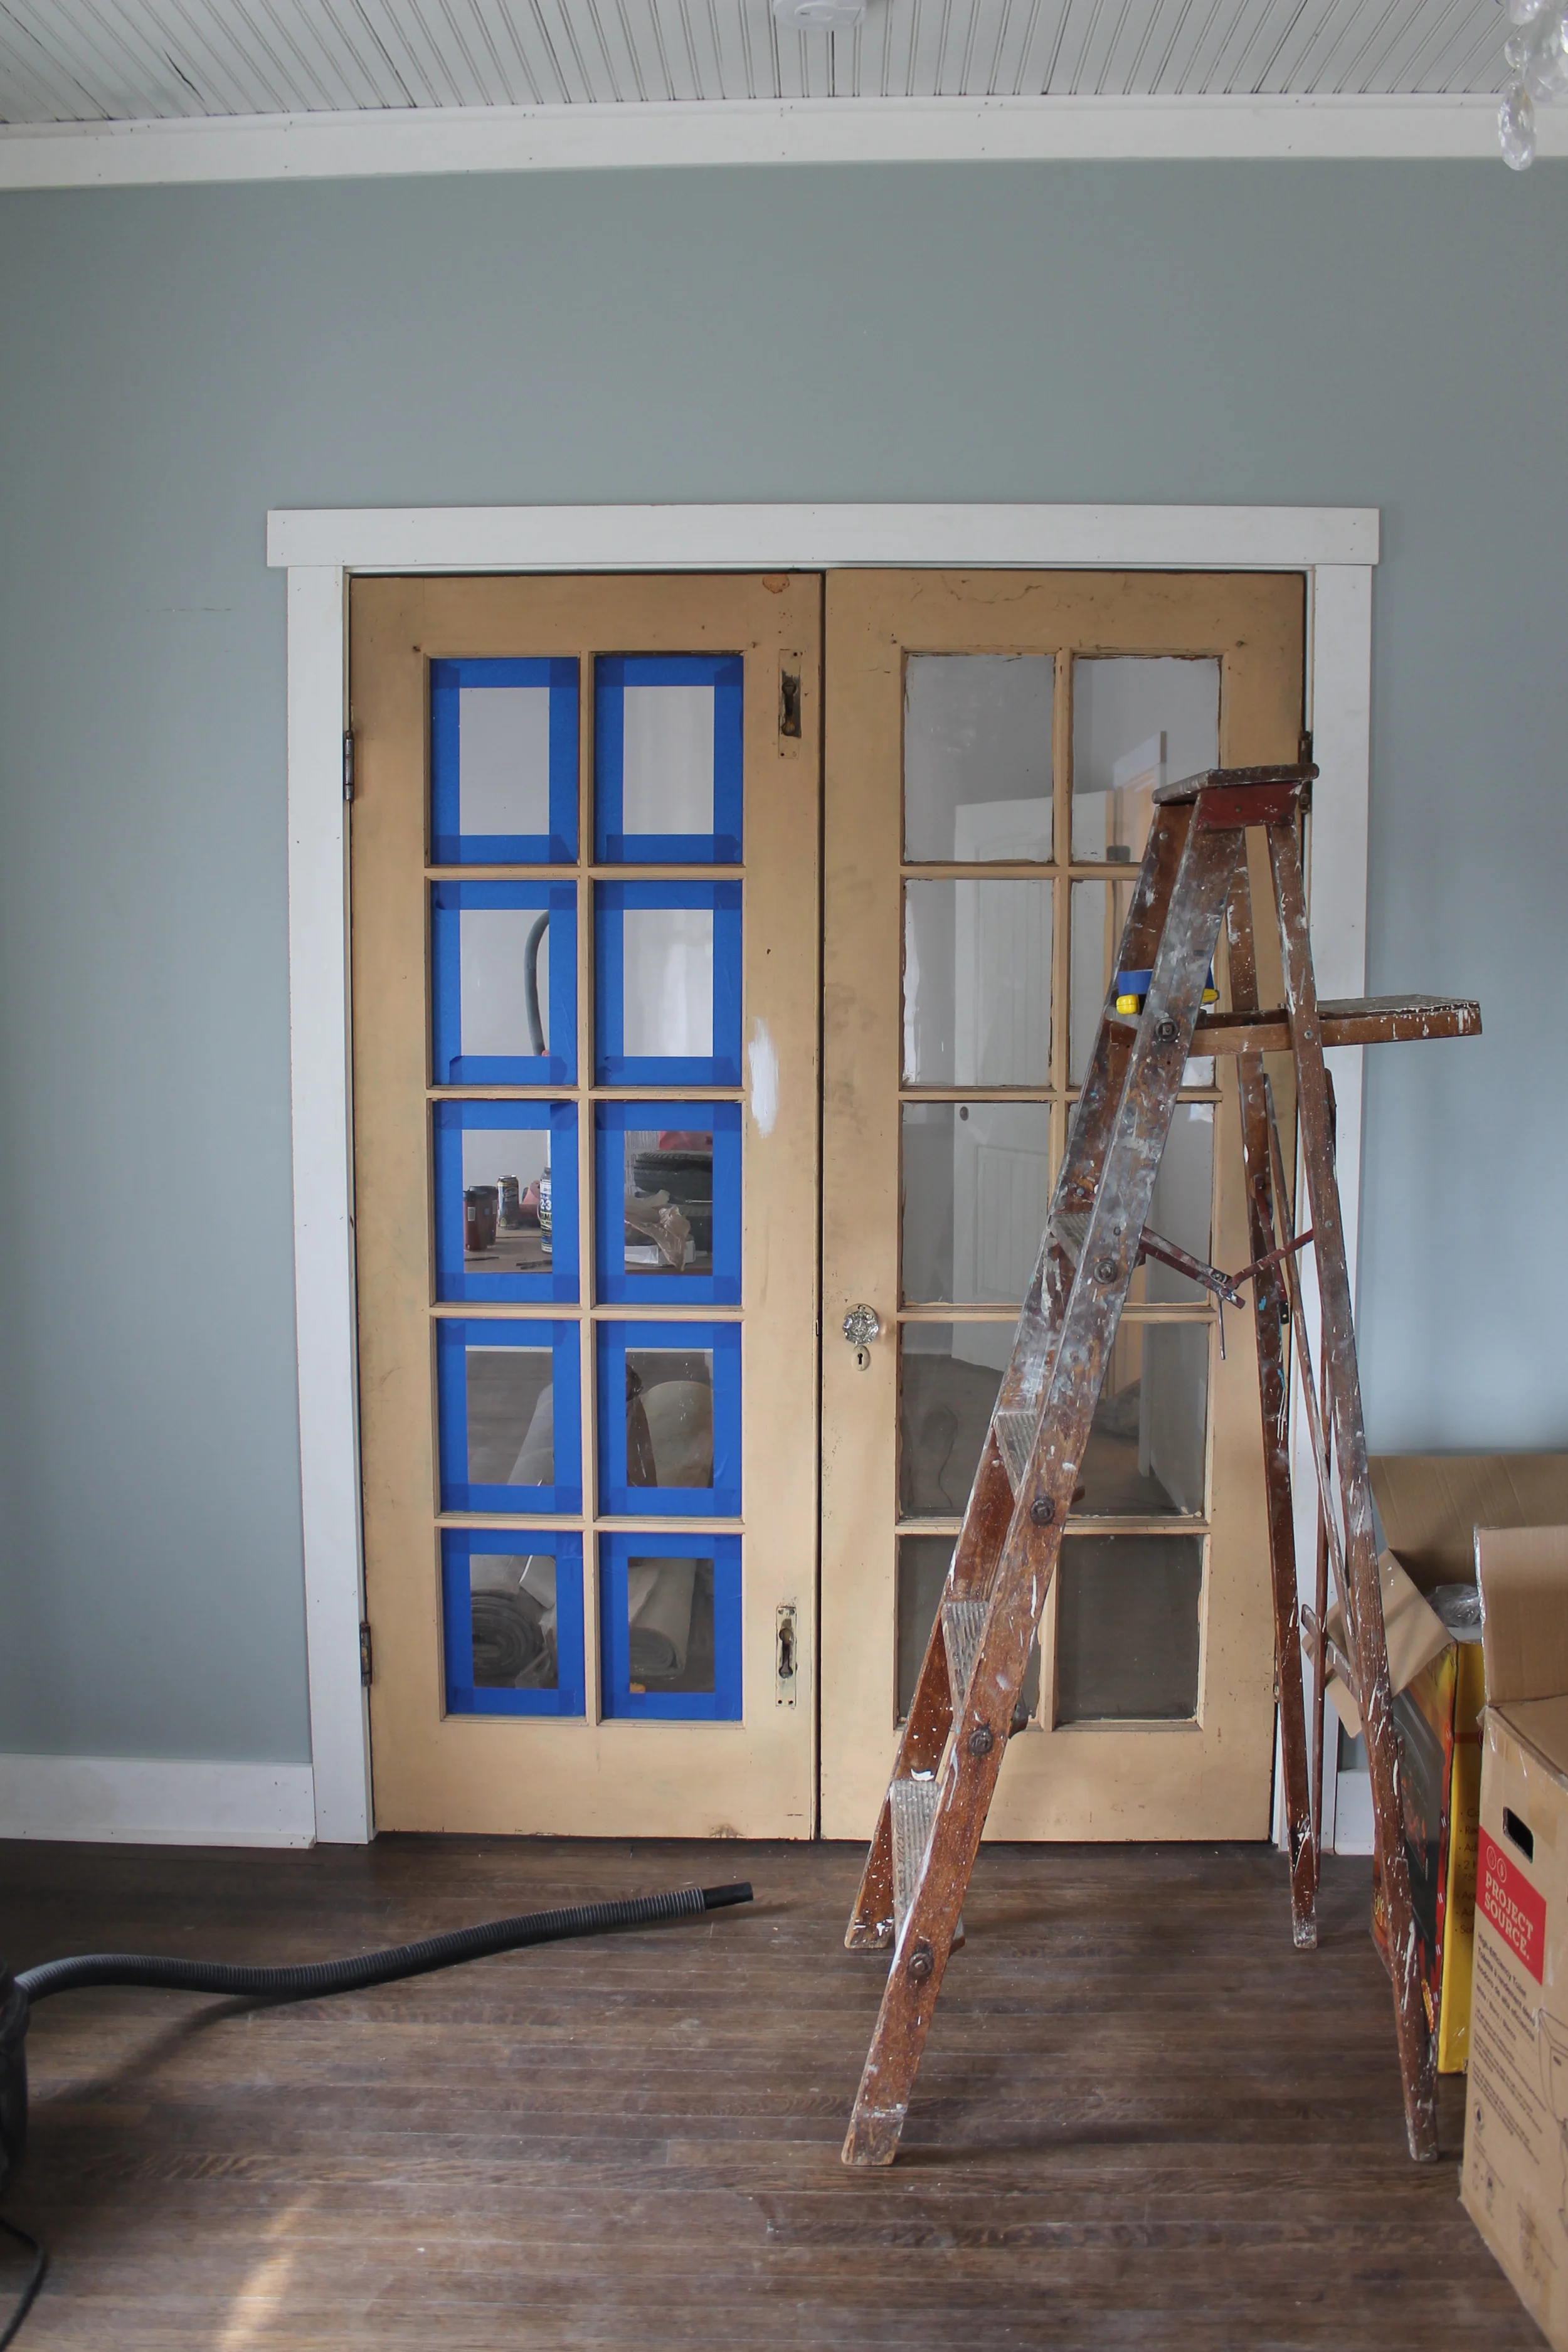

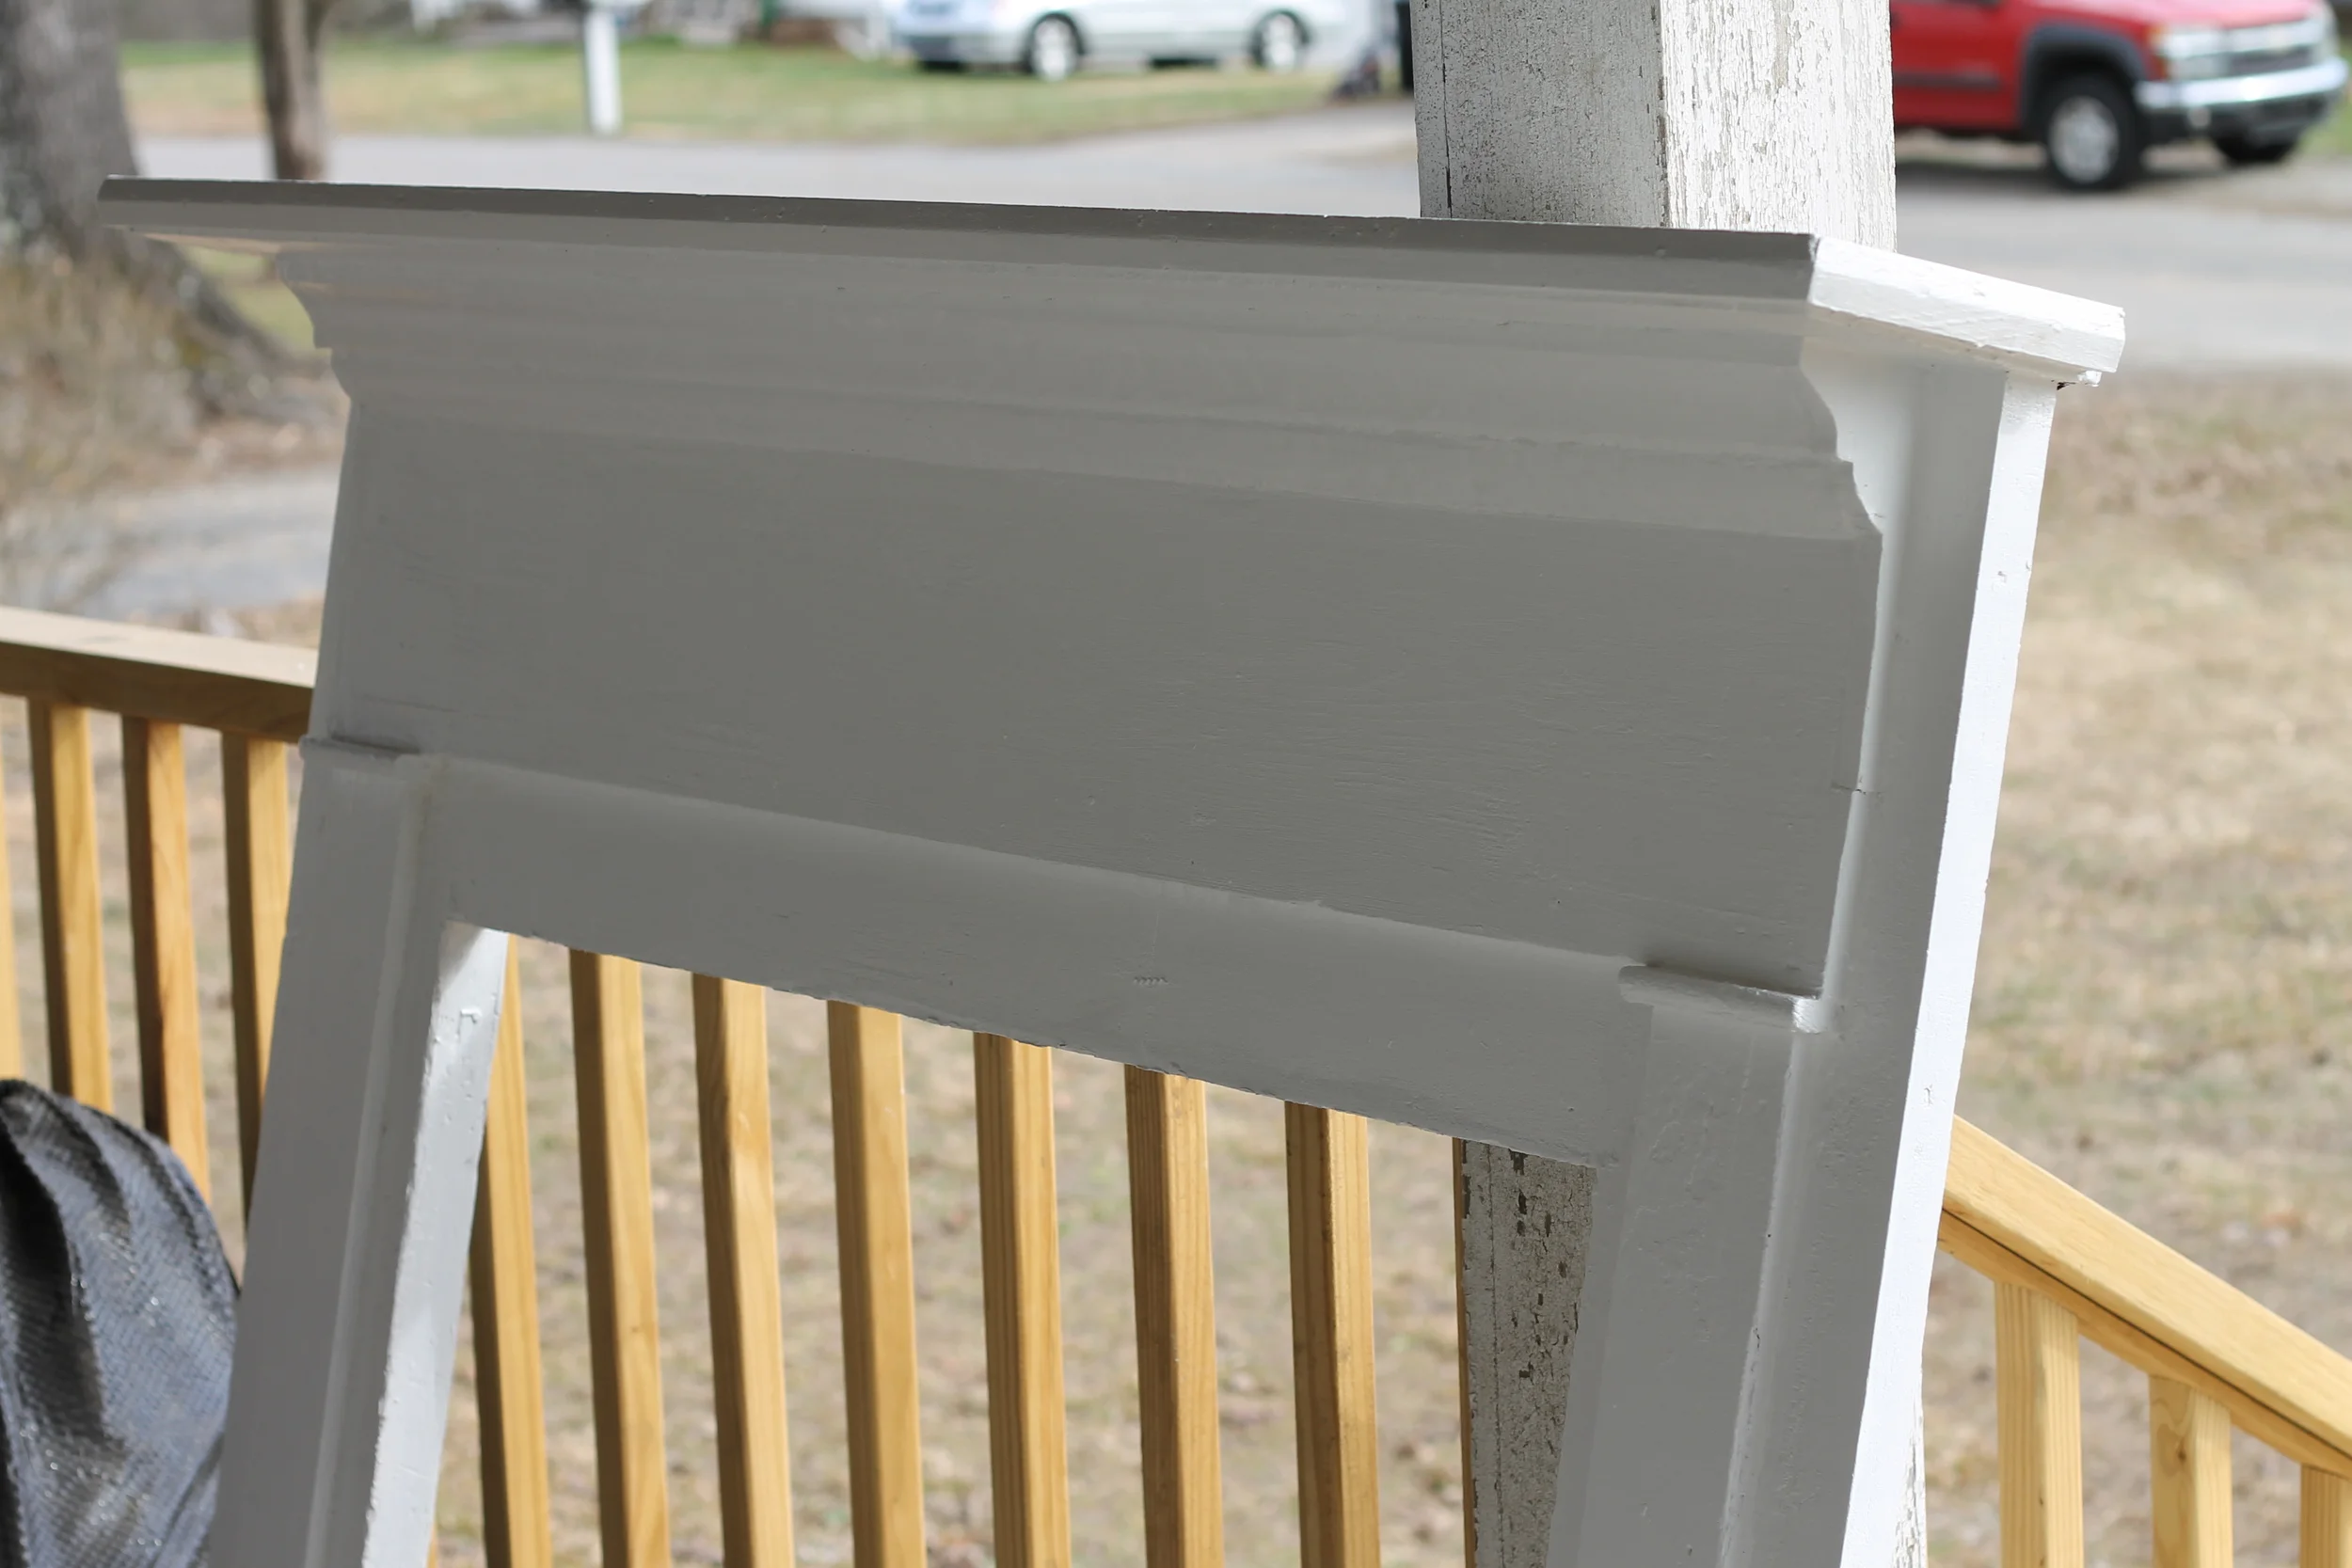
There was a little miscommunication with the contractor about the design of the trim, but once those door casings are squared off we can move on to endless caulking and painting. Since we are expecting a near heat wave here in NC (i.e. over 50 degrees) we are thinking about tackling the porch this weekend and adding some paint! Happy hump day, y'all. :)
Faux Fireplace | Myrtle House
I know I have probably mentioned 101 times how bummed I was to lose the crumbling fireplace at the Myrtle House. With a $6,000 price tag to repair, it was way out of the budget for this little town. So we opted to demo the brick, repurpose it as a walkway, and place siding over the hole where the fireplace was. Since we were able to salvage the original oak floors, we had an empty area where the brick hearth used to be. We still had three original mantles from the house (one where the demo-ed fireplace used to be and two from the now exposed double-sided fireplace). I took one of the mantles, sanded the heck out of it, then repainted it.


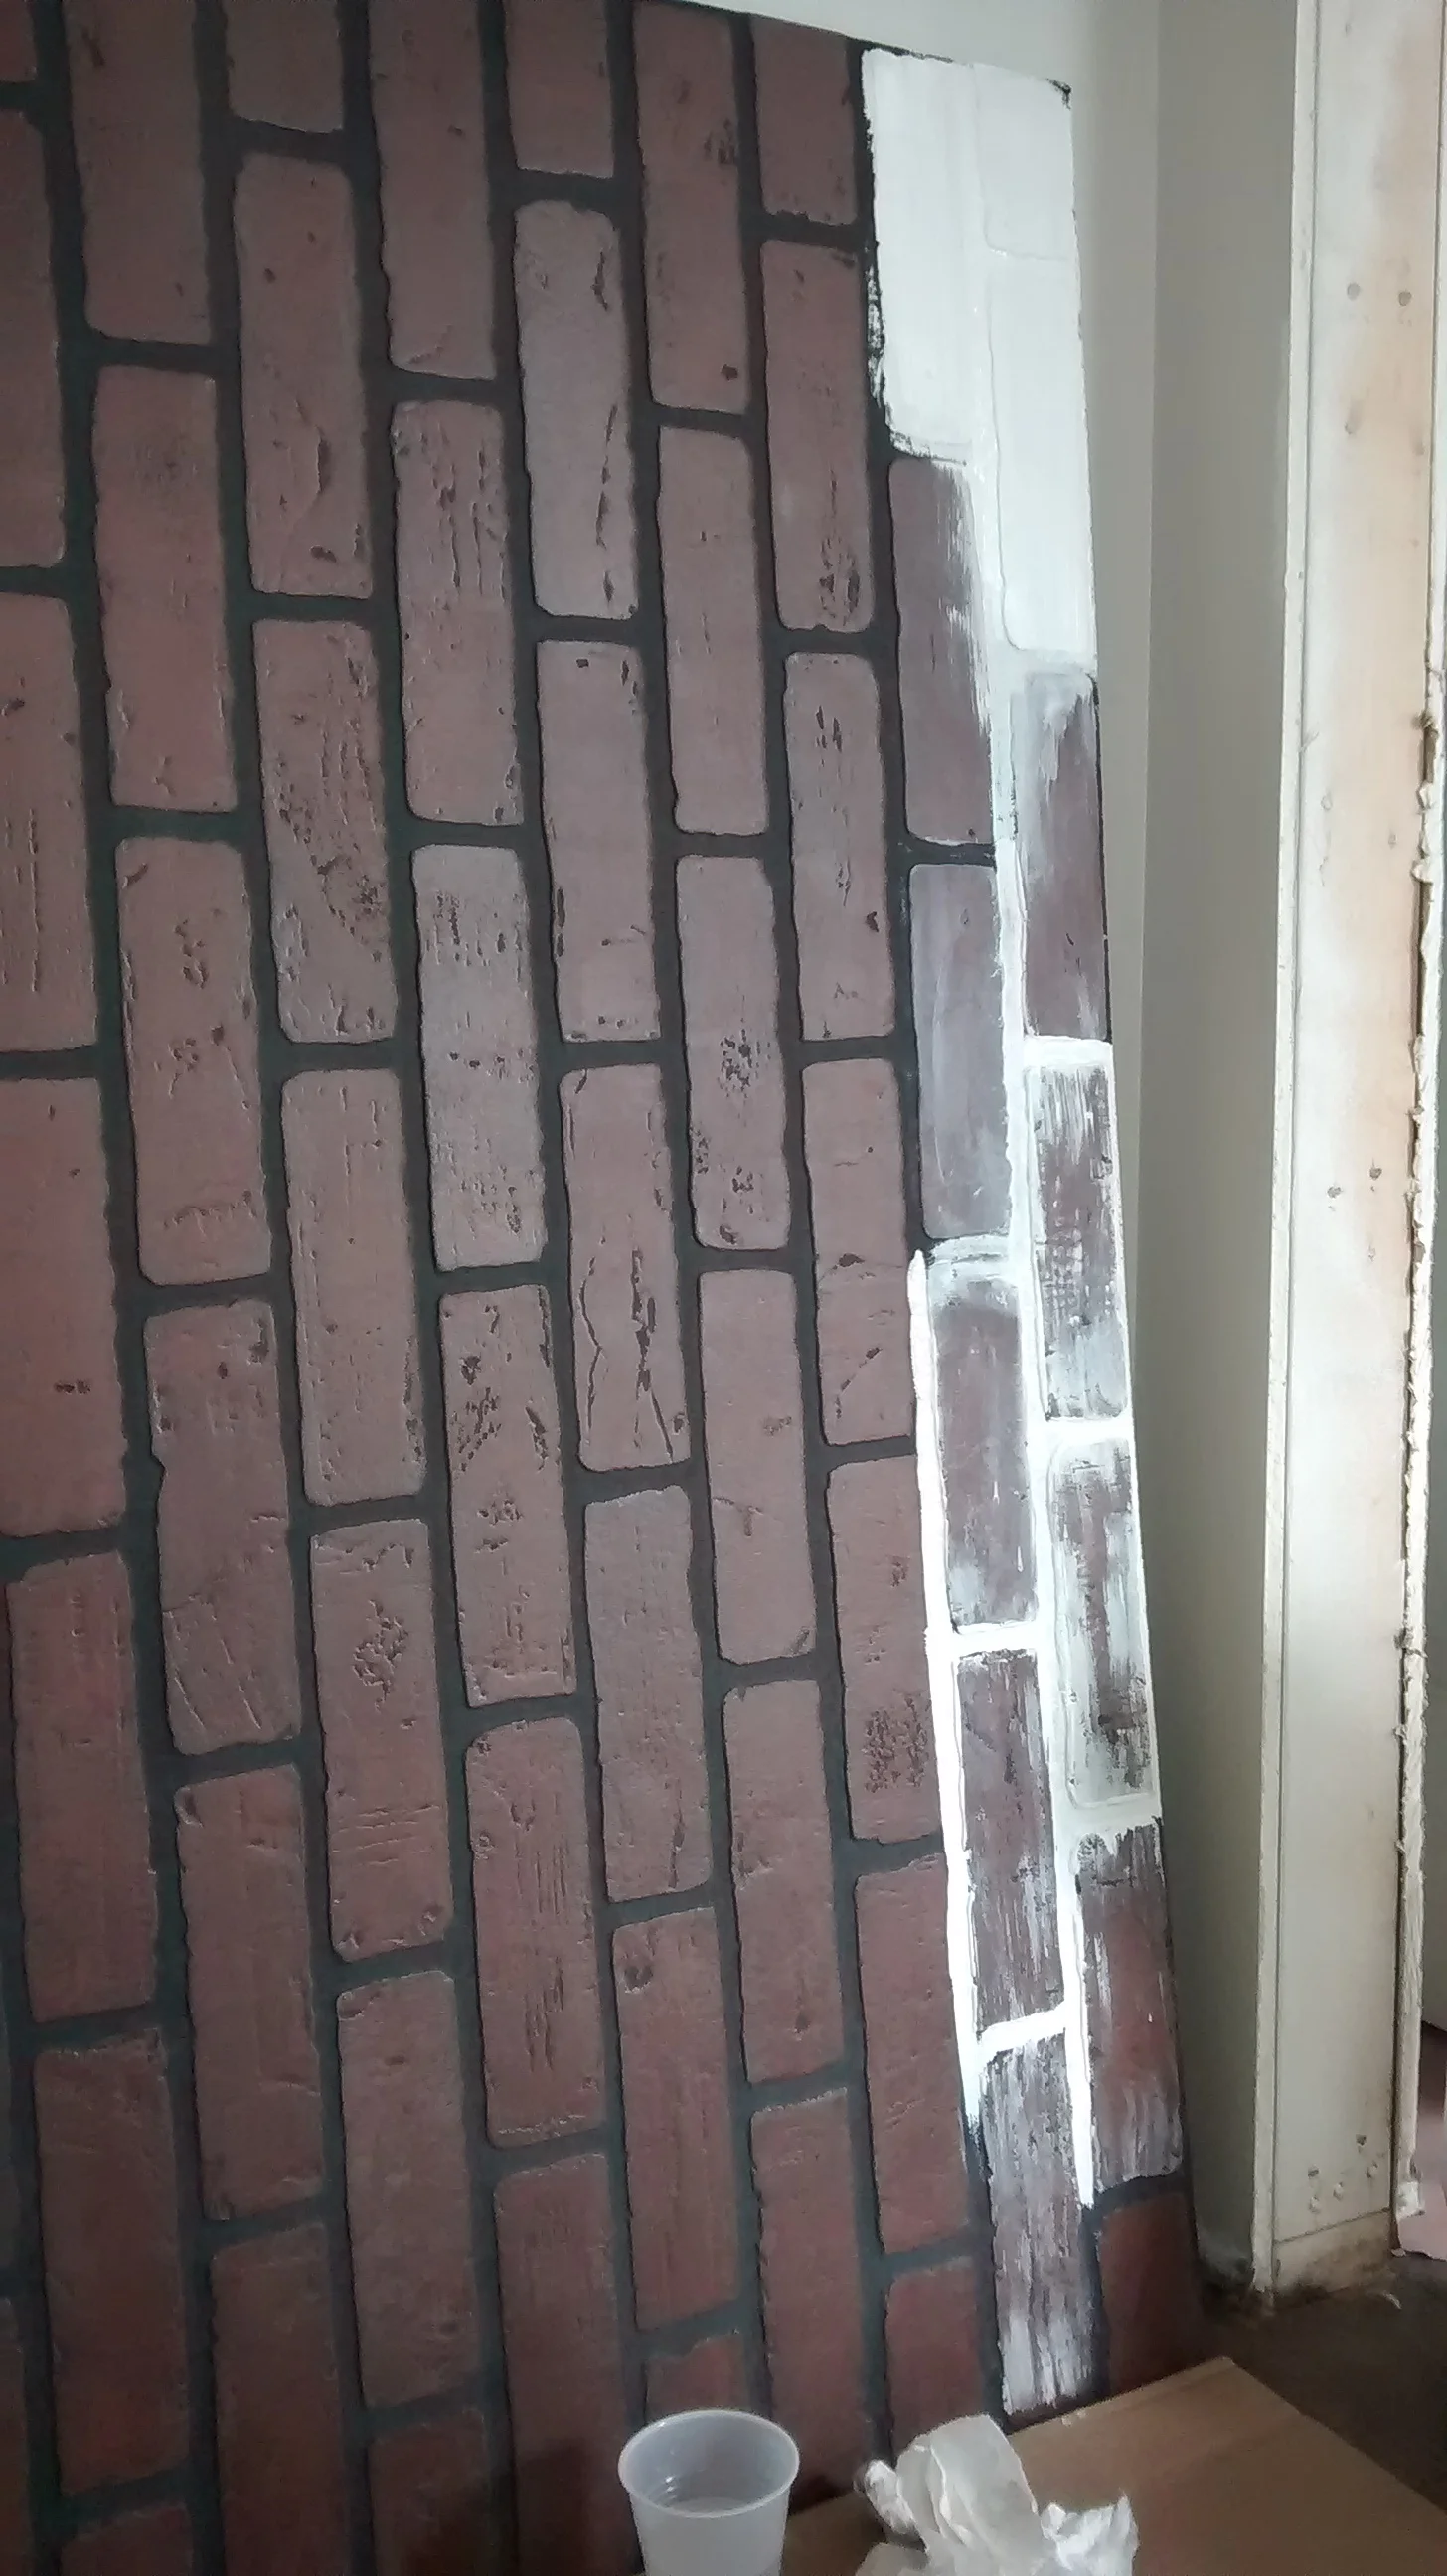
It was a pain in the rear to get this mantle in somewhat decent shape. Once the old, chipped paint was blasted off, I focused on the hearth and surround. Originally we were going to pay our contractor to fill the hearth with concrete to match the double-sided fireplace, but I stumbled upon this brick paneling at Lowes that I thought would do just the trick. For $27/panel, this DIY project was way cheaper than paying a contractor and would add some interest to the wall.
I wasn't crazy about the super dark red brick color and black grout, so I tested some painting options on the panel before cutting the sections down to size. Bright white paint seemed too stark and unrealistic, so I grabbed leftover wall paint tinted Agreeable Gray and that did the trick. The gray paint looked more like grout and gave a softer contrast. I paint the grout lines first and made sure to follow the uneven edges of the brick so it didn't look super fake. I then dry brushed the paint onto each brick making sure to get paint into the nooks and crannies. I used a paper towel dipped in water to remove excess paint and give the brick a white washed effect. I tried to vary the amount of paint each brick received for a less perfect finish.


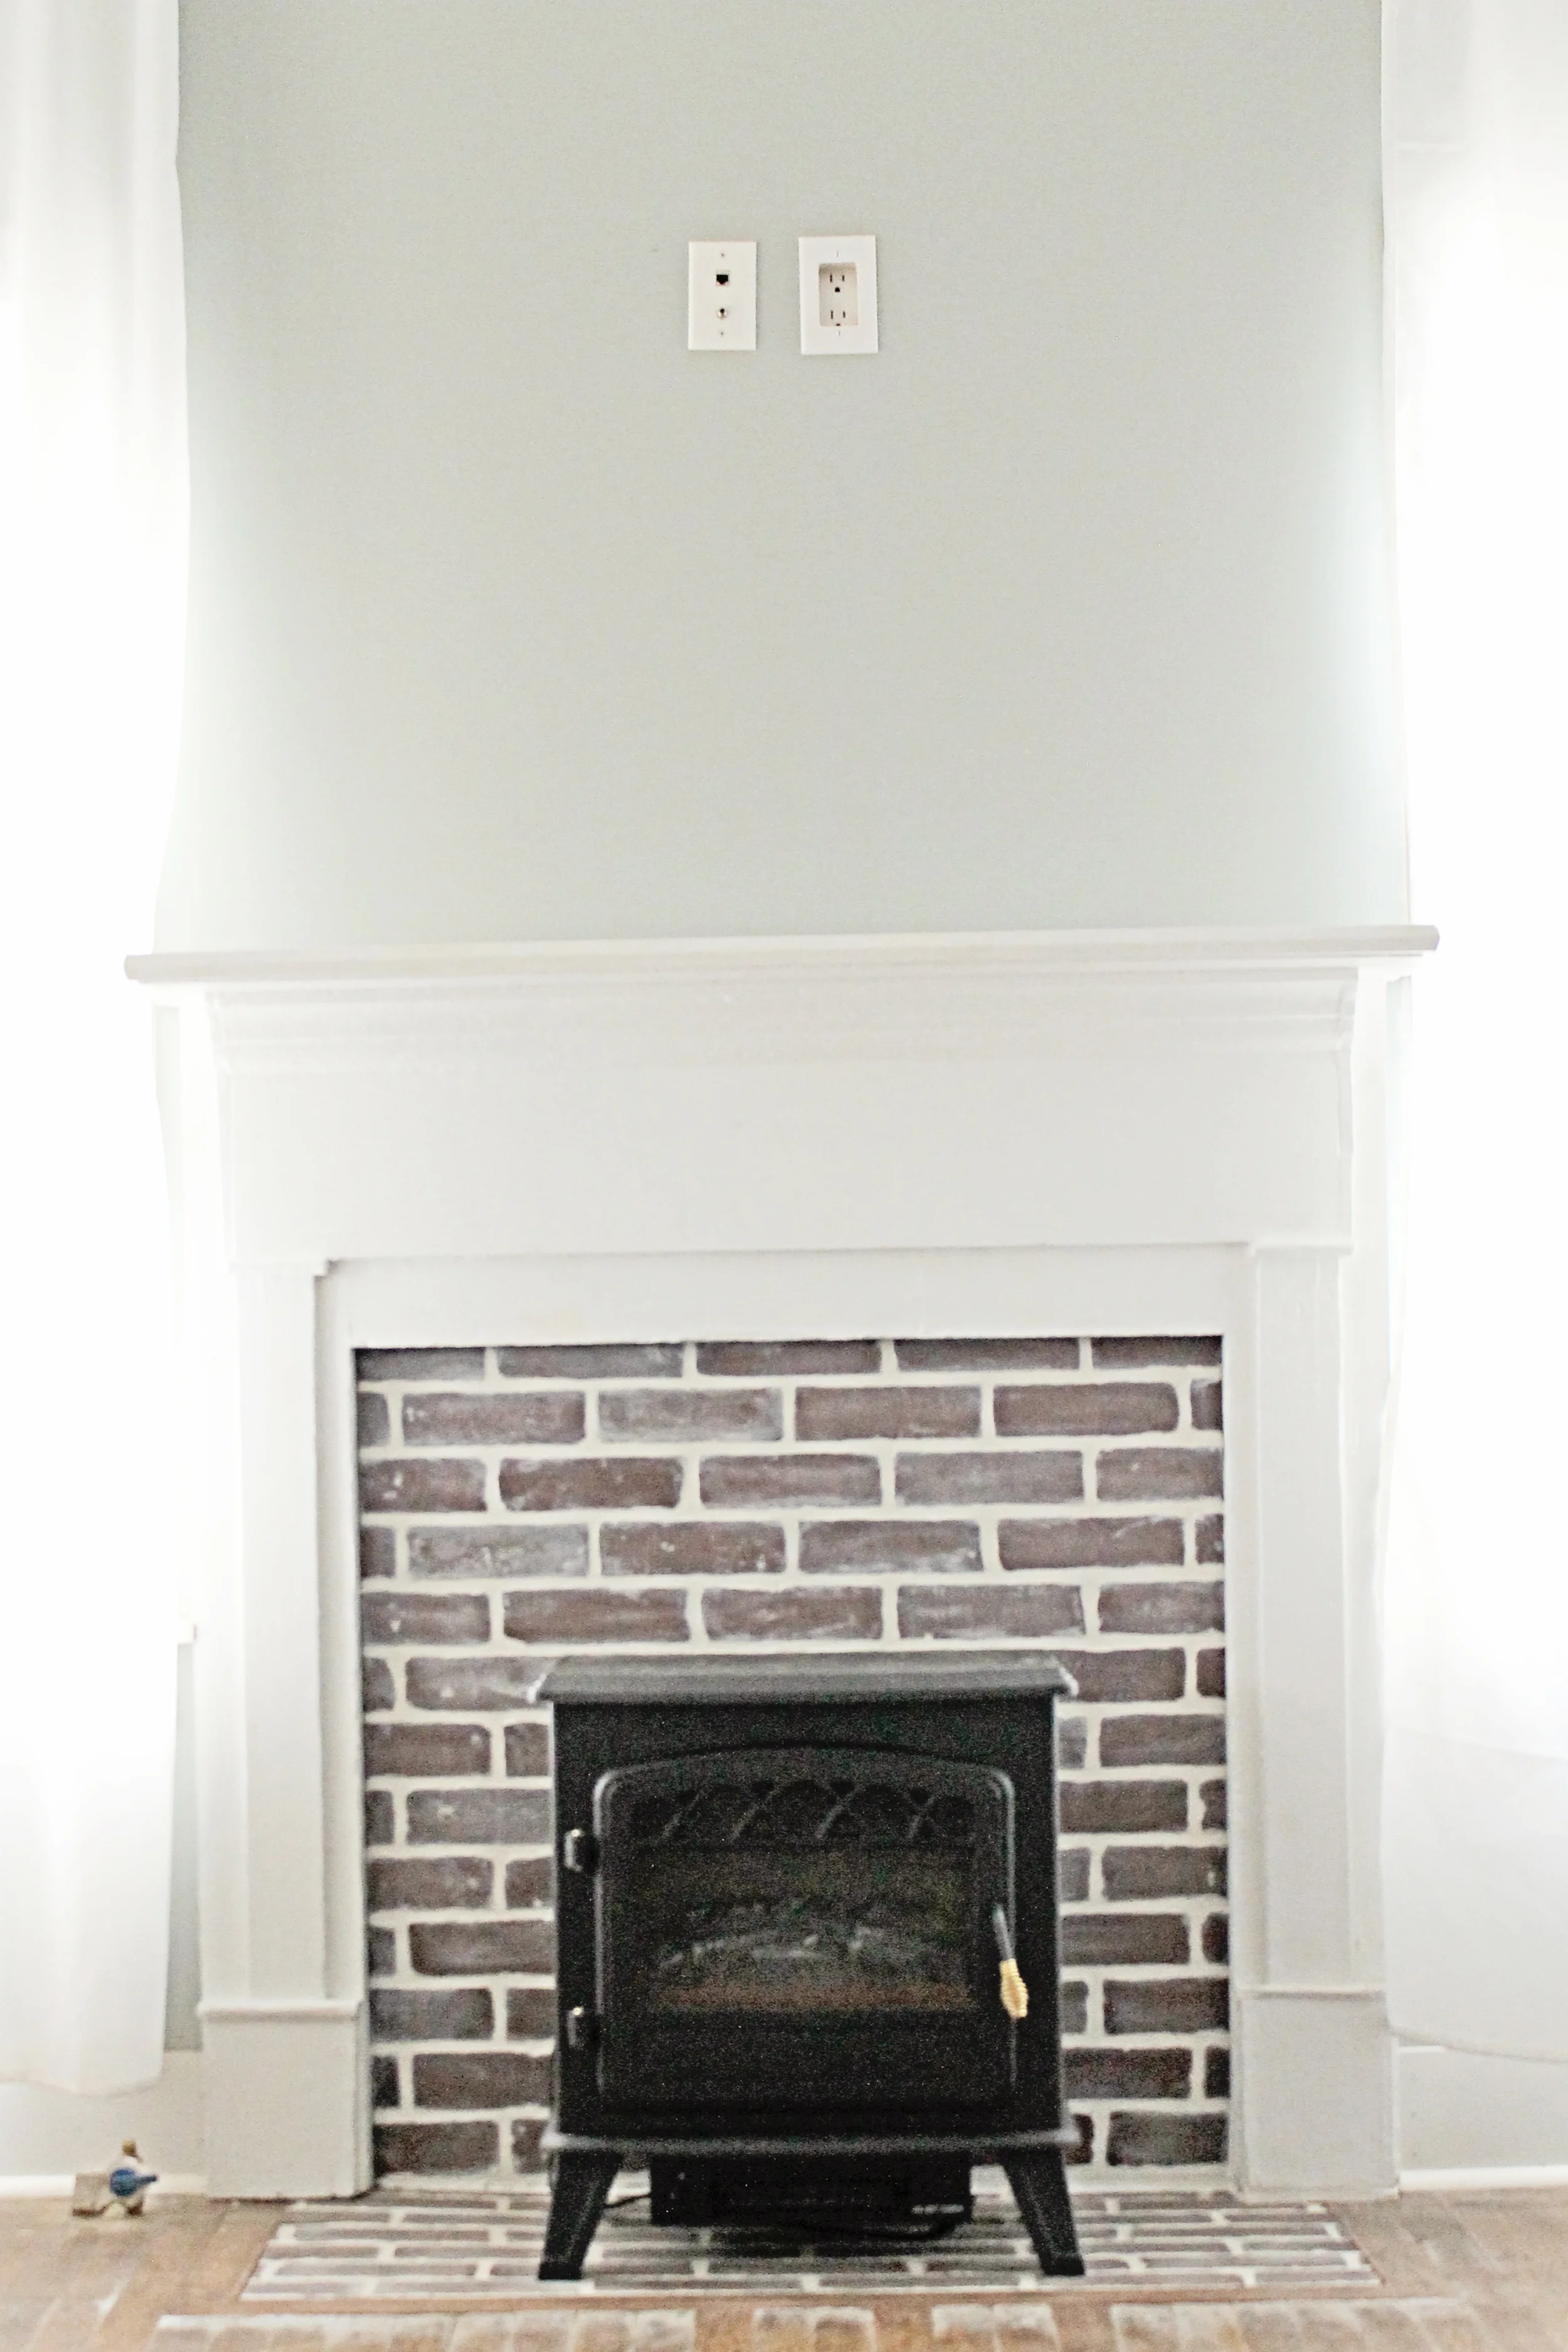
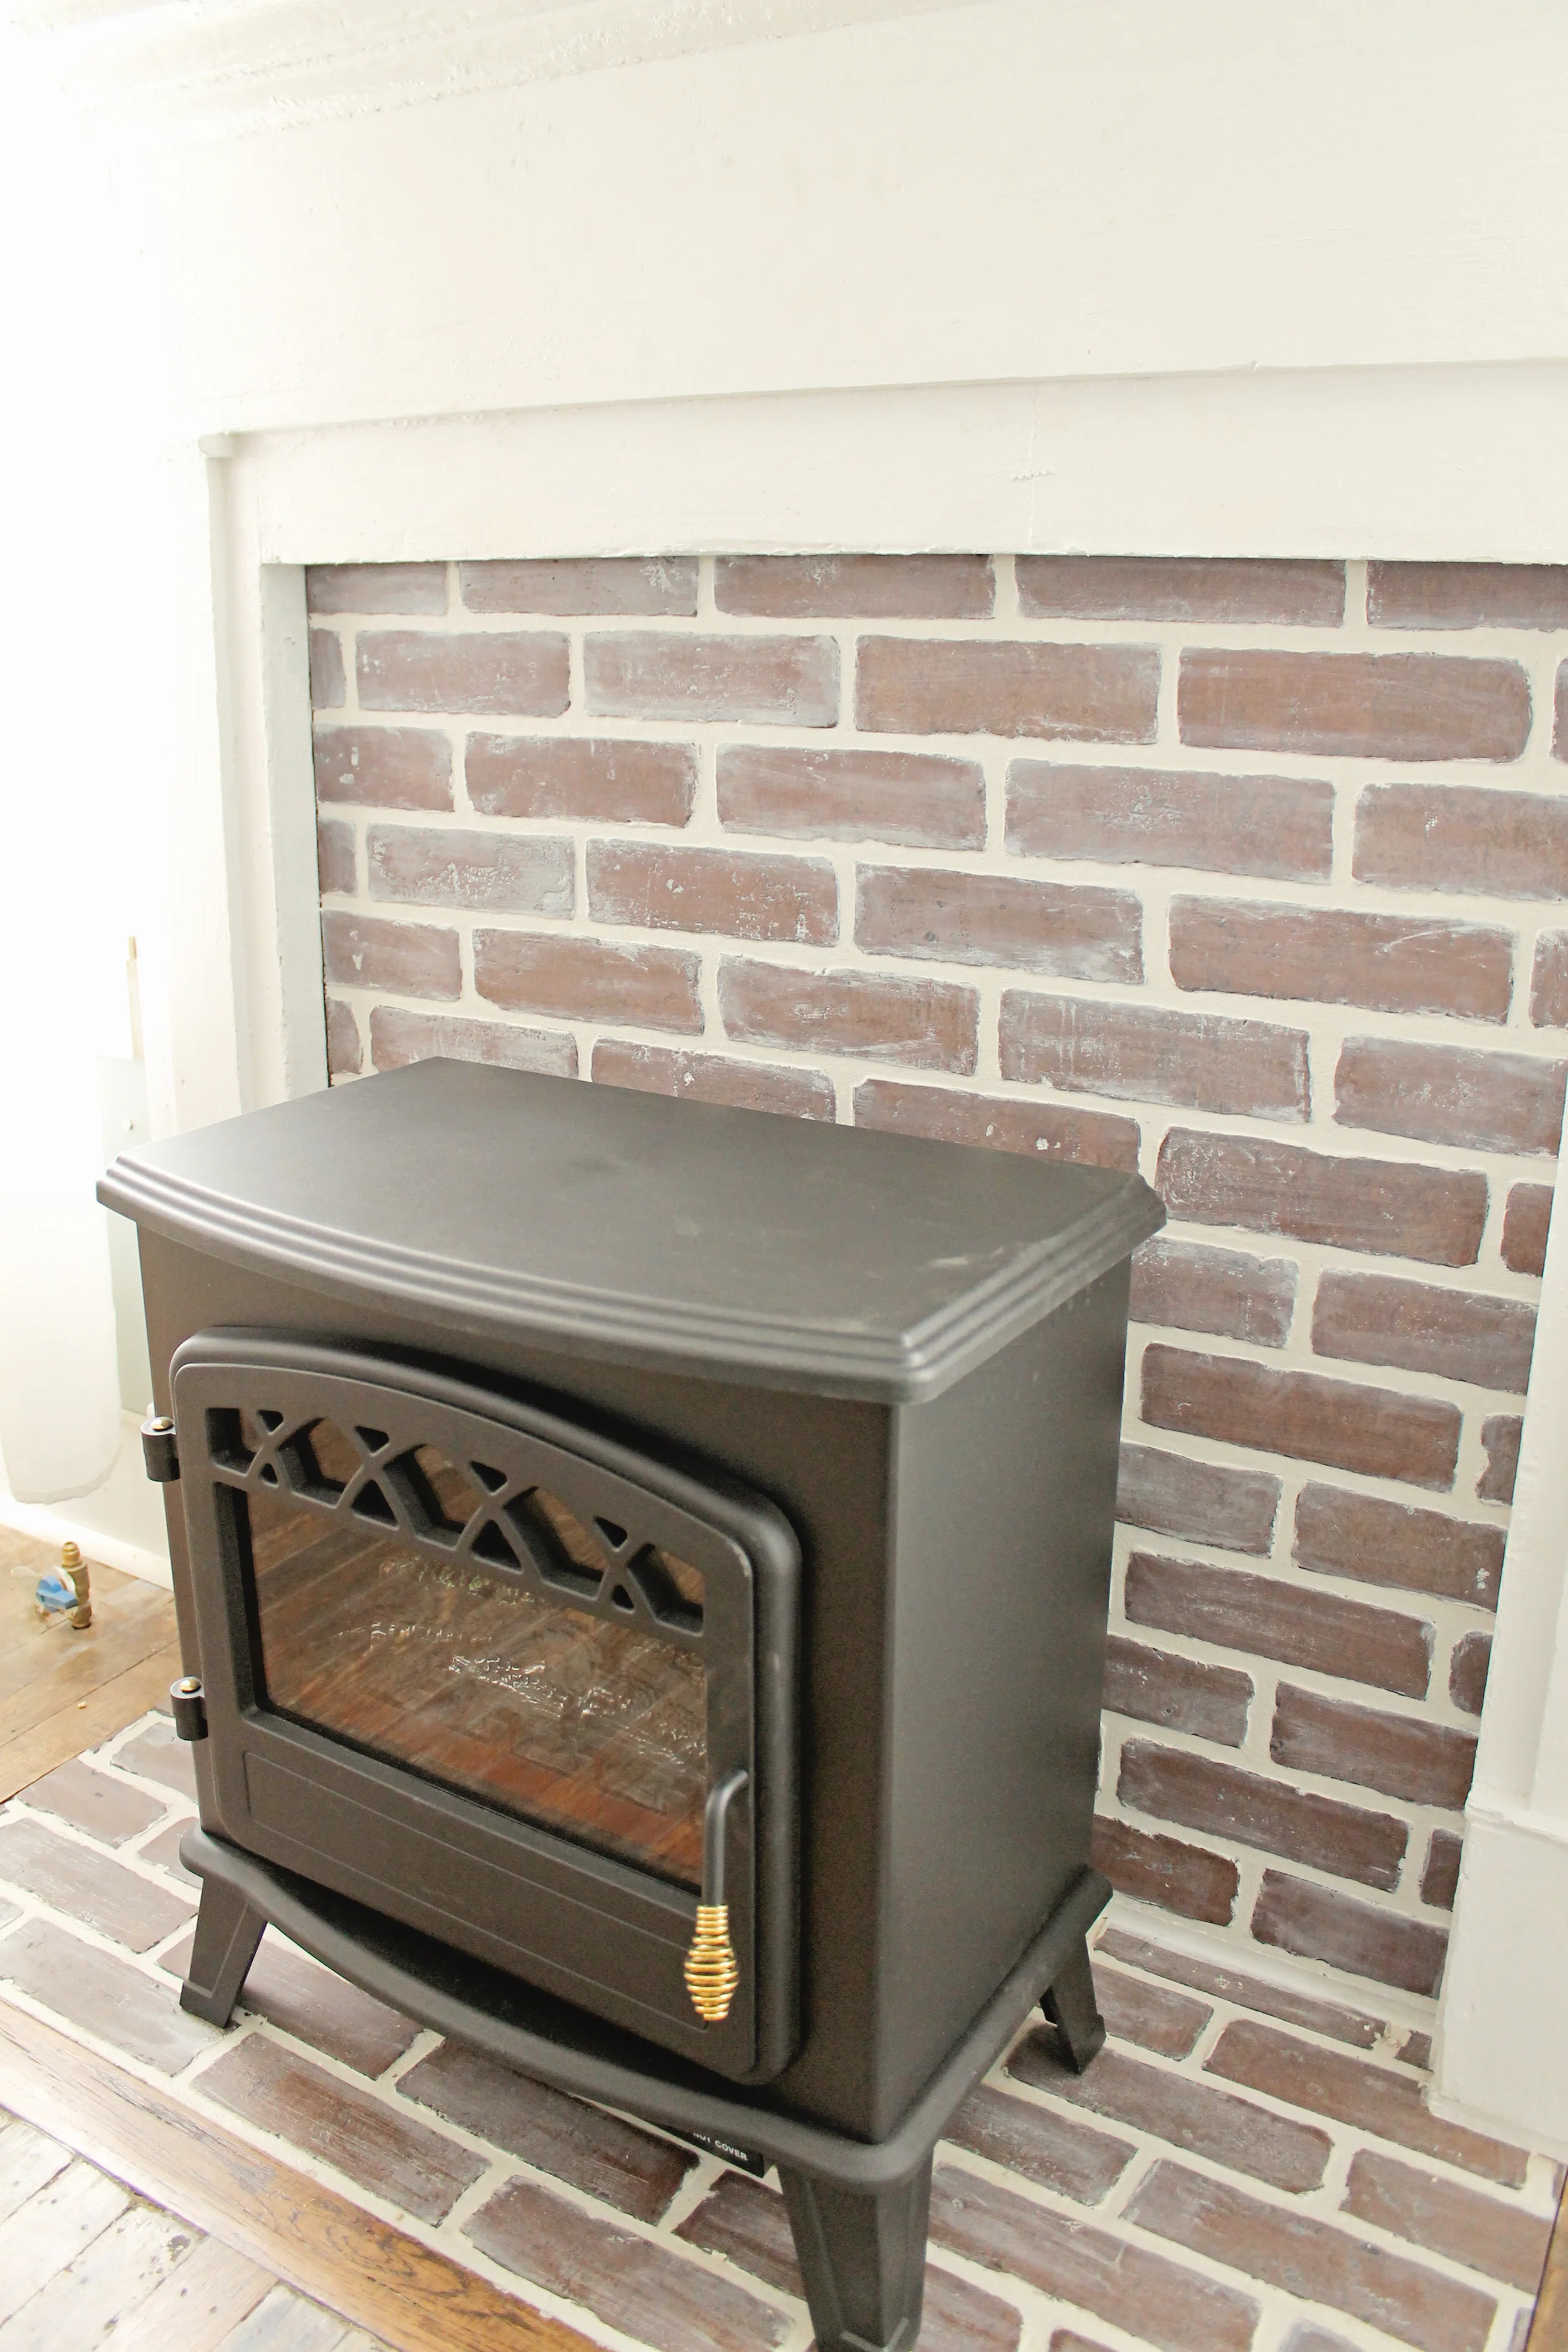
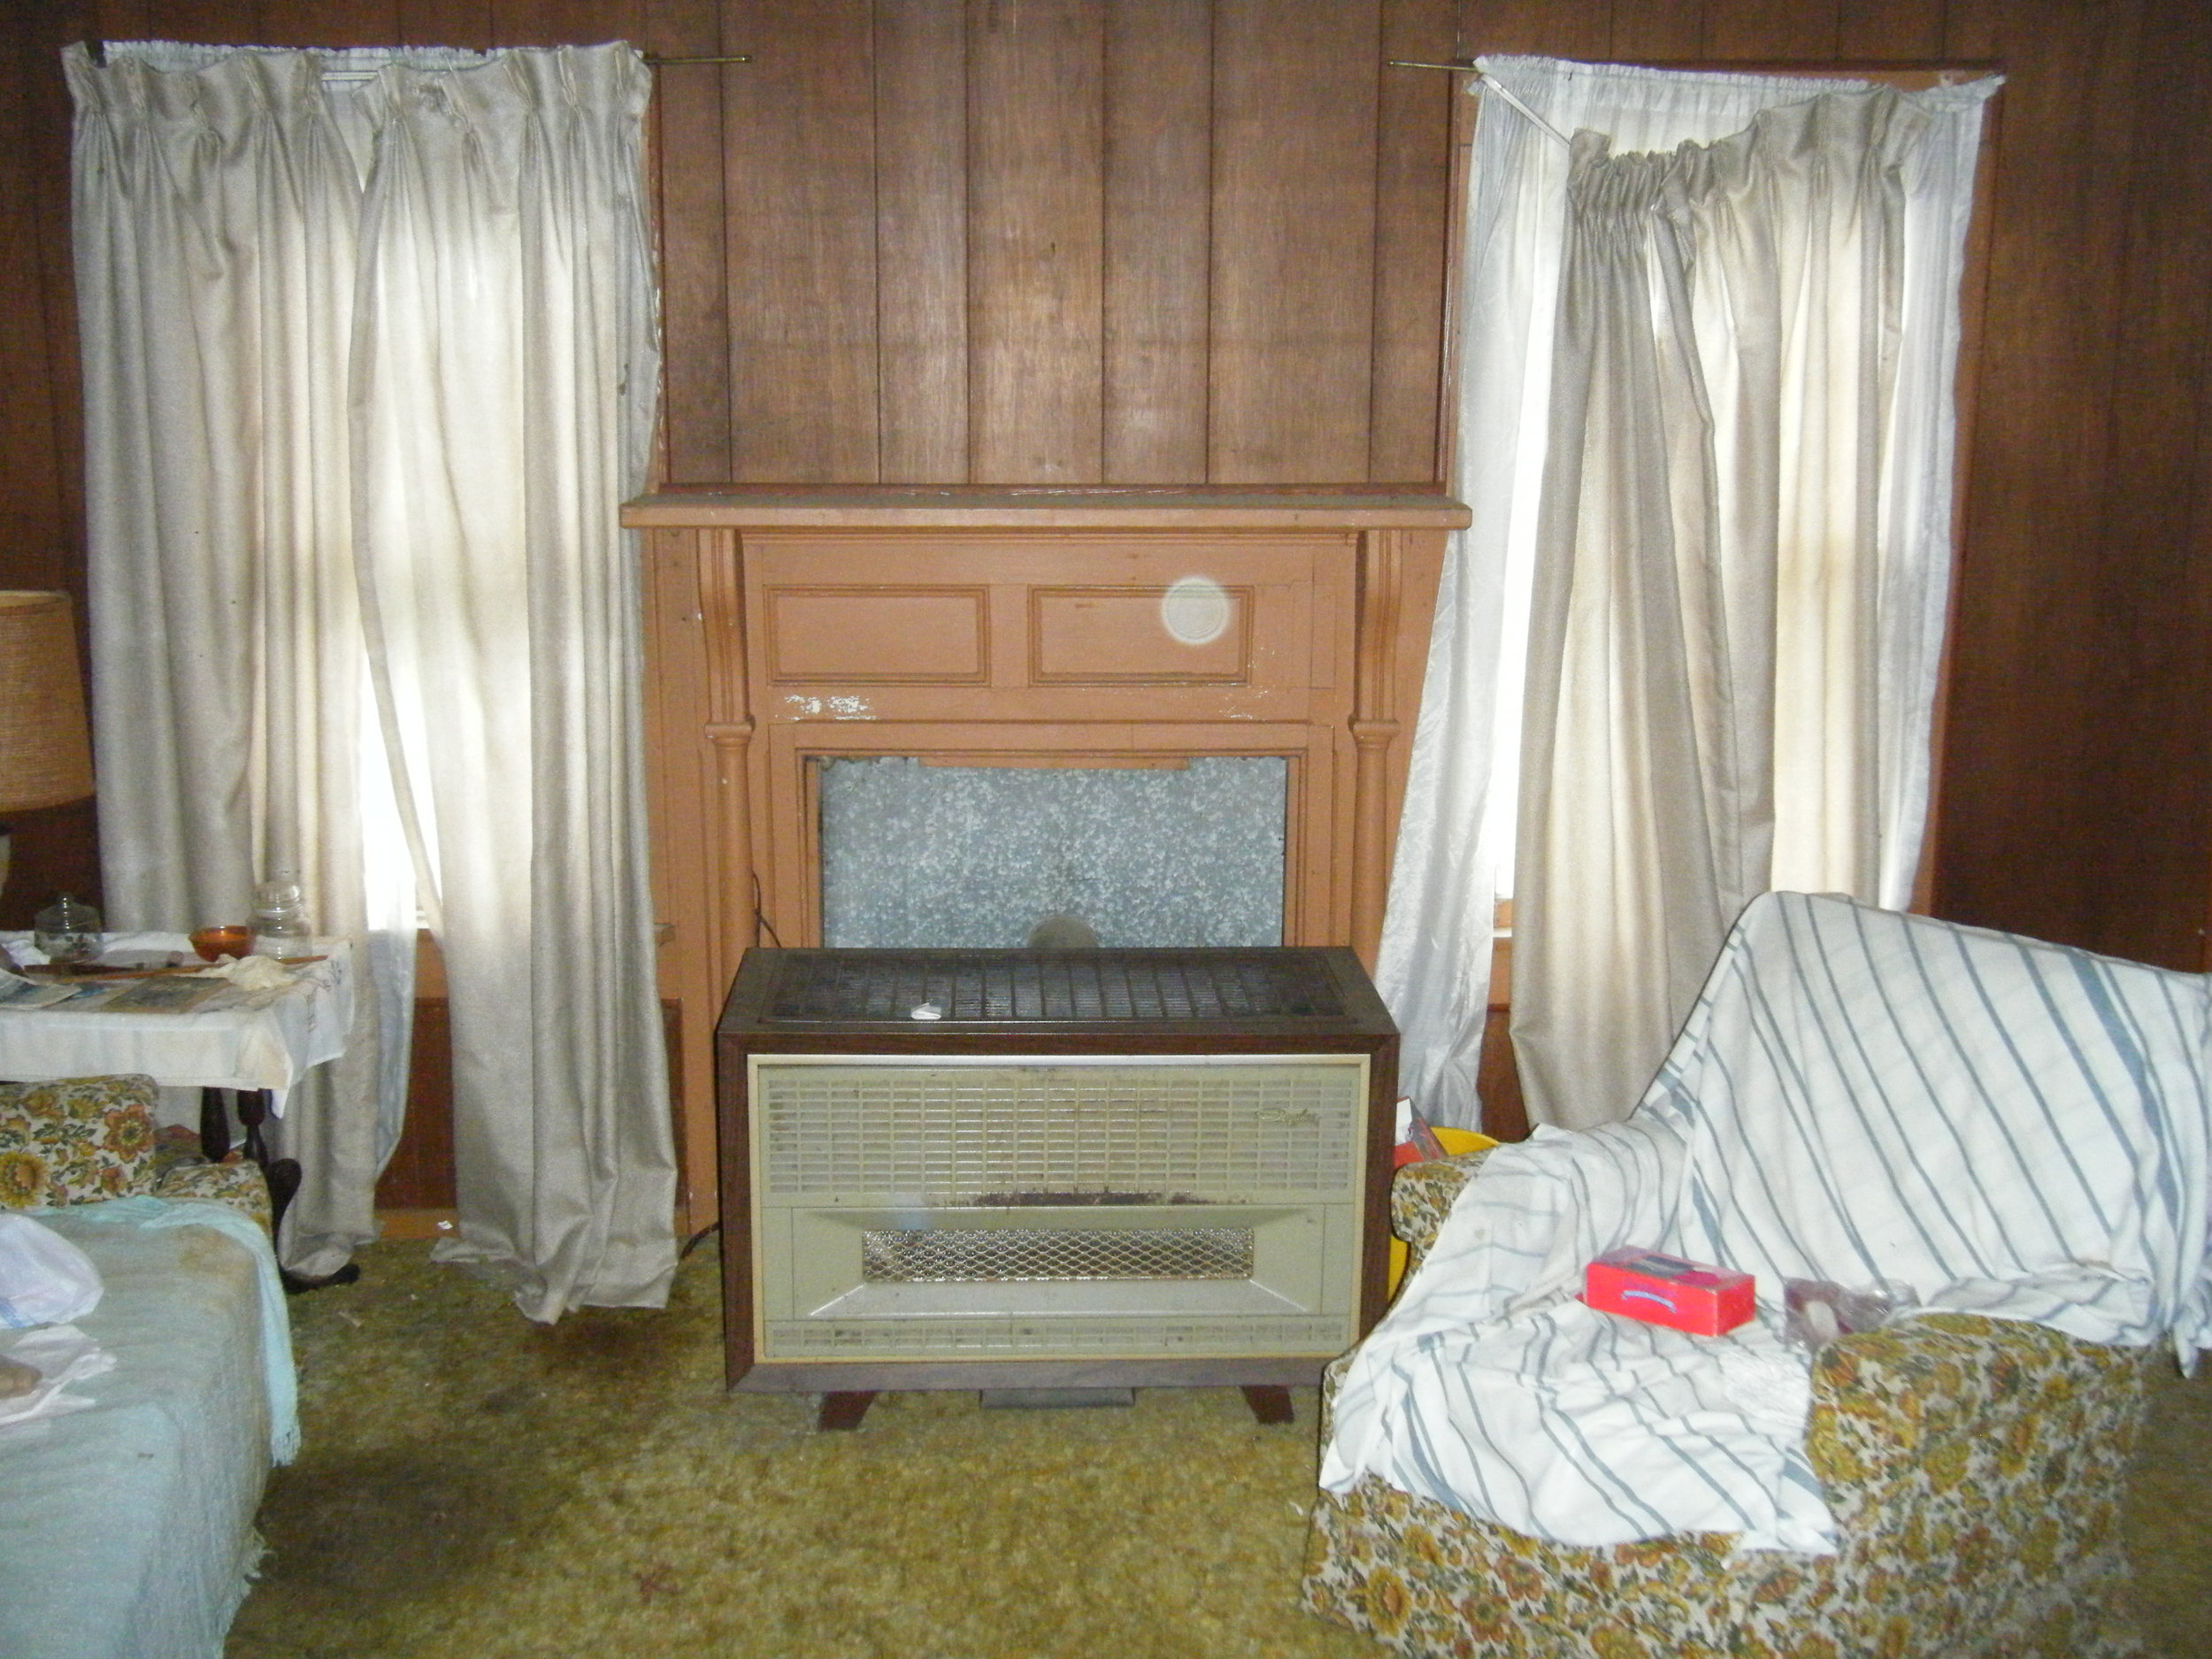
Once the faux brick was painted and all of the pieces were installed, I found this cutie-patootie heater for $100 to complete our little faux fireplace. Since the Myrtle House is 115 years old, it can be a bit drafty and this electric stove makes the open space feel warm and toasty. For a grand total of $127, we have a new focal point in the room and some extra heat to boot! I'll take that over six grand any day. :)

Here is the before and the current state of the living room. The ceiling used to end at the top of the windows, but we removed the dropped ceiling to expose the original 9' ceilings. There is still touch up to do, but the finish line is in sight!

Update | Myrtle House
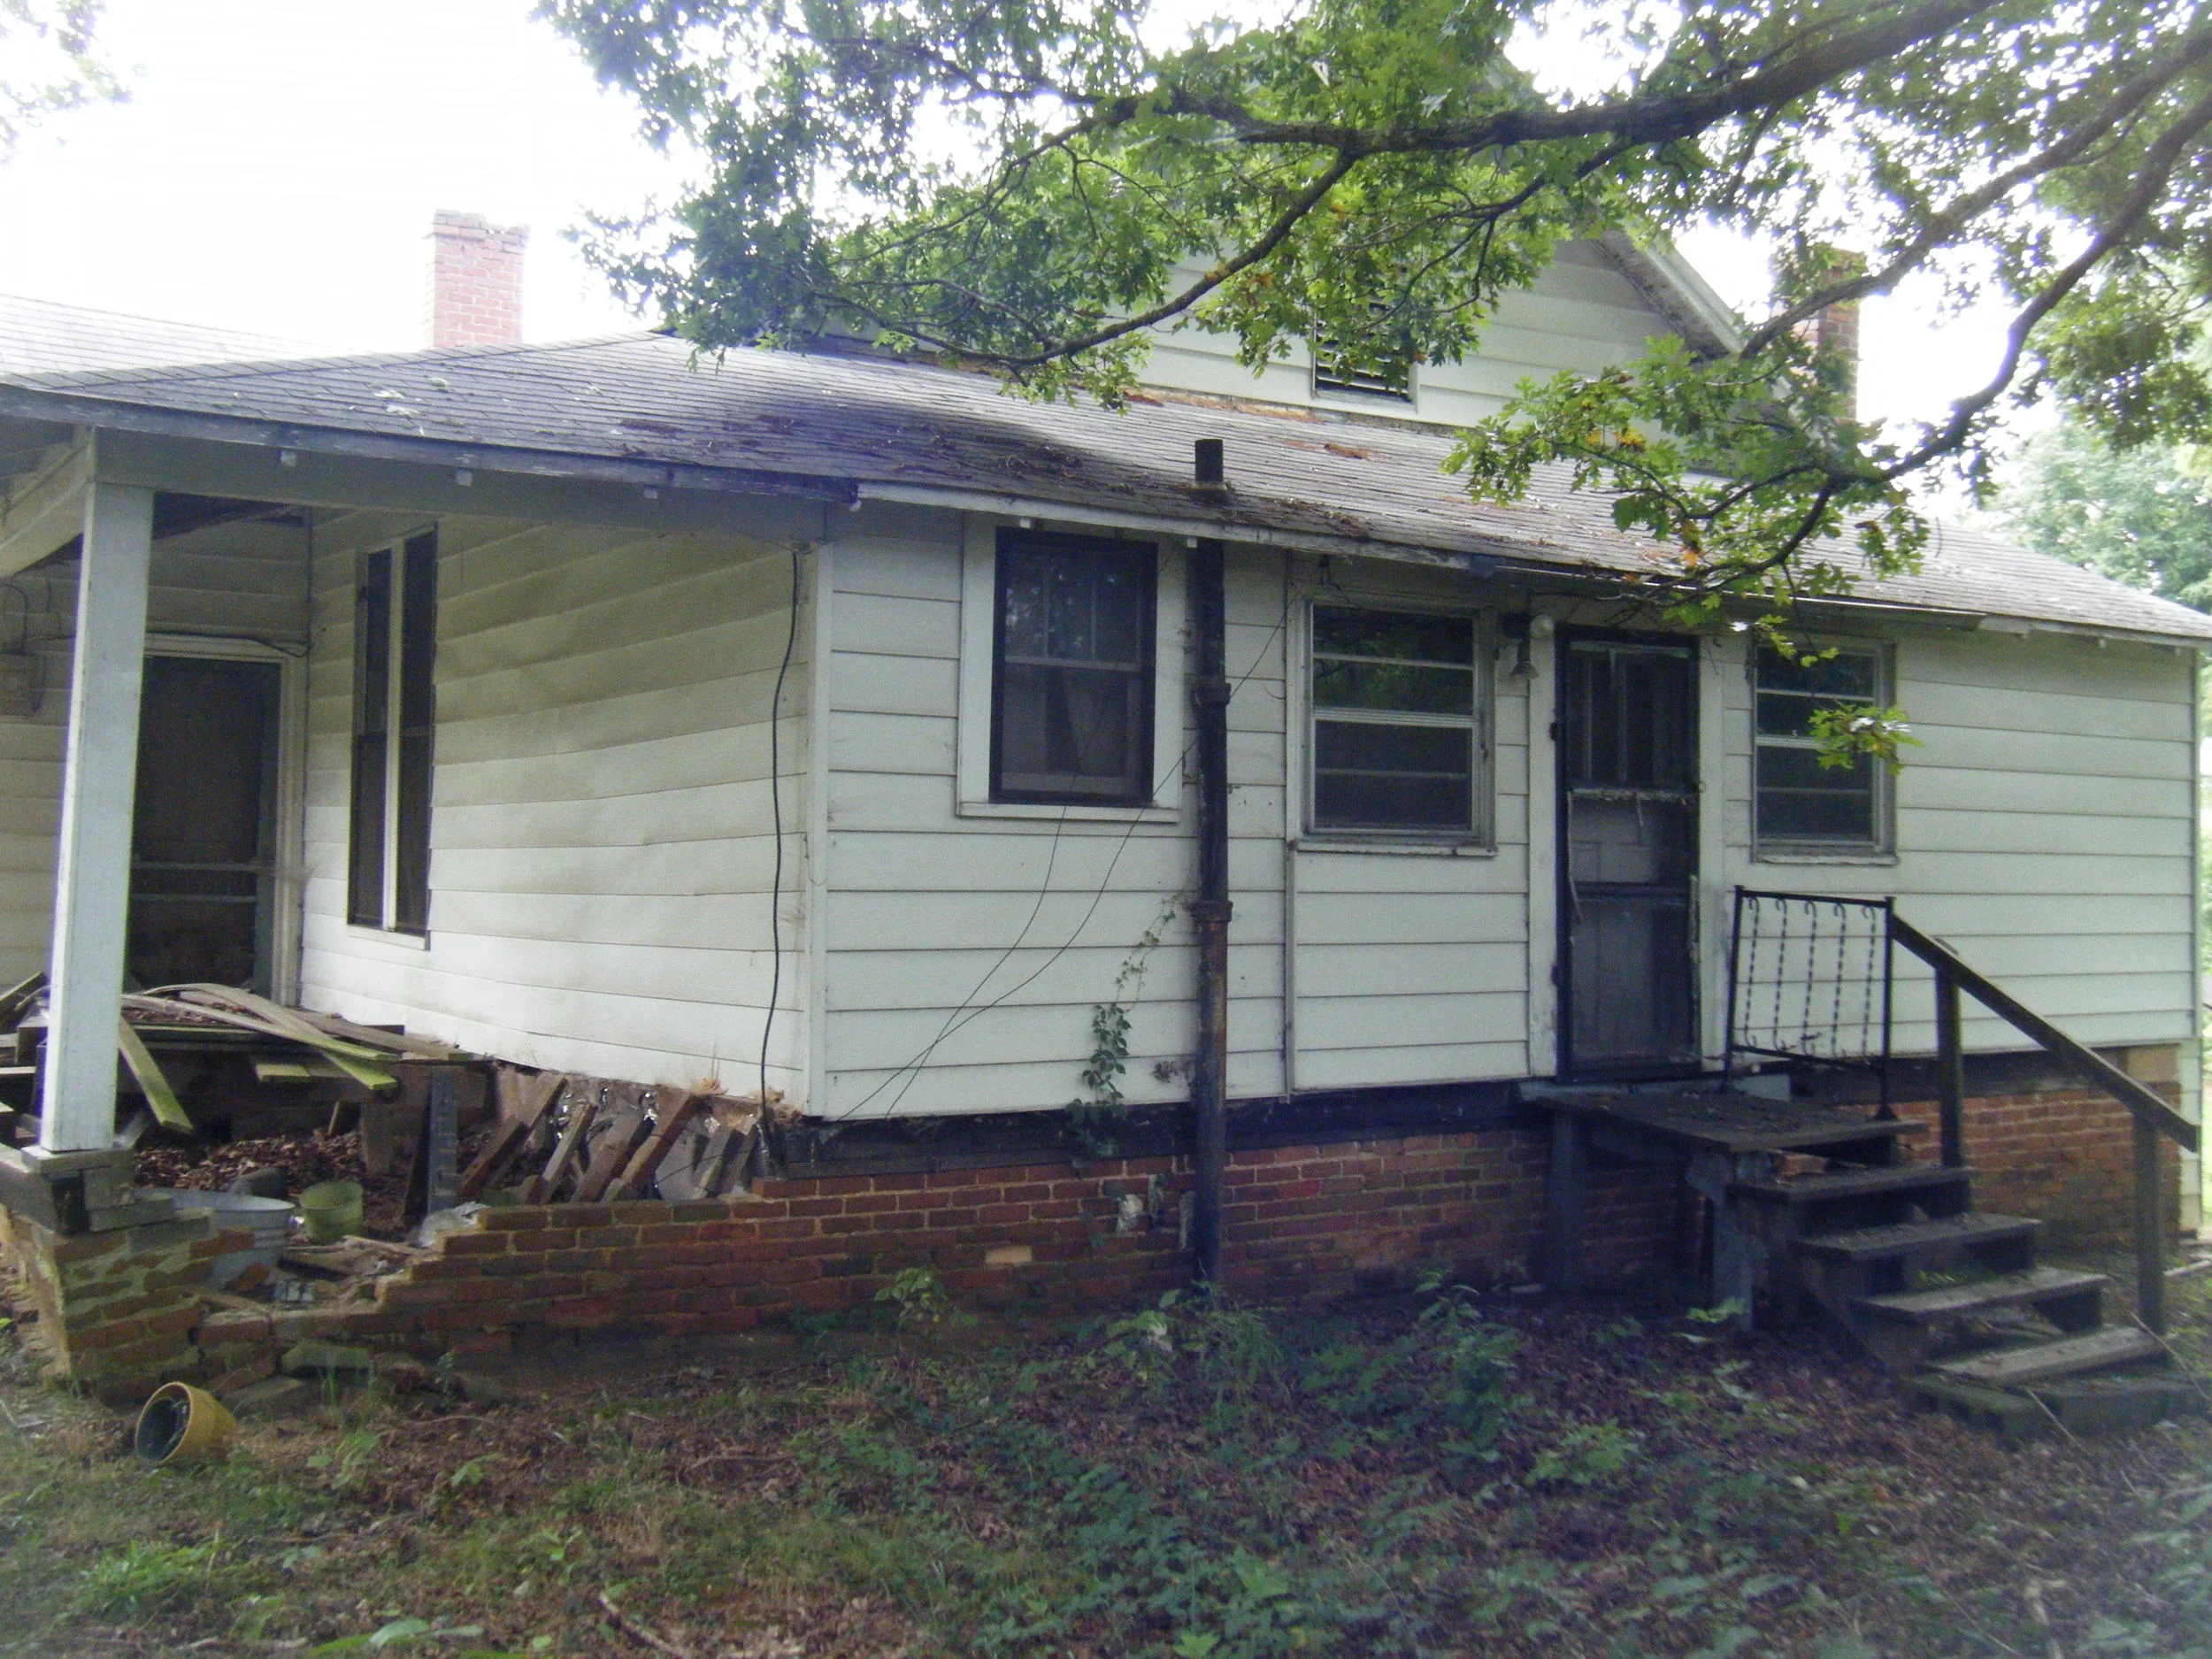
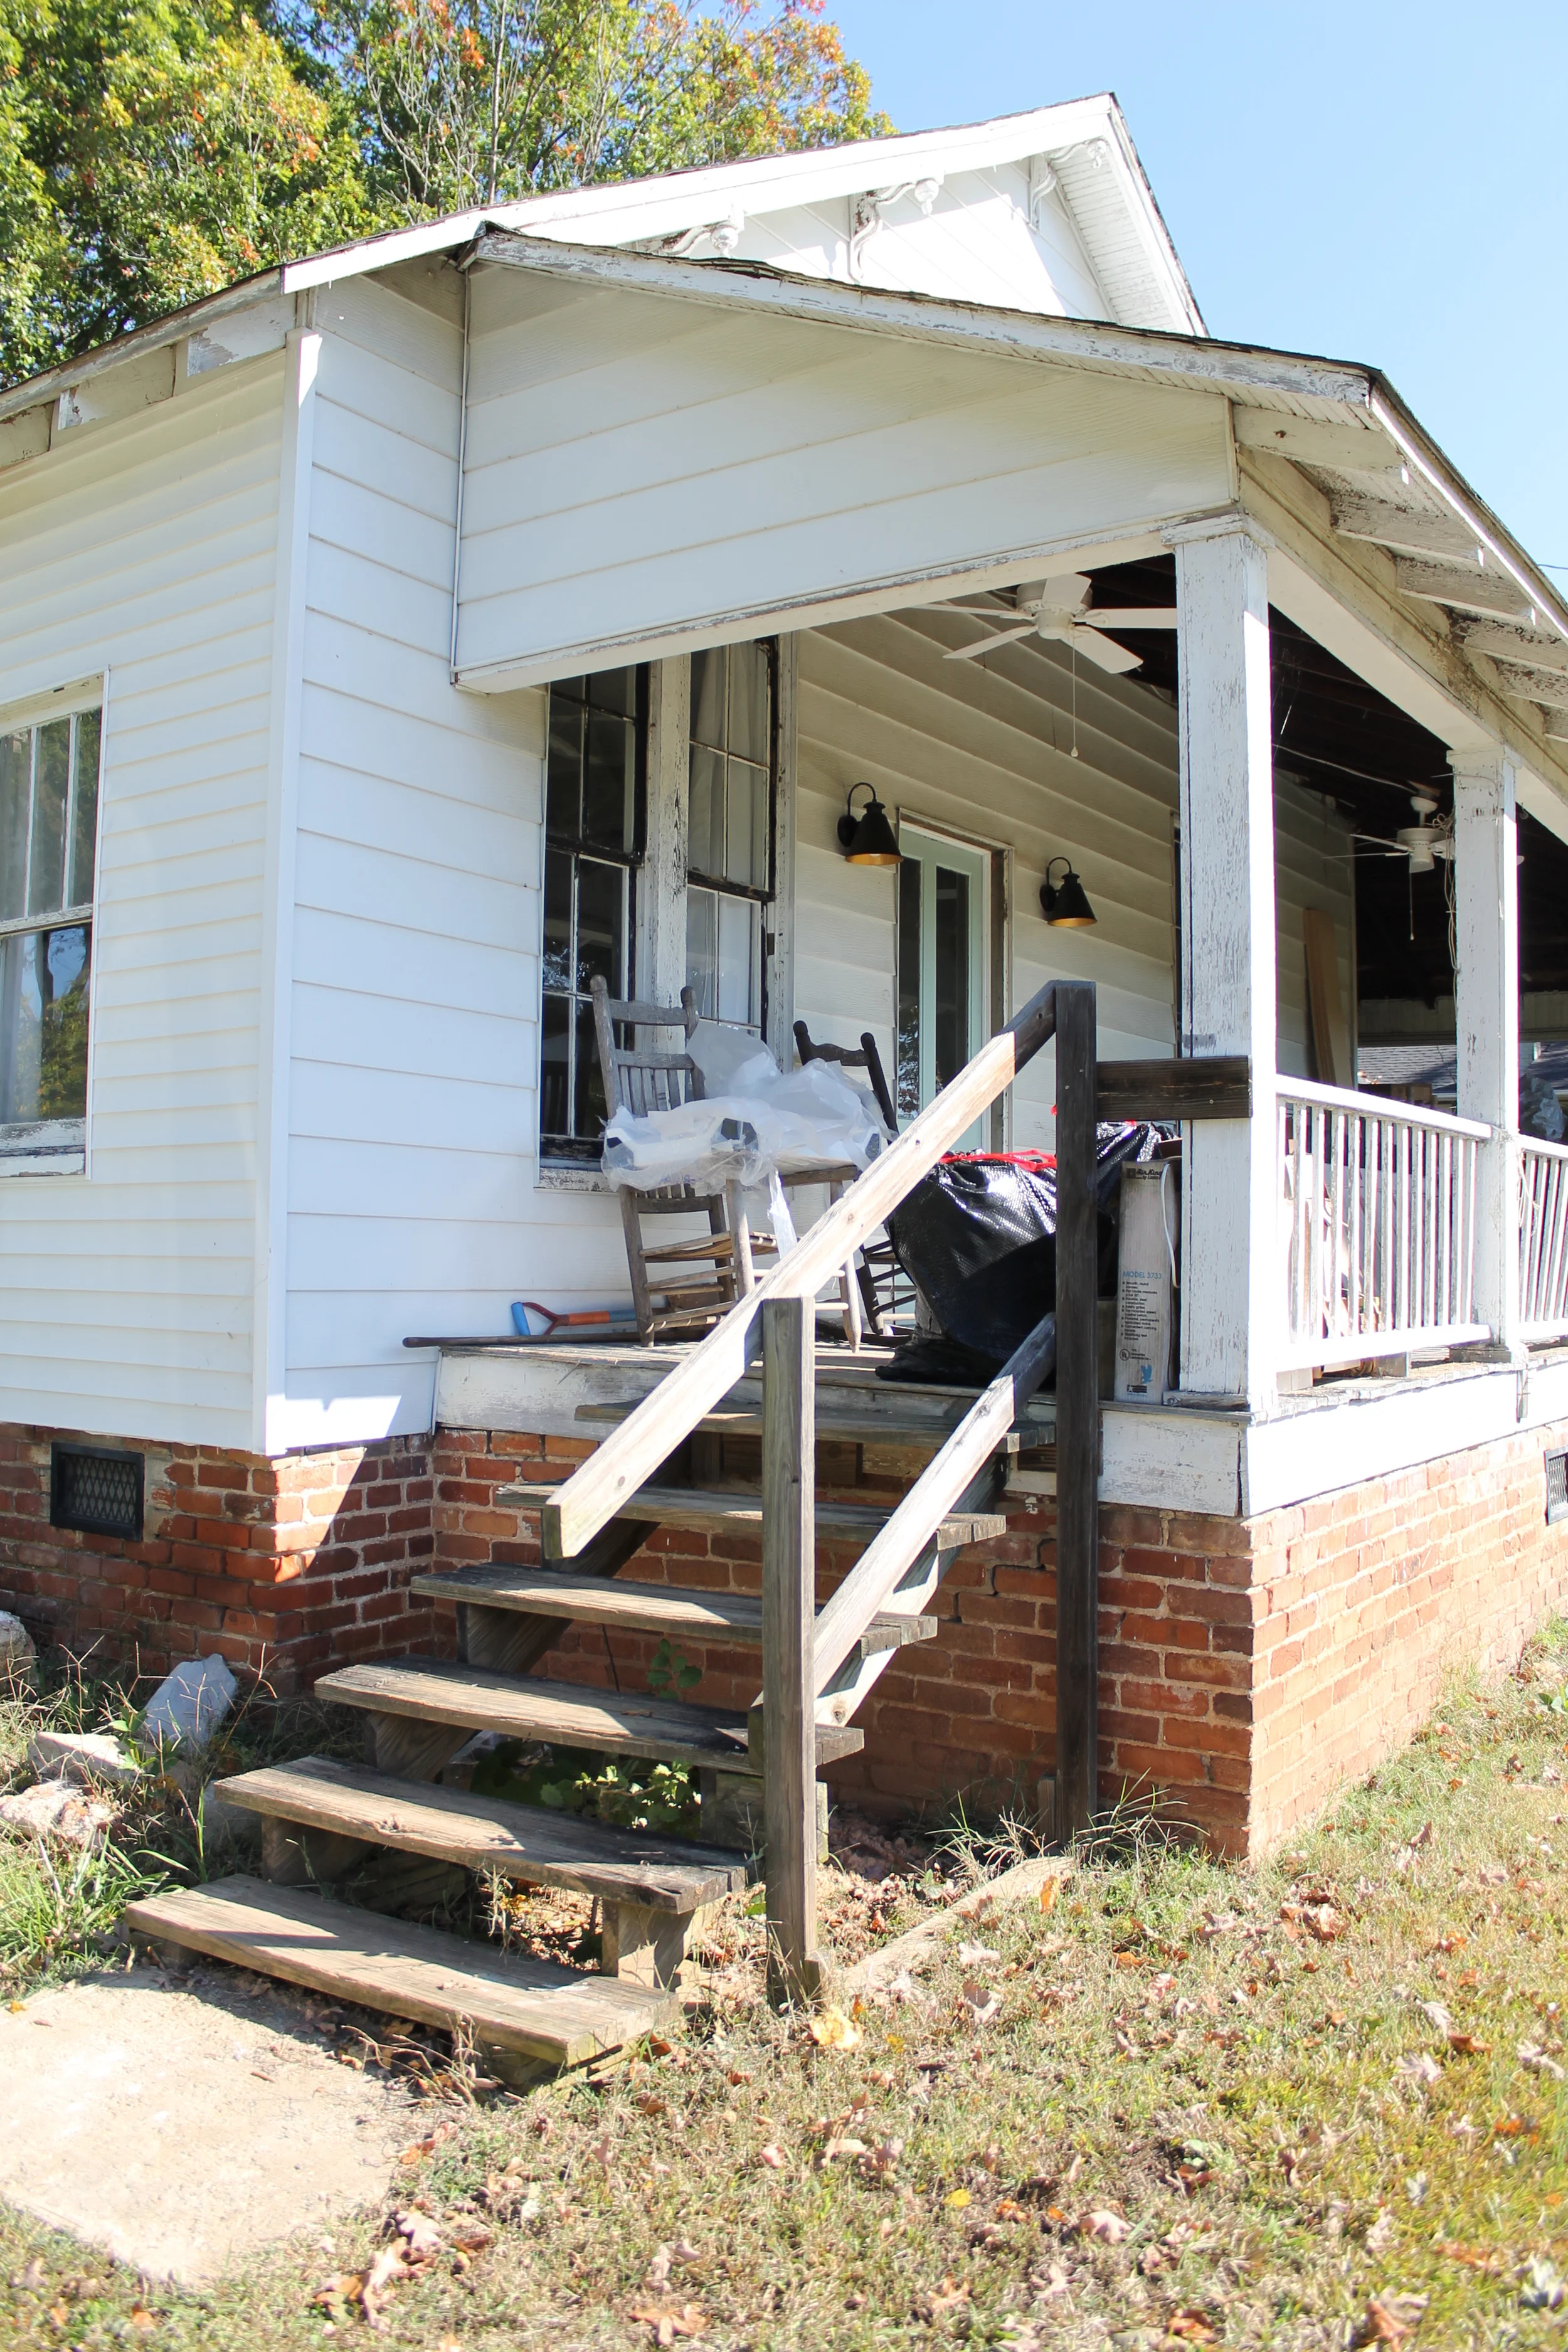
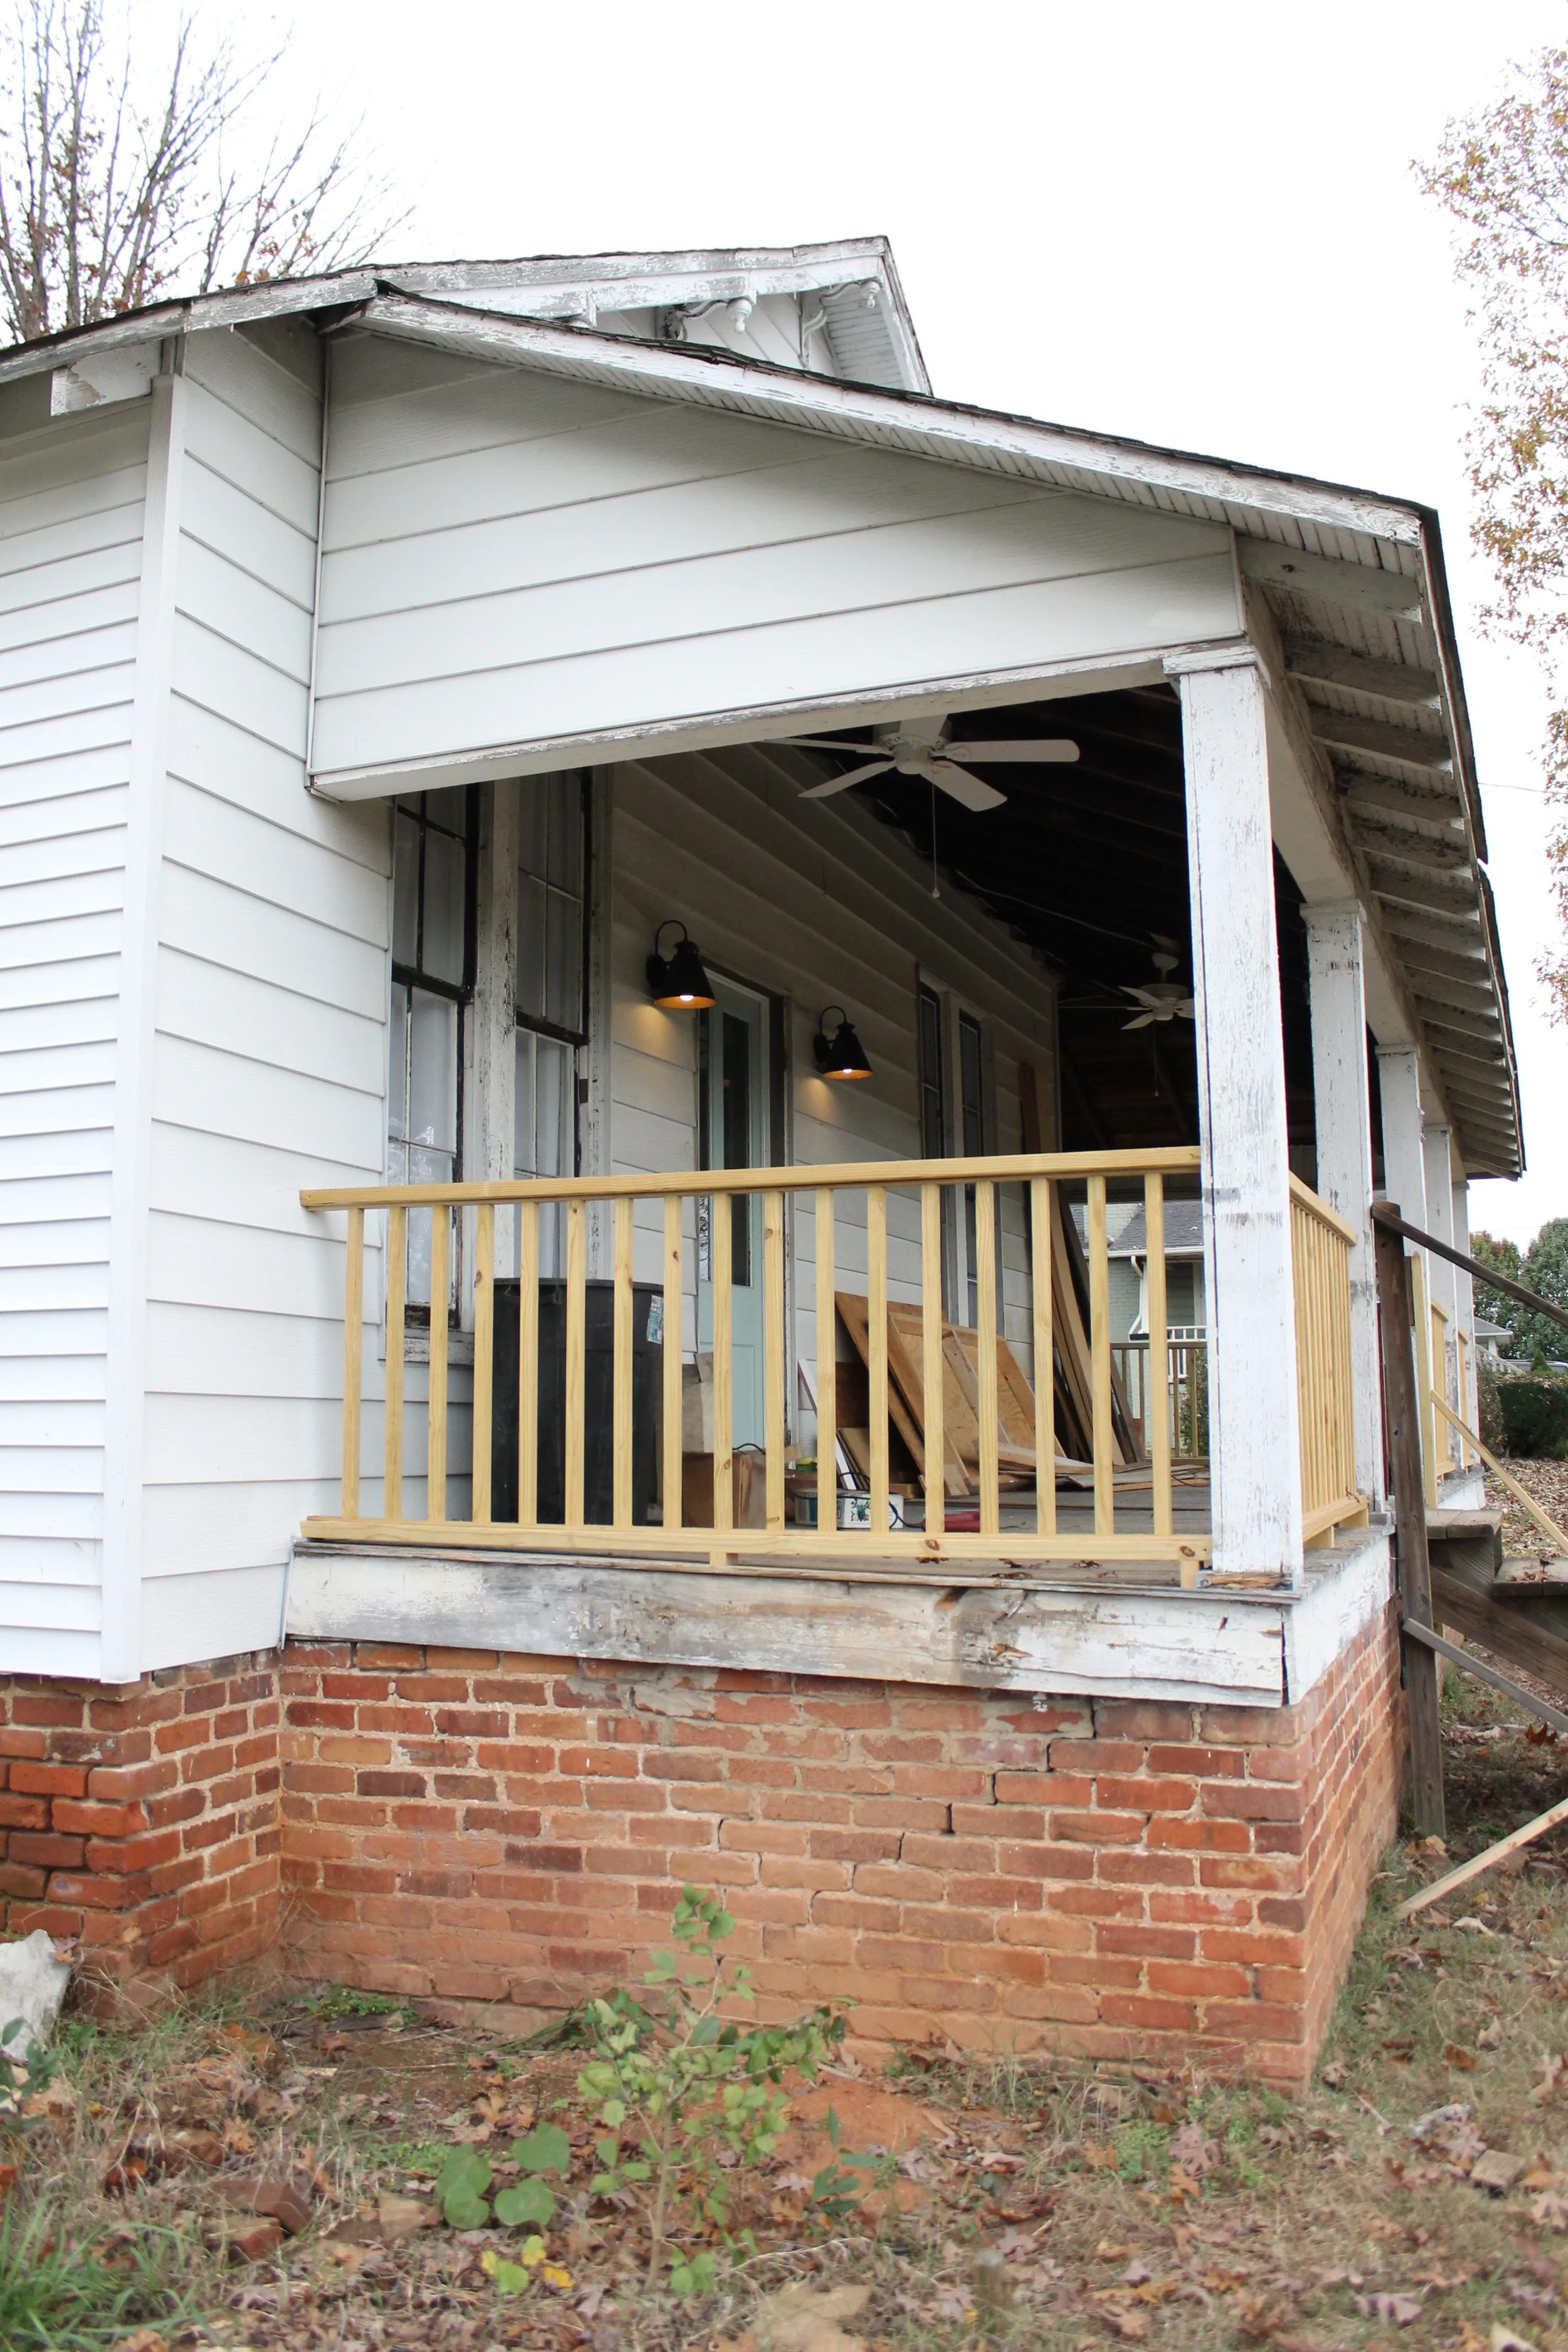
Hello. It's me. (As if you weren't sick enough of that song.) Apologies for the silence. 2016 has been equally busy and crazy so far, so I have been putting off writing a new post until I had some concrete completed projects to share. We have set a self-imposed completion date of early April for the Myrtle House (can you believe it?), therefore we have been running around like maniacs trying to get the hundreds of little things checked off of the list before our impending deadline. With the "blizzard of 2016" hitting us this weekend, we are already a week behind. Hopefully we can pull this off!
We have enlisted the troops (specifically, a contractor) to help get us to the end with the bigger projects. The most recent task to be crossed off the list is the exterior porch railings, stairs, and decking. Below are before and after photos showing the changes. It is so nice to finally be able to walk on that side porch! We just need some fresh paint and the exterior will be looking a thousand times better.