
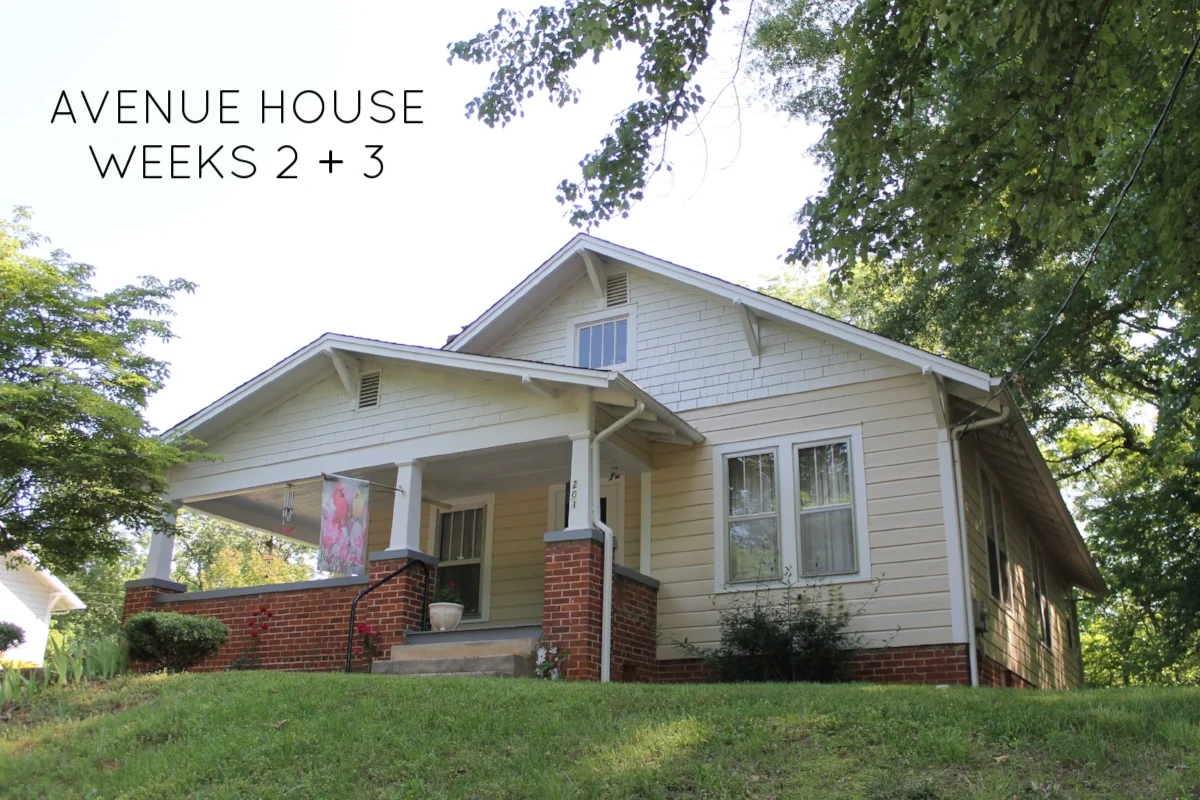
We are in the middle of flipping our latest project, the Avenue House! Check out our initial walk through evaluation here, and week one here.
Weeks two and three have come and gone quickly but slowly at the same time, lol. We have been tackling some of the time-consuming - and a little boring - projects off the bat. Brian got all of the walls nice and smooth by scraping, patching, and sanding ALL of the darned cracks in the plaster walls of this house. None of them were very deep or concerning, but we know that buyers can be really scared of cosmetic cracks in walls so we wanted to make sure the potential buyers didn't have any concerns about the structural integrity of this little house. If you do this in your own home, just be aware that this is a very messy process. You will probably be sweeping, dusting, and mopping for weeks. Here are some of the rougher areas before we fixed them.


Once the walls were sanded, I was able to start painting! I tackled the beadboard ceiling first, and then the walls. Word to the wise, if you are painting beadboard, make sure to get a large nap roller (1/2" is best in my experience). This helps the paint get into all of the nooks and crannies. Since the house was so dark when we viewed it, I thought they walls were ivory, but really they were a light beige color. The house seems so much brighter already by replacing the beige with white! (Sorry, my phone pics are awful.)


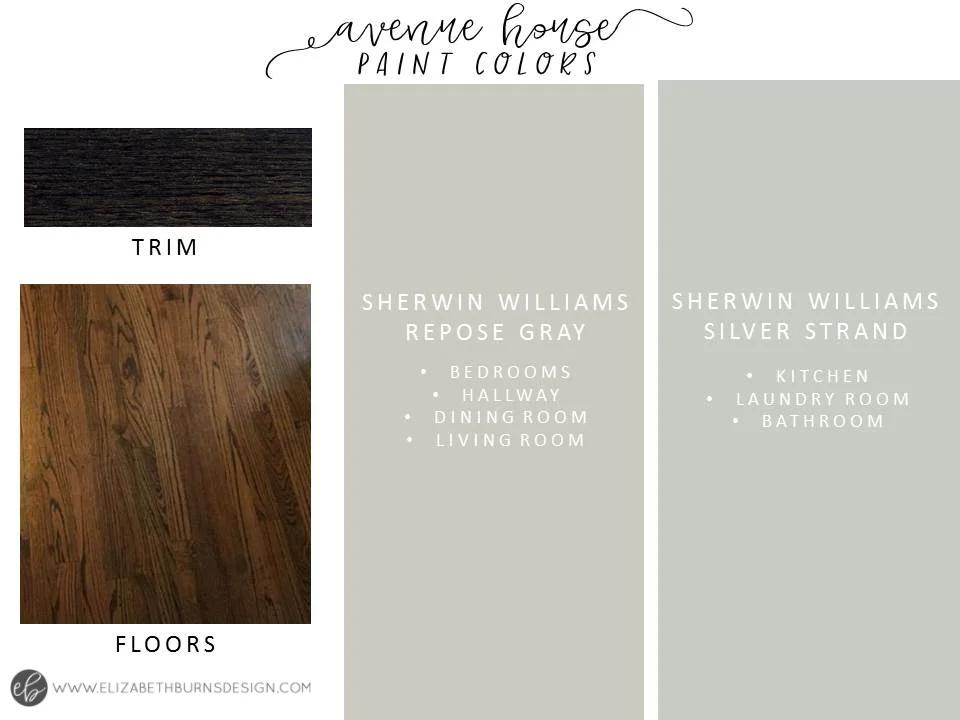
I spent a lot of time on the laundry room (the beadboard walls took much longer to paint than the flat plaster ones) but it made me excited for how this house will look when we're all done! If you have been reading my blog for any length of time, I probably sound like a broken record, but Sherwin Williams Silver Strand (SW 7057) is one of my go-to paint colors, especially for houses we are selling because it is a color almost EVERYONE seems to love. We have showed this paint color to friends and clients as options and 99.9% of the time, they end up choosing it for their home. It looks especially pretty with white cabinets and trim. We are using this color in the back of the house (kitchen, laundry room, and bathroom) where the trim has already been painted. Here is a quick before and after of the laundry room after painting and repairing the warped beadboard ceiling (something Brian had a lot of practice with after our own roof leaked, haha).
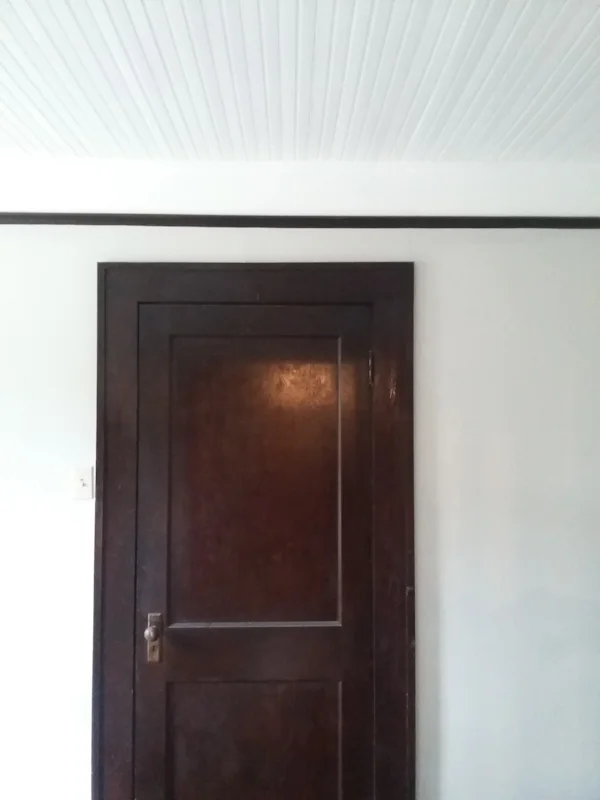
I painted the built-in in the bedroom white and the hardware got a fresh coat of oil-rubbed bronze paint (photos to come). In the rooms where the trim is still stained, we are going with Sherwin Williams Repose Gray (SW 7015) (one of my favorite picks for pure gray paint colors). It adds a nice slight contrast to the warm tones of the wood trim and wood floors. I don't think I will ever not be amazed by the power of paint! If you are trying to update your own home, this is one of the easiest and least expensive - albeit a bit time-consuming - projects you can DIY. You definitely get a big bang for your buck with paint. Doesn't the room seem fresher already?

One thing people don't really mention when flipping is the coordination it takes to get things (and keep things) moving. Even though we tend to do a lot of the cosmetic work ourselves, we are bringing in a heating and air professional to install central heat/air (currently no AC in the house), an electrician to bring the kitchen up to code, a plumber to connect a new hot water heater (that is not in the kitchen ;) and move the kitchen sink location, and lastly a hardwood refinishing specialist to tackle the very worn pine floors. Brian has already spent a lot of time trying to get in contact with the subs for estimates and scheduling. Since we live in a small town, there are not a lot of reputable sub-contractors around, so you are kind of at the mercy of their schedules.
After a few weeks of calling, we were able to get the heating and air guy over for a quote and he is working as I write this! This is very exciting because we have been working in this little hot box of a house with no A/C (not even window units!) so it will be nice to continue work through the summer with cool air. Only we would buy a house in June with no air conditioning, lol. We can't actually hook the AC unit up until the electrician is done since we need to update the electrical panel, so I will probably continue to be a literal hot mess for another week or so. I won't bore you with these details anymore, but as you can see, it takes a lot of planning to figure out which projects need to be completed first.
I was terrified that we were not going to be able to save the original wood floors (I thought they were oak at first, but it turns out they are longleaf pine) but the flooring specialist said they should sand out just fine! He also didn't seem concerned with the water damage in the kitchen which was music to my ears. It would have broken my heart to have to cover those floors up after all of the time and sweat we put into uncovering them. Once the HVAC, plumber, and electrician are done, we can have the floors refinished and then Brian and I can start renovating the kitchen and bathroom. (!!!!)

We had originally budgeted around $25,000 for this renovation, but I think we actually may come in under that! The two biggest costs for this project are the HVAC and hardwood flooring (I had budgeted $6000 and $4500 respectively). I was ecstatic when our HVAC quote came in at $4500 and the hardwoods at $2500 ($3500 less total than budgeted)! It took everything in my being to play it cool when the hardwood refinisher gave us that price - I wanted to run up and hug him.
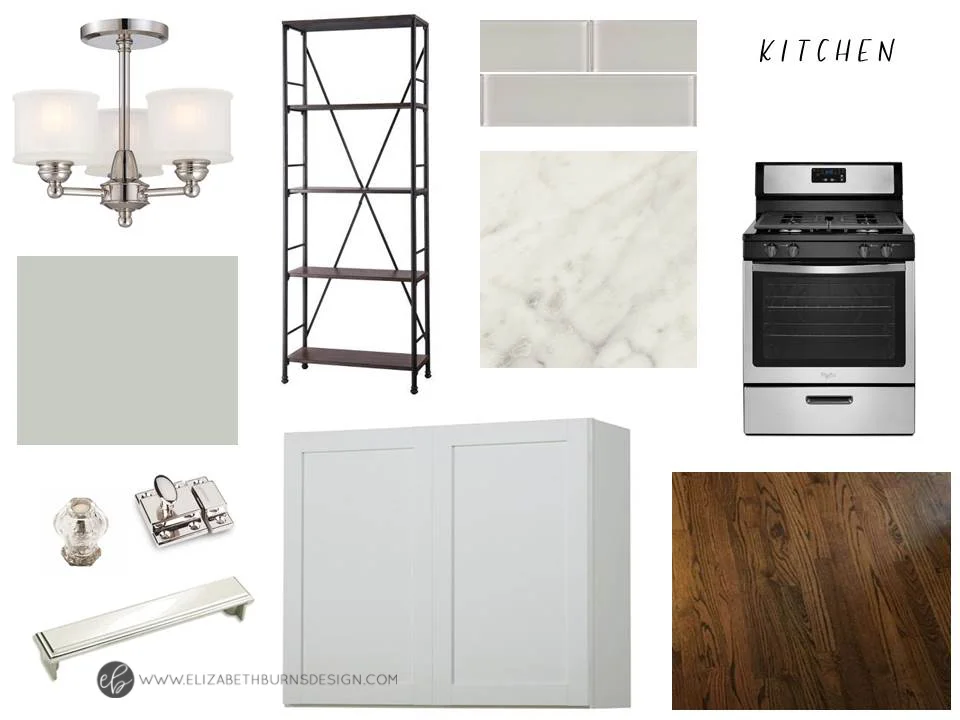
I have a design plan pretty much figured out (and purchased many things too!) but am struggling with a few decisions. Has anyone ever painted a melamine vanity? I got this one on clearance at Lowes, but the gray is more periwinkle and looks purple against the other colors in the house. The style and size (and price!) are great, so I would love to keep it and paint it Sherwin Williams Mindful Gray (SW 7016) but am curious as to how it will hold up over time since it is not a factory finish? Here are my inspiration boards I threw together to see how everything will look. I ALWAYS do this, even for small projects, because it is a quick way to figure out if your selections are cohesive and look good together. :)


(All of the items still available can be found on my Pinterest Board for the Avenue House.)
If you have made it through this long, rambling post, thank you! There are a lot of things in the works, but not a lot of finished projects to show. I am hopeful that my next update will be a little more exciting. ;) If you are on Instagram, I hope you'll consider following along on our progress! Hope you guys have a great weekend.