

This is a series of posts about our latest endeavor as newbie house flippers! We give updates every few weeks on our house flipping adventures that include timelines, budgets, problems, and before + afters. If you want to start flipping houses, I hope you'll follow along with this series!
Week 1
Weeks 2 + 3
Weeks 4 + 5
Weeks 6 + 7
Weeks 8 + 9
Update
Bathroom Before + Afters
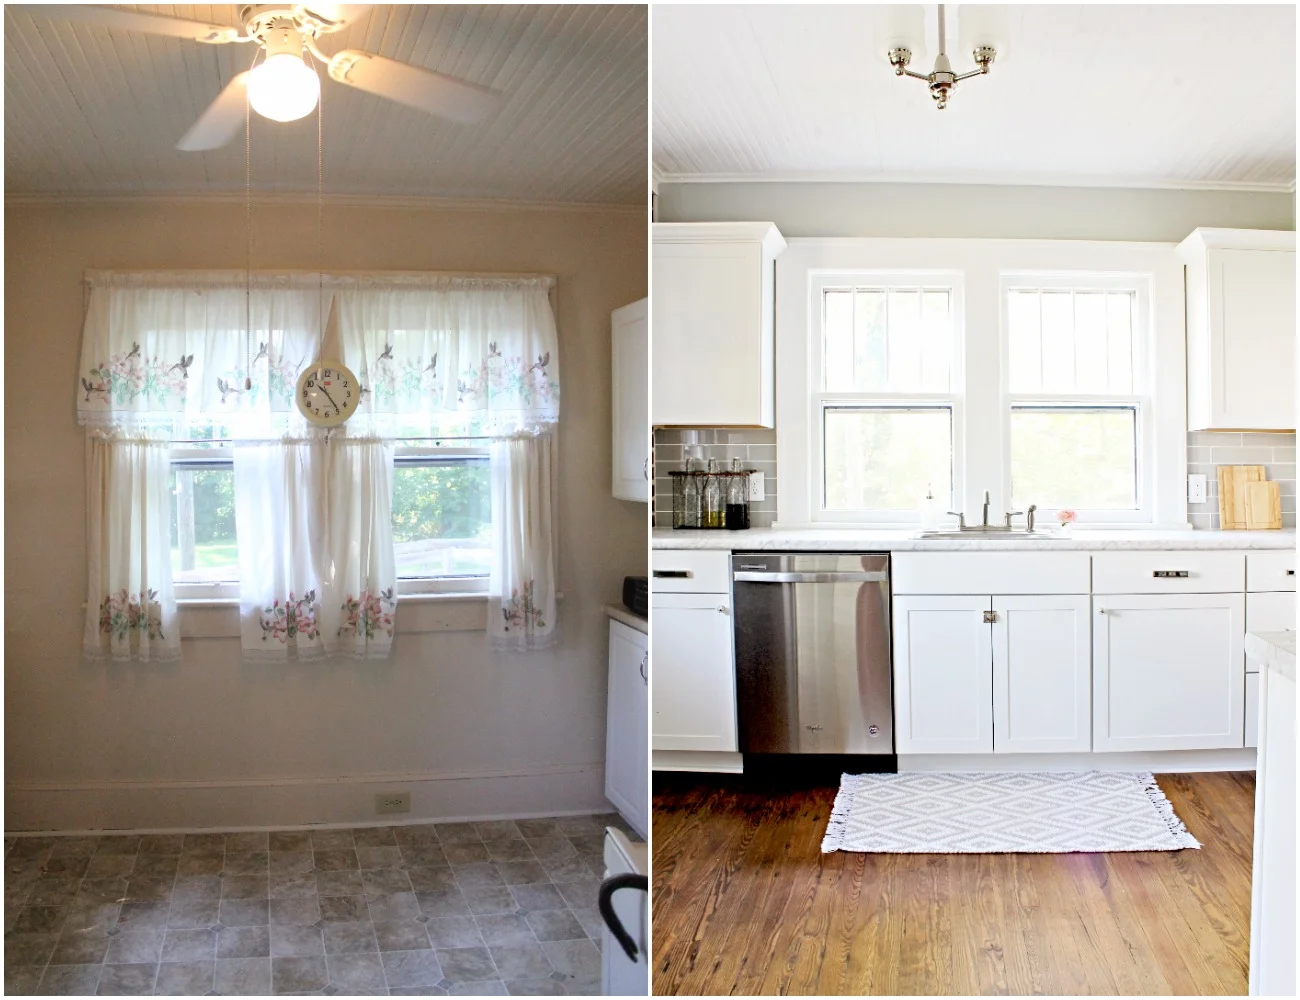
Y'all know I'm impatient (saving the best for last doesn't work for me, lol), so next up on the house flip before and afters is another personal favorite - the kitchen! Although this room is small, there were a lot of original features we were able to uncover to redeem the lack of space including the brick chimney and the pine floors. Removing the layers of vinyl was a beast (and probably the first moment we thought, "what have we gotten ourselves into?") but totally worth it in the end. The kitchen gets gorgeous afternoon sunlight and it seems like such a cozy little spot to whip up a meal in. We did put a lot of the project budget and time into this room (we literally got rid of everything but the kitchen sink!), but I think we'll get every penny spent back. Here is a summary of the projects we did:
- Upgraded the plumbing to PEX*
- Added/upgraded electrical outlets and wiring*
- Removed vinyl floor
- Patched wood floor
- Patched and sanded the plaster walls
- Refinished the original floors*
- Added in crown molding where missing
- Added in baseboard where missing
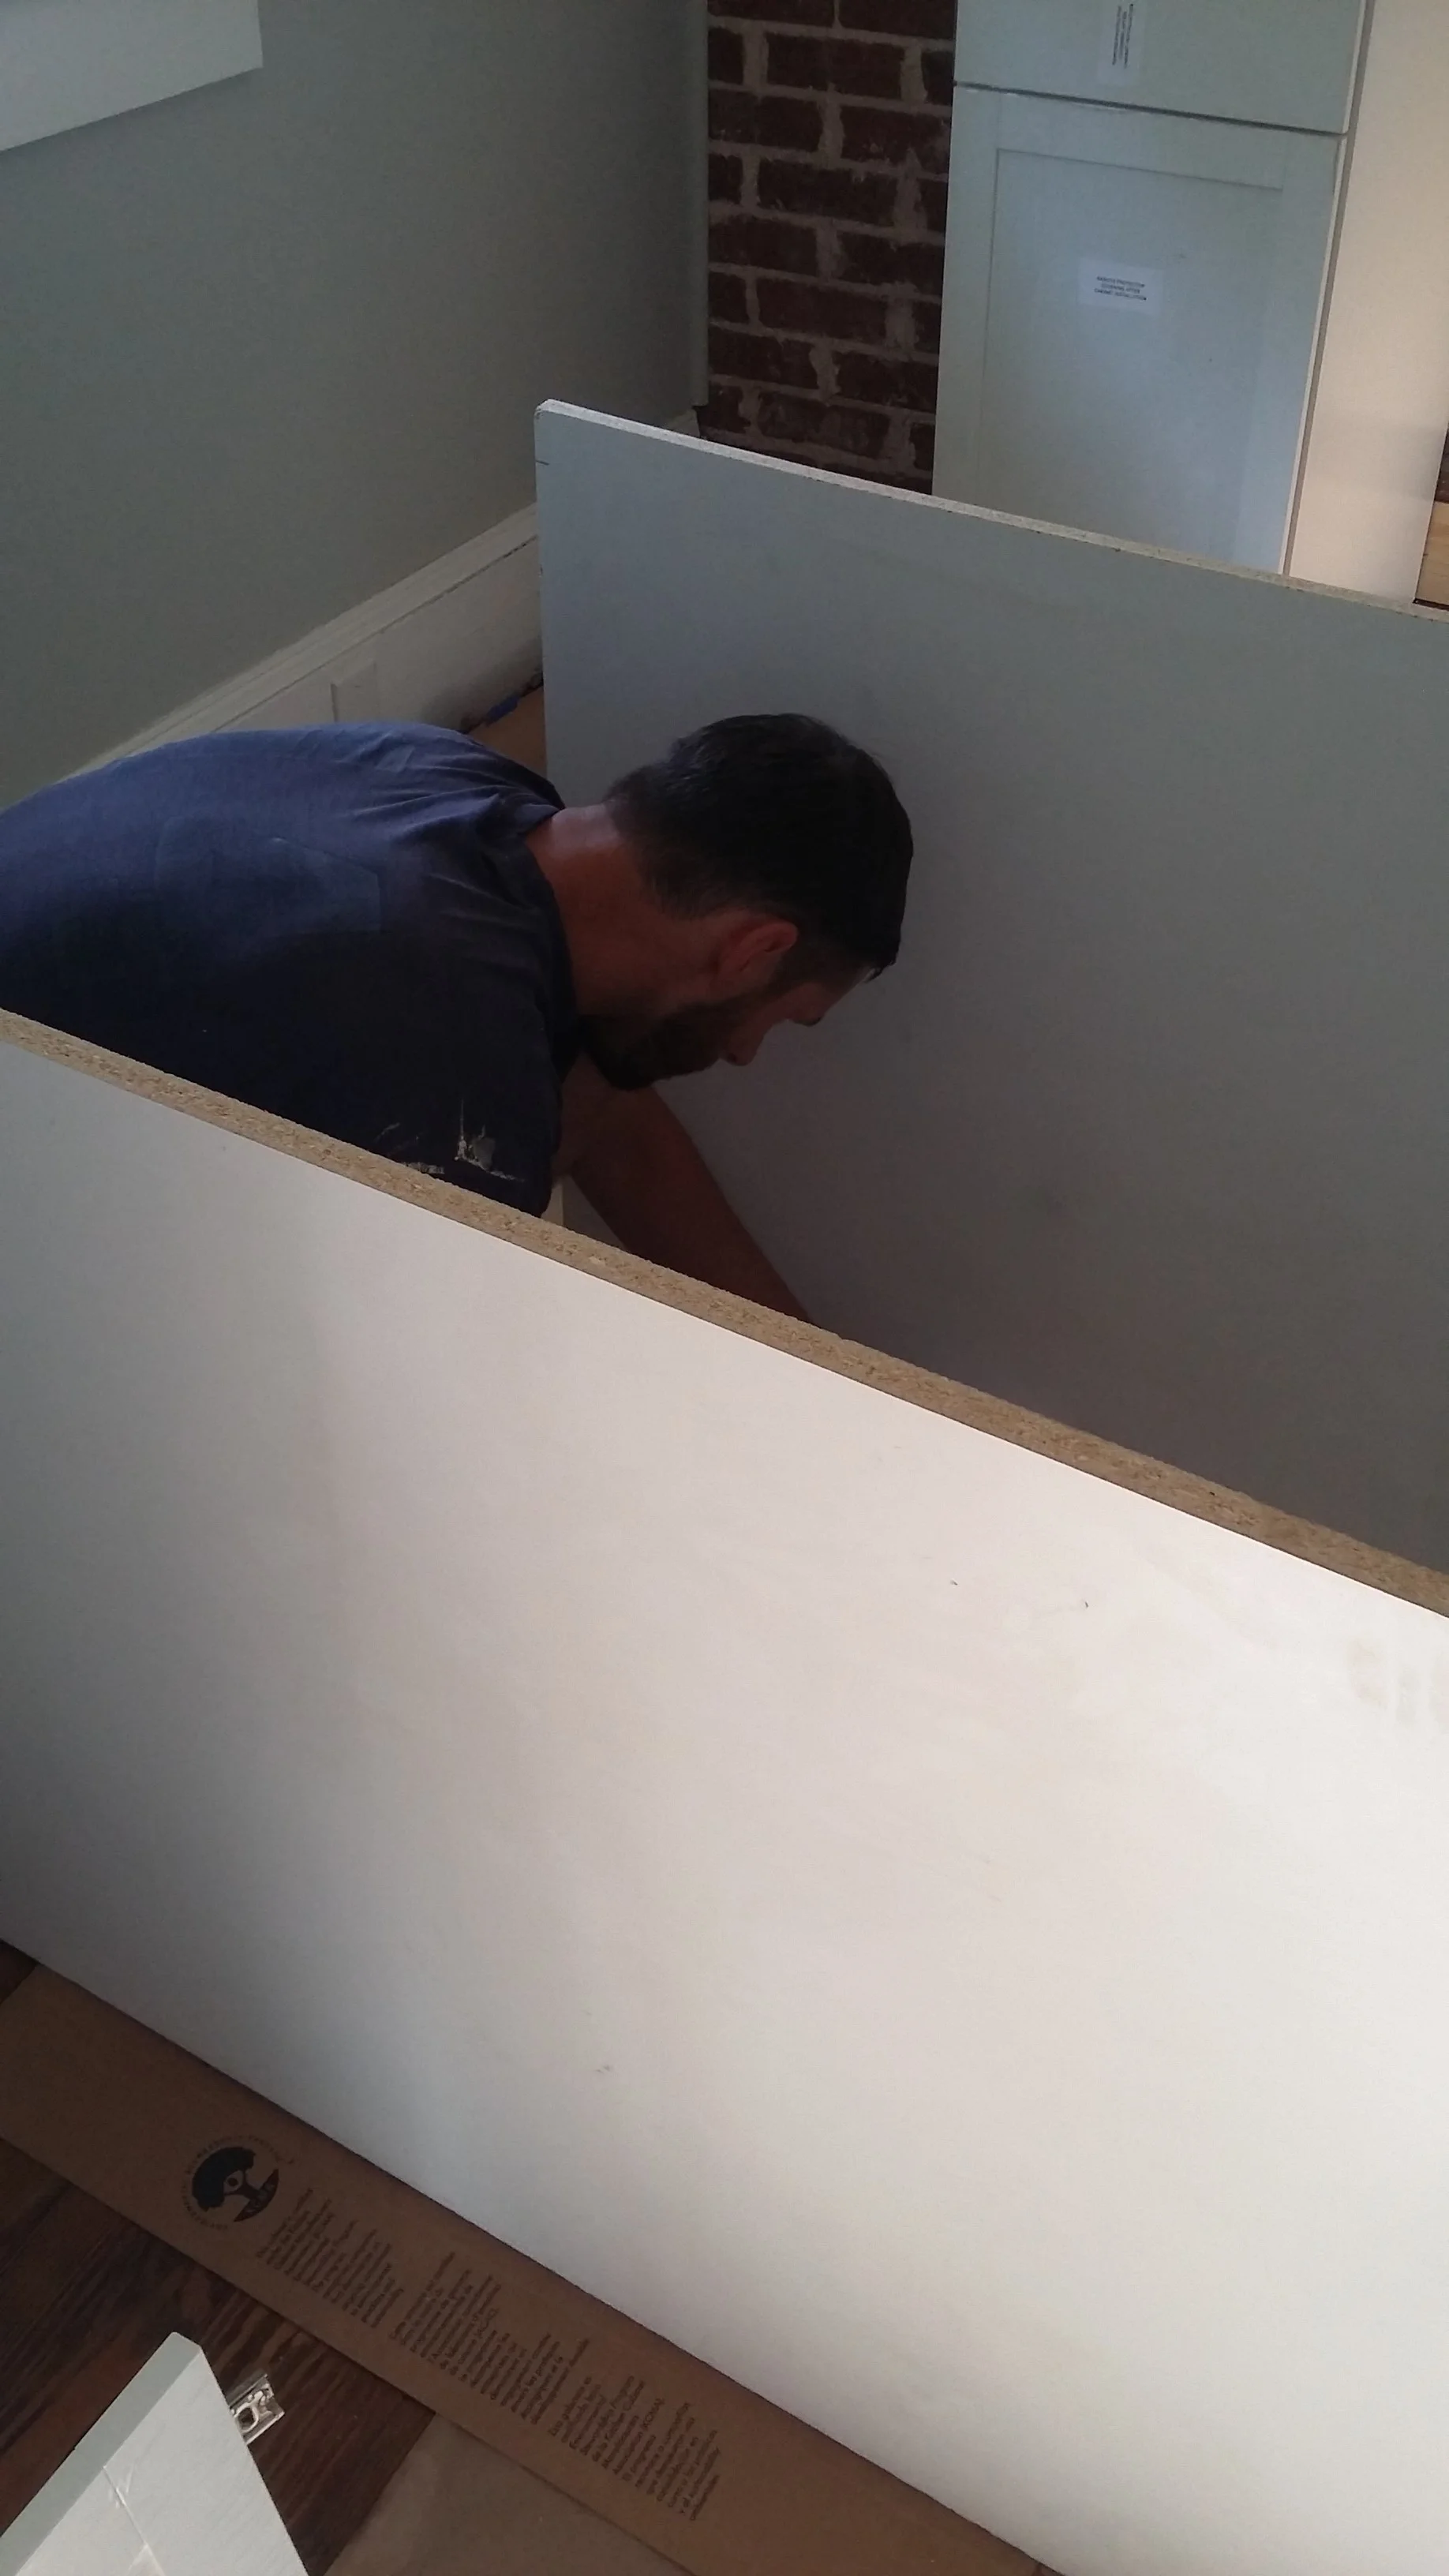
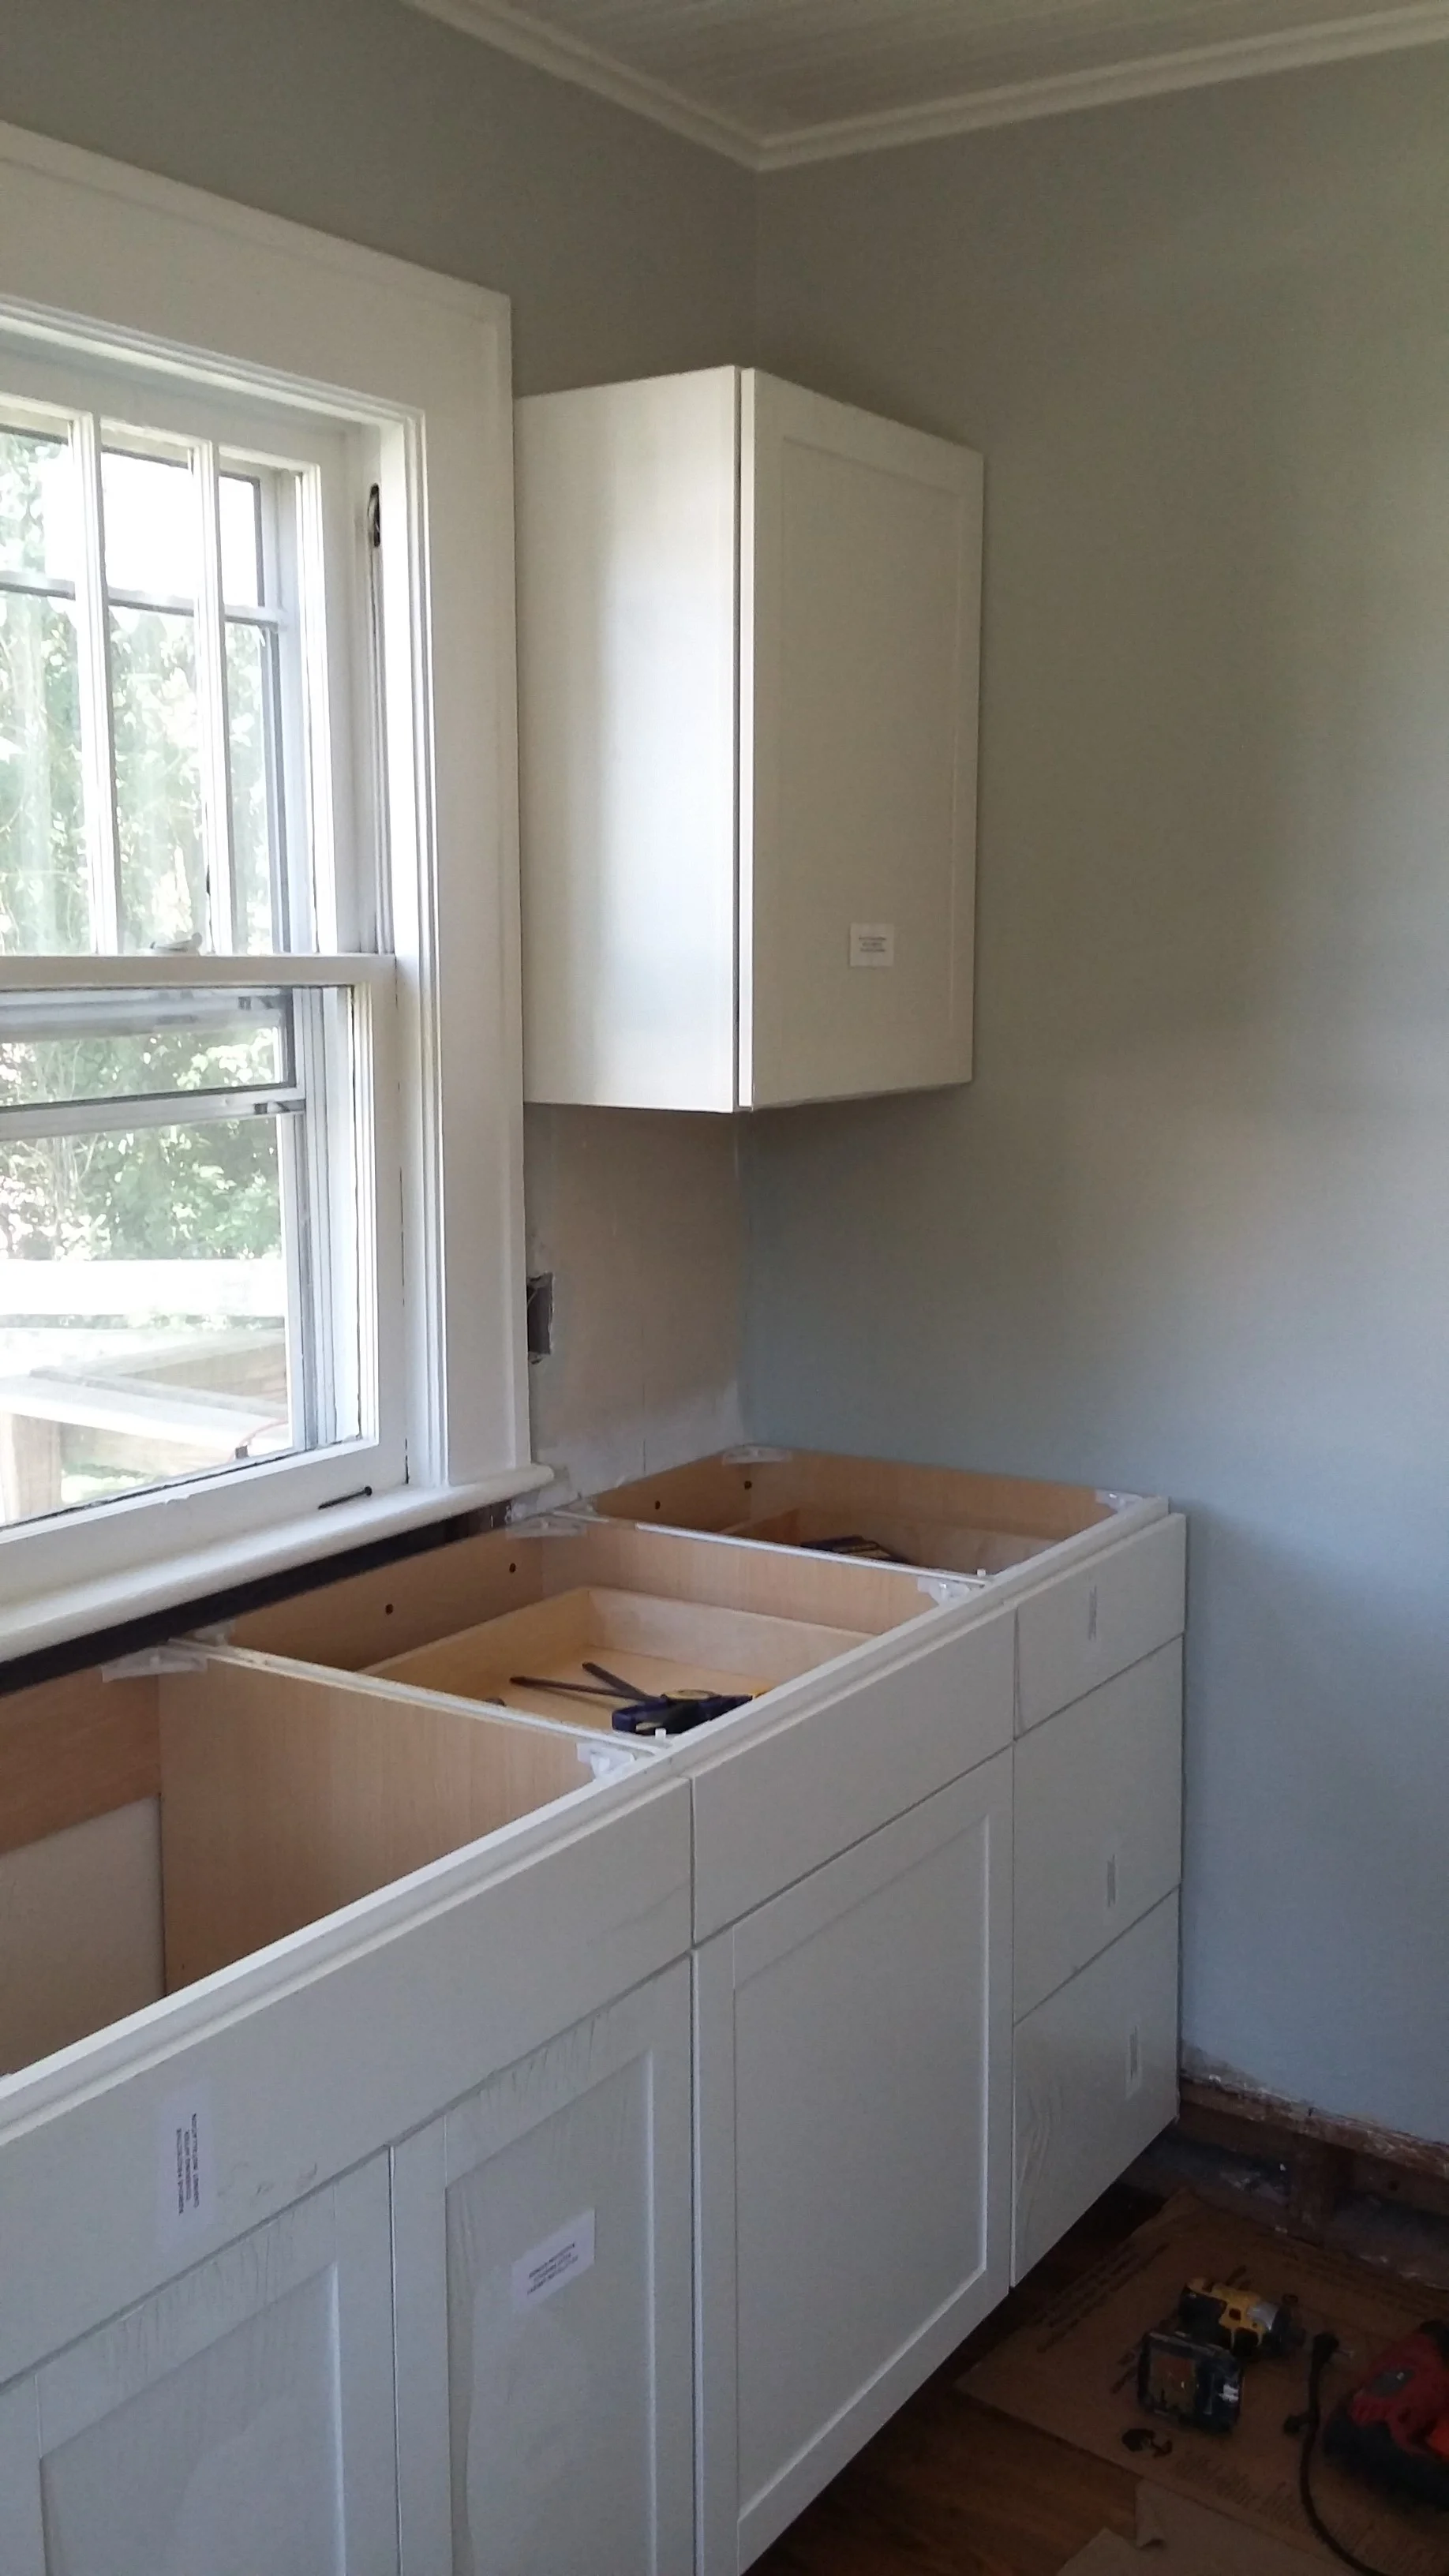
- Installed new shaker cabinets
- Built fridge cabinet
- Added crown to cabinets
- Installed new marble laminate counters
- Installed and grouted glass subway tile backsplash
- Re-installed kitchen sink and faucet
- Installed new hardware
- Installed new ceiling light
- Primed and painted the trim and windows
- Primed and painted the walls
- Installed reclaimed wood shelves
- Patched the hole in brick chimney
- Sealed brick chimney
- Added central heat/air to the room*
(* items are tasks we hired out)
Below photos by Maggie Mills Photography


BEFORE + AFTERS
This kitchen had a completely different layout when we bought it. The hot water heater was in the kitchen taking up a ton of space. The house never had a dishwaser and the fridge was in the dining room. I can't tell you the number of times I measured (and re-measured) before ordering the cabinets. There was such little wiggle room that precision was key with this project. This room probably has the most dramatic before and afters of all of the rooms in this flip house. Here are the before and after shots:

Can you believe that pretty pine was hiding underneath all of the vinyl? Even though there was some water marks (you can see faint markings if you look closely), these sanded up incredibly well. The warm tones of the Provincial stain I think help to balance out the cool white, gray, and blue tones in the rest of the kitchen.

I don't think that this kitchen layout could have been more awkward! I don't know how anyone cooked in here before because there was almost no counterspace. By relocating the sink to the window, it seems like a much more natural layout, provides way more prep space, and creates a working triangle which was important in this small of a kitchen. You can also see we now have a dishwasher and fridge in the kitchen! Hooray! That clunky hot water heater was chucked and replaced with a standard hot water heater in the crawlspace.

You can see how much extra storage space we were able to squeeze in by re-arranging the layout. And now the kitchen sink overlooks the backyard (and new firepit!) which I think is much more pleasant than doing dishes facing a wall. Fun fact - we barely had enough room to squeeze the countertop underneath those windows. In fact, we had to remove the sill in order to make everything fit but luckily everything slid in without giving us too much trouble.

The above before/after shot is probably one of my favorites because you can see all the way to the front of the house. I really tried to get as much storage out of this little kitchen as humanly possible so we added a cup/mug rack to the side of the fridge (this also helped break up the sea of white on the fridge cabinet). You can see what I mean about having to be very precise with cabinet measurements when you look at the stove corner. We had 1/2" of clearance to spare between the cabinet and the door casing! I wish you could see the other side of the stove - we had *juuuussstttt* enough clearance for the oven door to open, lol.

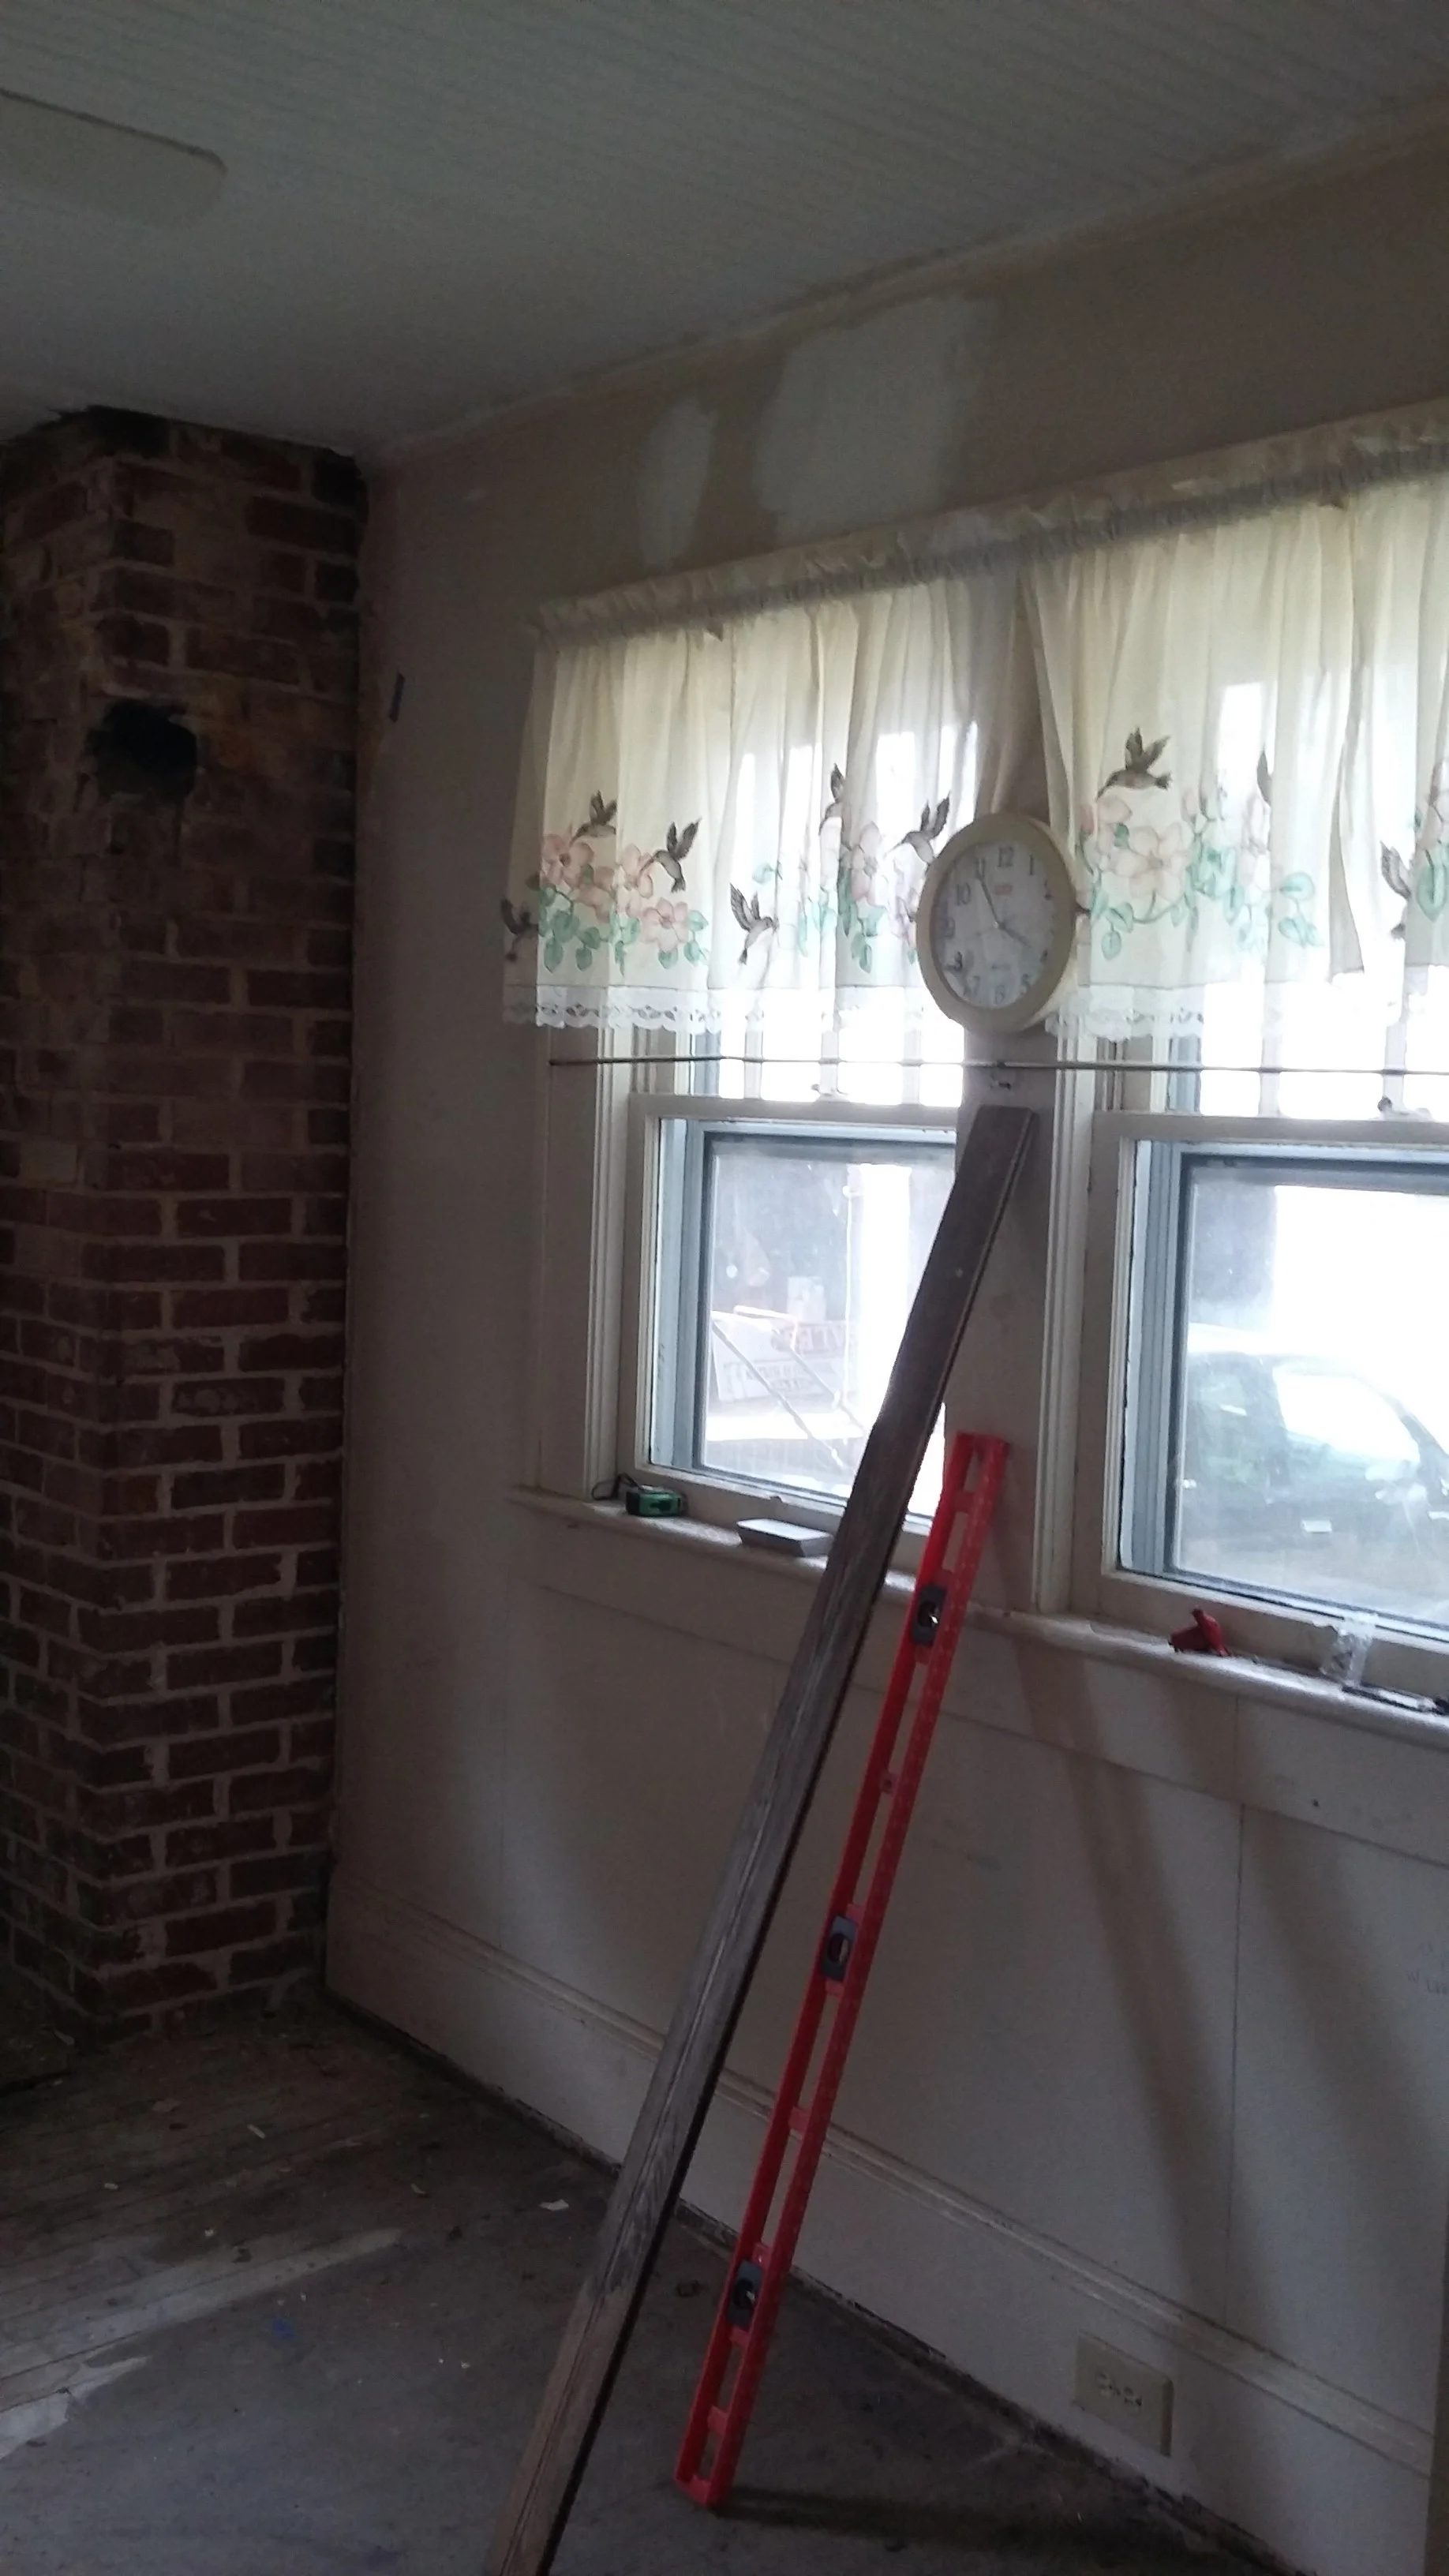
Yet again, this room was a sea of ivory, so once we created some contrast between the trim and walls, the original details like the thick baseboards, beadboard ceiling, and original window casings really started to shine. P.S. I felt extremely guilty for throwing away those hummingbird curtains.
I'm not typically a fan (no pun intended) of fans in the kitchen, but you can bet I was grateful for that rickety old fan in this house since we didn't have AC from June through August, haha. That fan was our only cooling mechanism and I was a little nostalgic taking it down. However, it definitely had seen better days and this new polished nickel ceiling light provides much better lighting. Fun fact - that light was originally in our office, and then master bedroom, but I decided it was too bright and went with a chandelier (I have a chandelier problem). Poor Brian has had to install that light fixture three times, lol. I'm sure he is happy he will never have to install it again since it ended up in a flip house. ;)

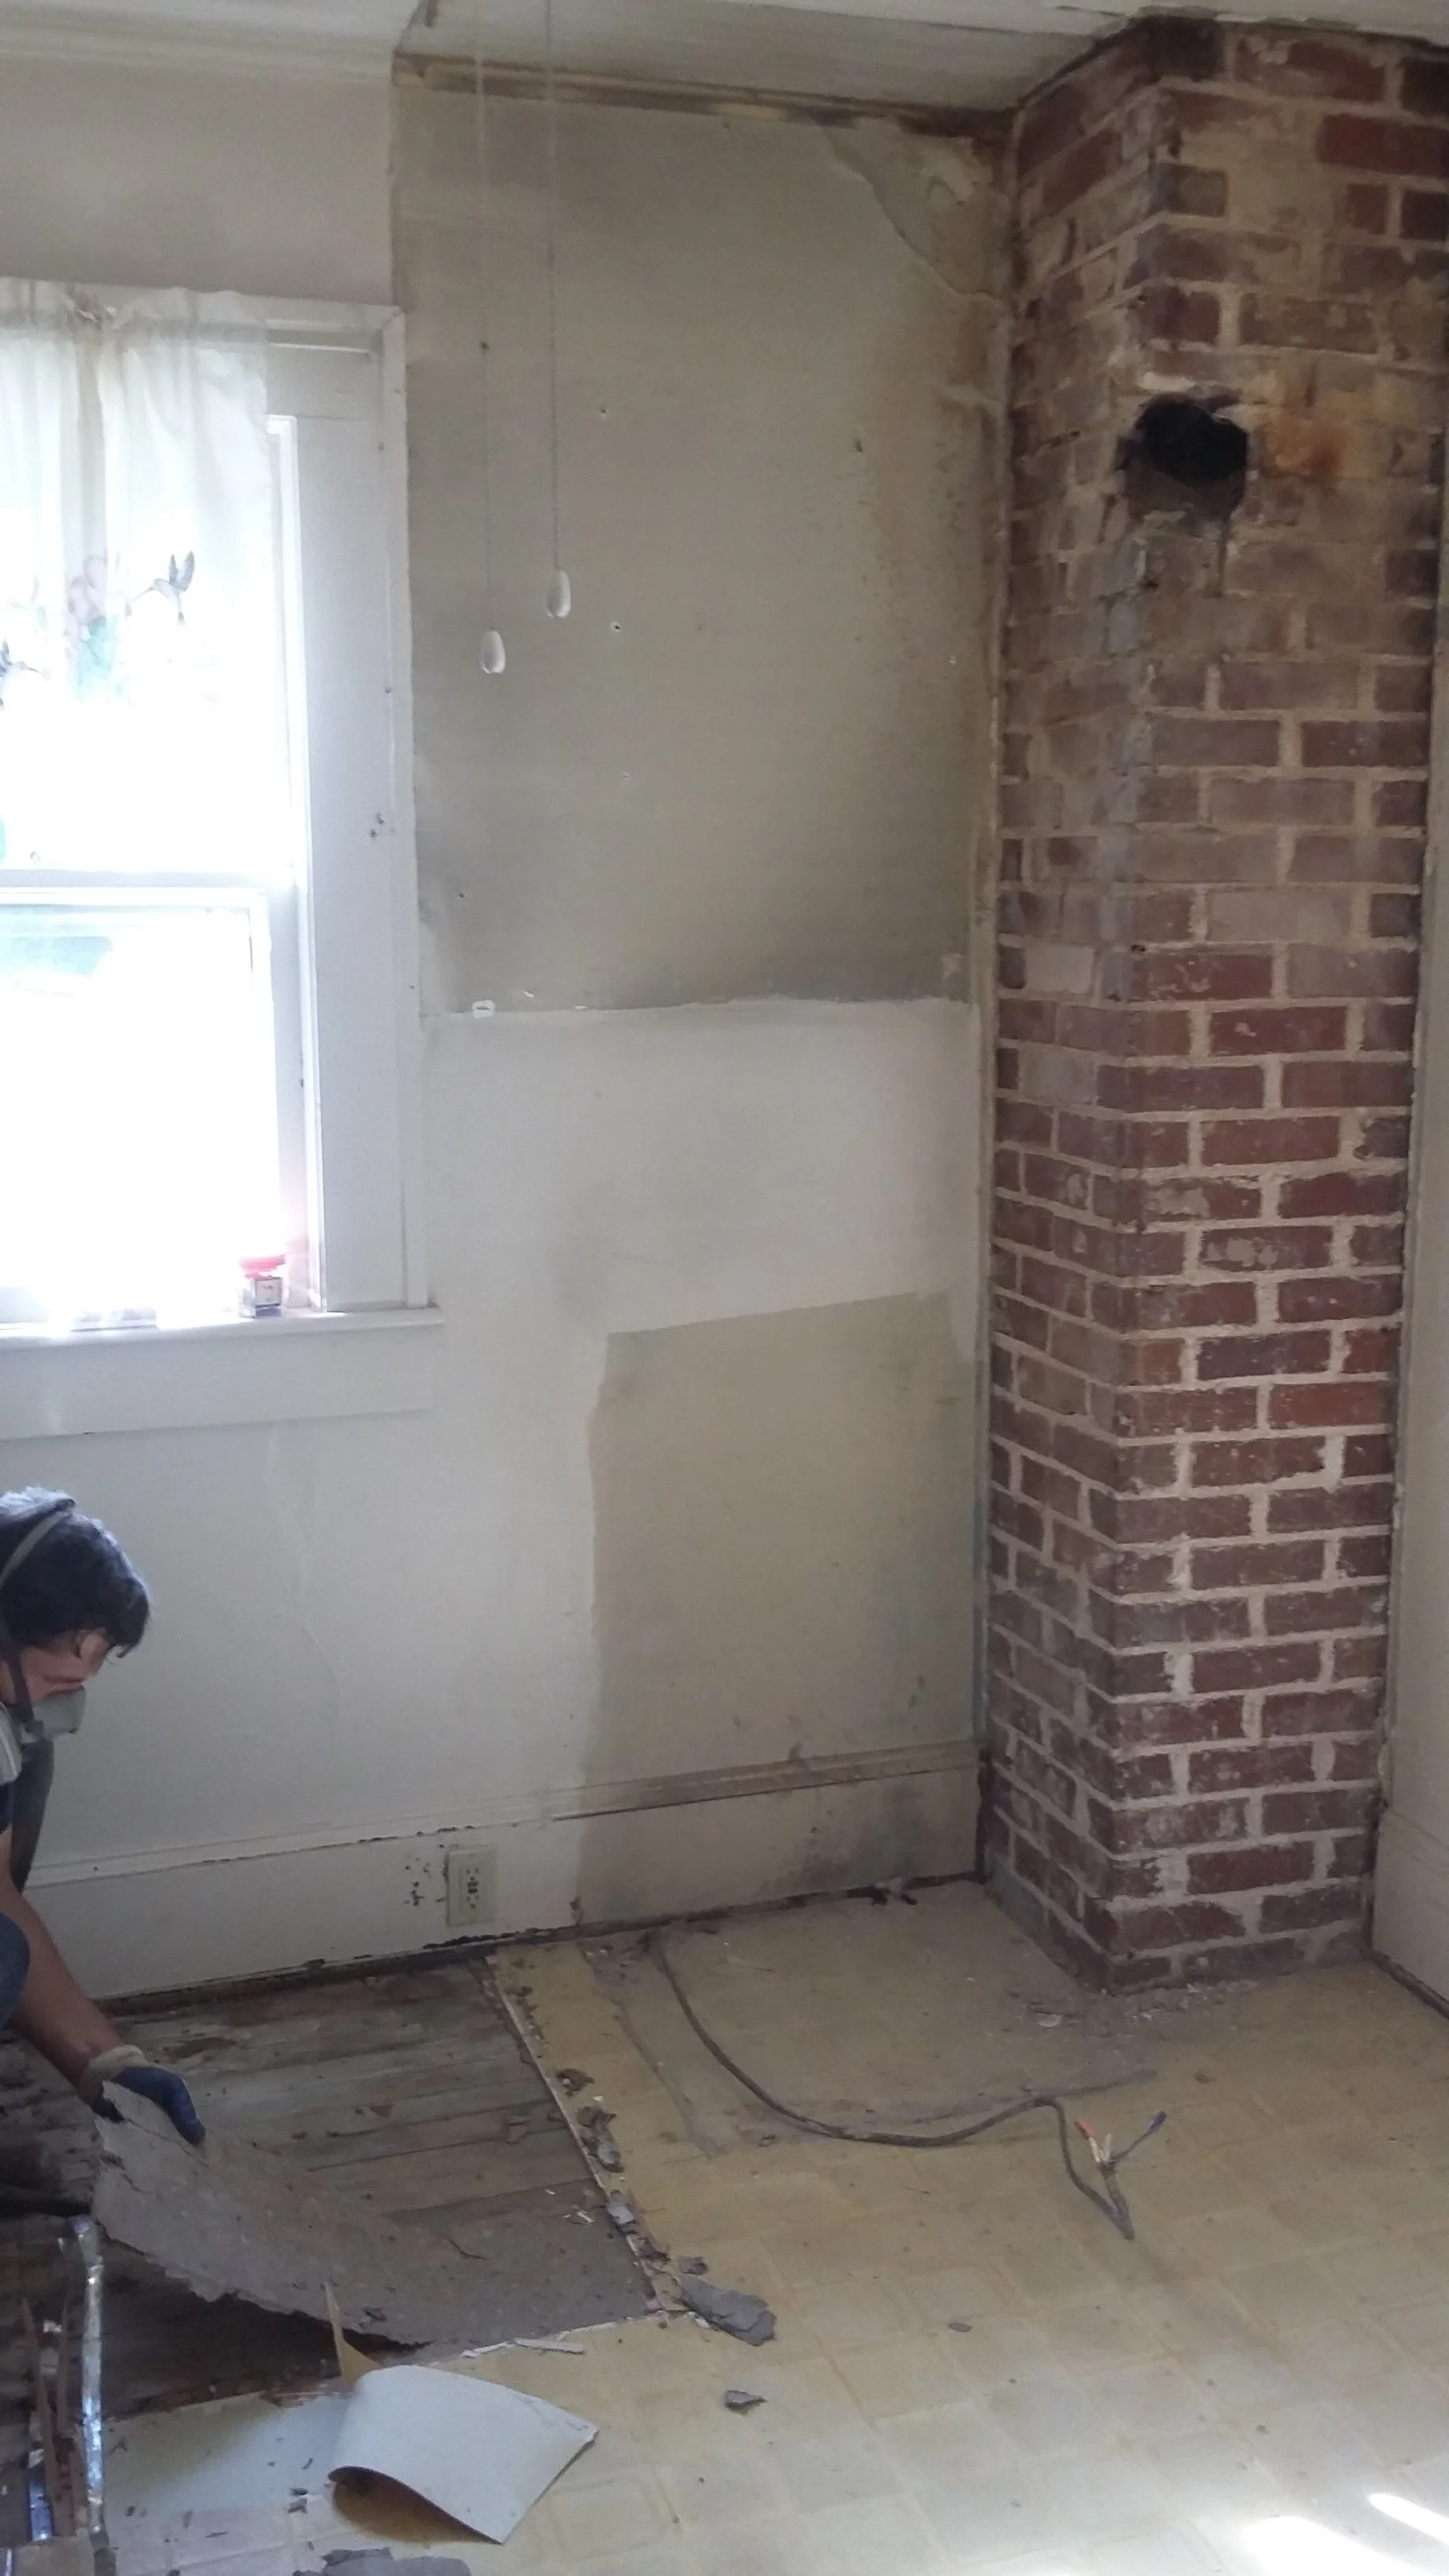
I've Instagrammed the above photo a lot but it hasn't gotten old to me yet! I love how the brick and reclaimed wood add texture to the otherwise flat kitchen. I still can't believe all of that character was hiding under the plaster! You can also see where we patched in some wood flooring next to the brick chimney. Some spots had water damage from an old leak that we needed to reinforce. You can tell the stain colors didn't exactly match up since we stole flooring from another room that didn't have water damage. Something to keep in mind if we have to patch wood floors again in the future.

Having the fridge chill (I can't stop with the puns) alone in the corner wasn't exactly ideal, but with two doorways and three windows in this tiny space, I was just happy to be able to fit a fridge in here. We centered the refrigerator on the wall to leave clearance for the light switch and window casing. This also left a 5" gap between the fridge and the window wall where one could store a broom or mop. By building this cheap fridge cabinet (around $200), I think it made the appliance look less awkward and more built-in.
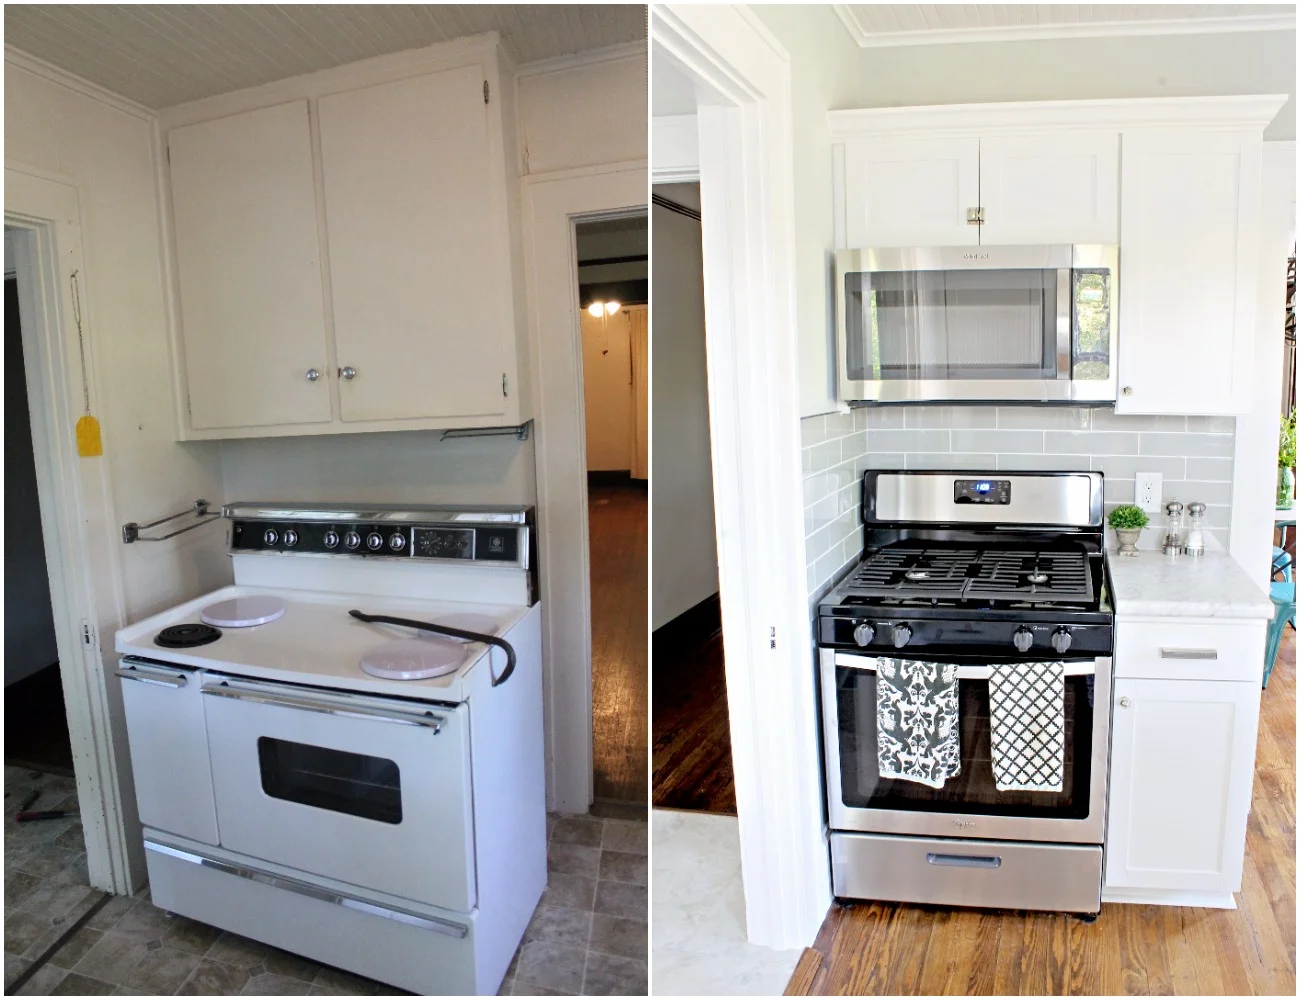
Normally, I really don't like when the backsplash wraps around a wall (like above) where there is no upper cabinet above the tile but I actually love how the stove corner worked out too! Brian didn't think tiling next to the side of the stove was necessary but I knew some poor homeowner would be trying to scrub splattered pasta sauce off of the wall paint and cursing us someday. ;) Again, a stove shoved in a corner is not ideal, but I am glad we were able to fit a 15" cabinet next to it. I personally would hate to have nowhere to put a pot lid or spatula when cooking (or let's be real, a fork when I'm microwaving my lean cuisine). You can see what I was talking about with the oven door having just enough room to open, lol. We also put in a gas stove since there was already a glas line there. Buyers love a gas stove. :)
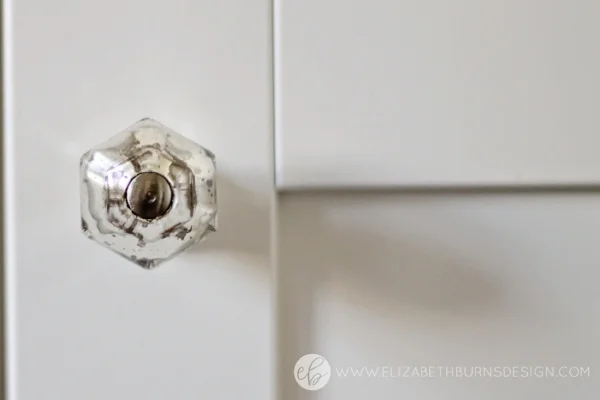
Yet again, DLawless Hardware completely exceeded my expectations in quality and design. We used three different styles of hardware for the kitchen - this mercury glass knob, polished nickel pulls, and these polished nickel latches. Brian was skeptical at first, but I think these three styles looked beautiful together and went with my vintage modern design.

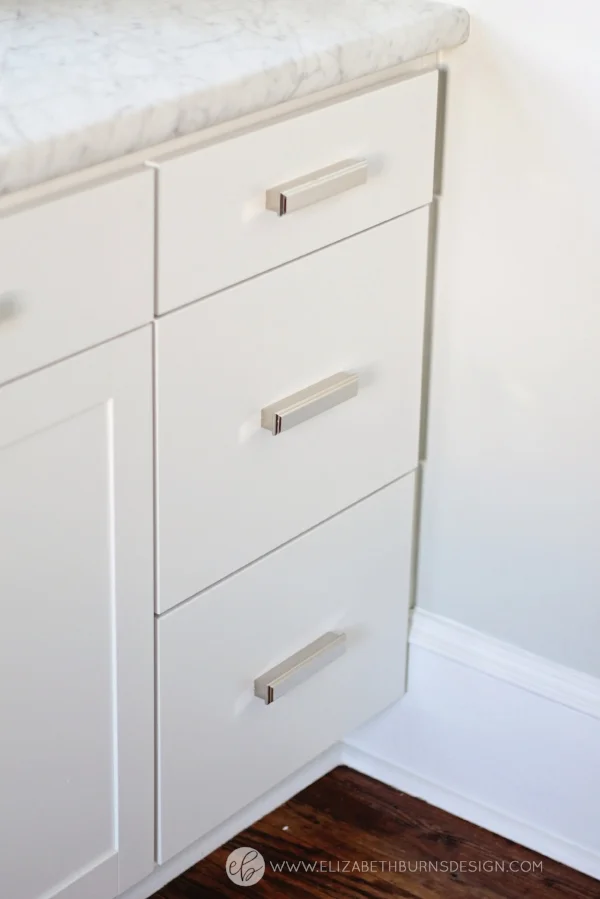
Another favorite finish is this kitchen are the budget friendly counters. We went with my trusty Formica marble laminate counter top but switched it up with a different pattern. For this kitchen we chose Formica Carrara Bianco. I chose this style because out of all of my samples, this seemed to have the most pure white background (an important consideration when you are doing white cabinetry) and because the repeat is pretty small which is best for a small space. Since we didn't have to order much material, I splurged an extra $40 on a fancier edge. We went with the double rounded edge (slightly rounded on the top and bottom). I think this is the closest edge to resembling actual stone.

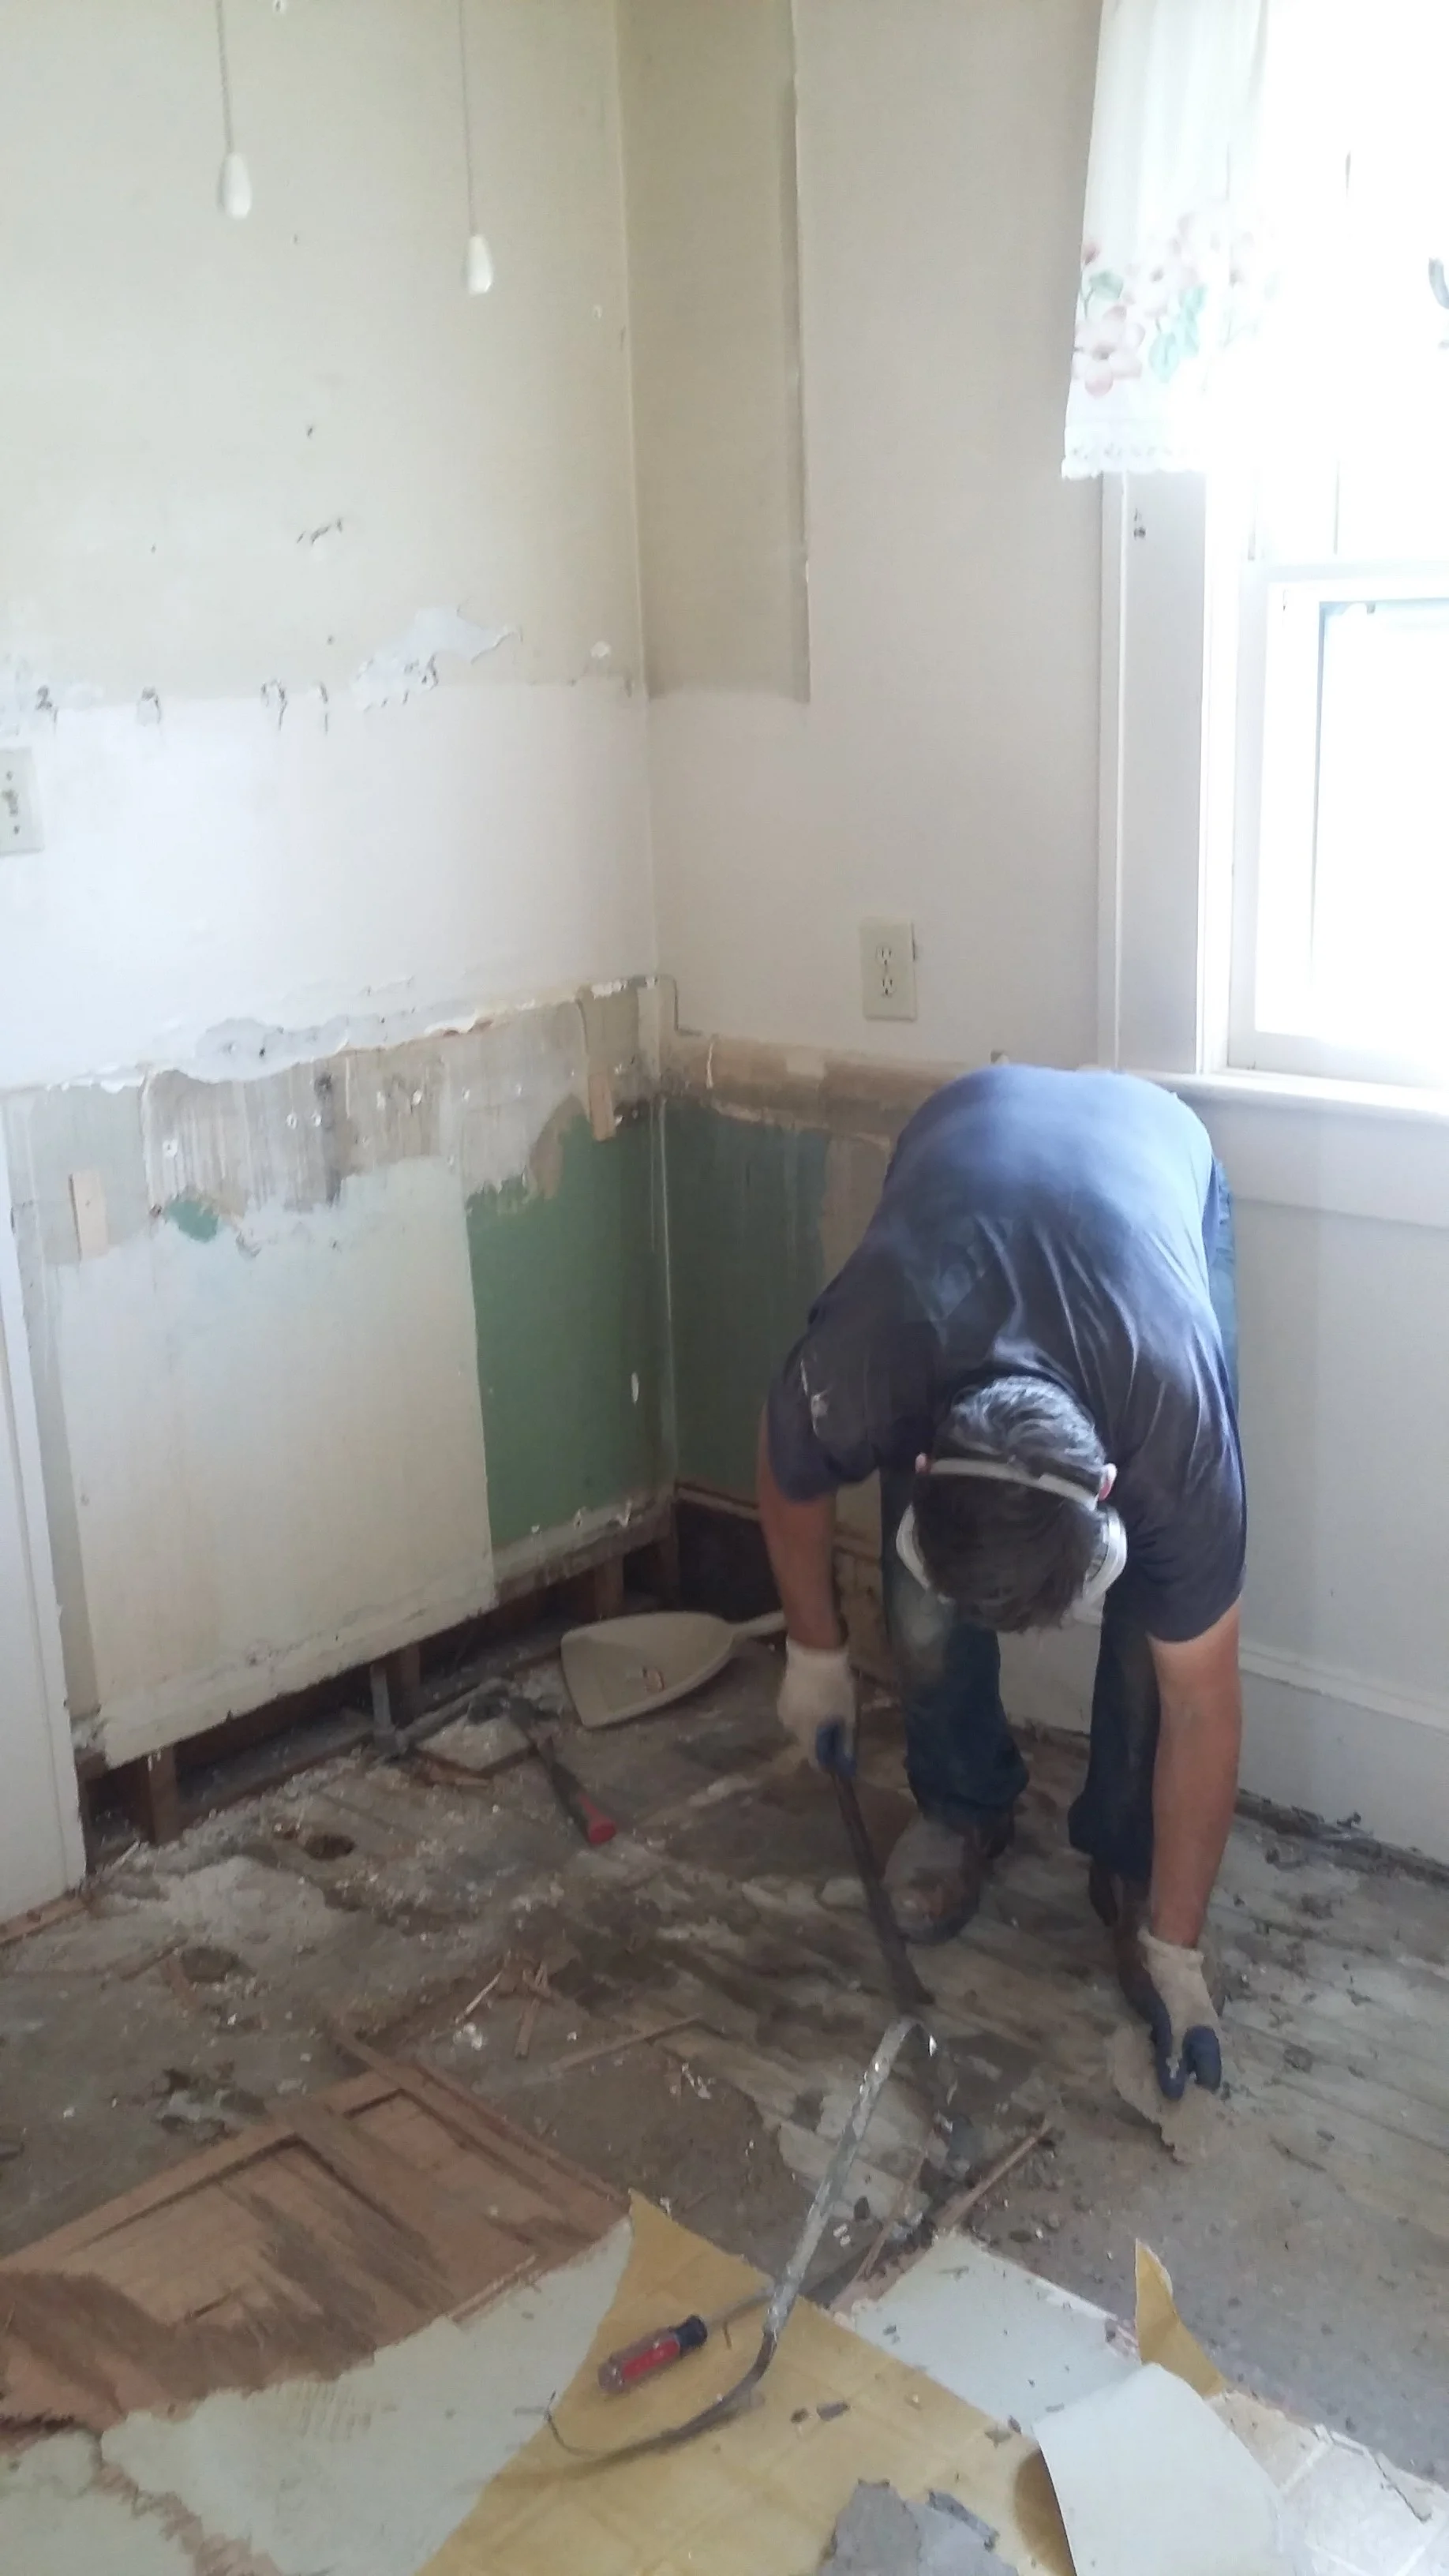
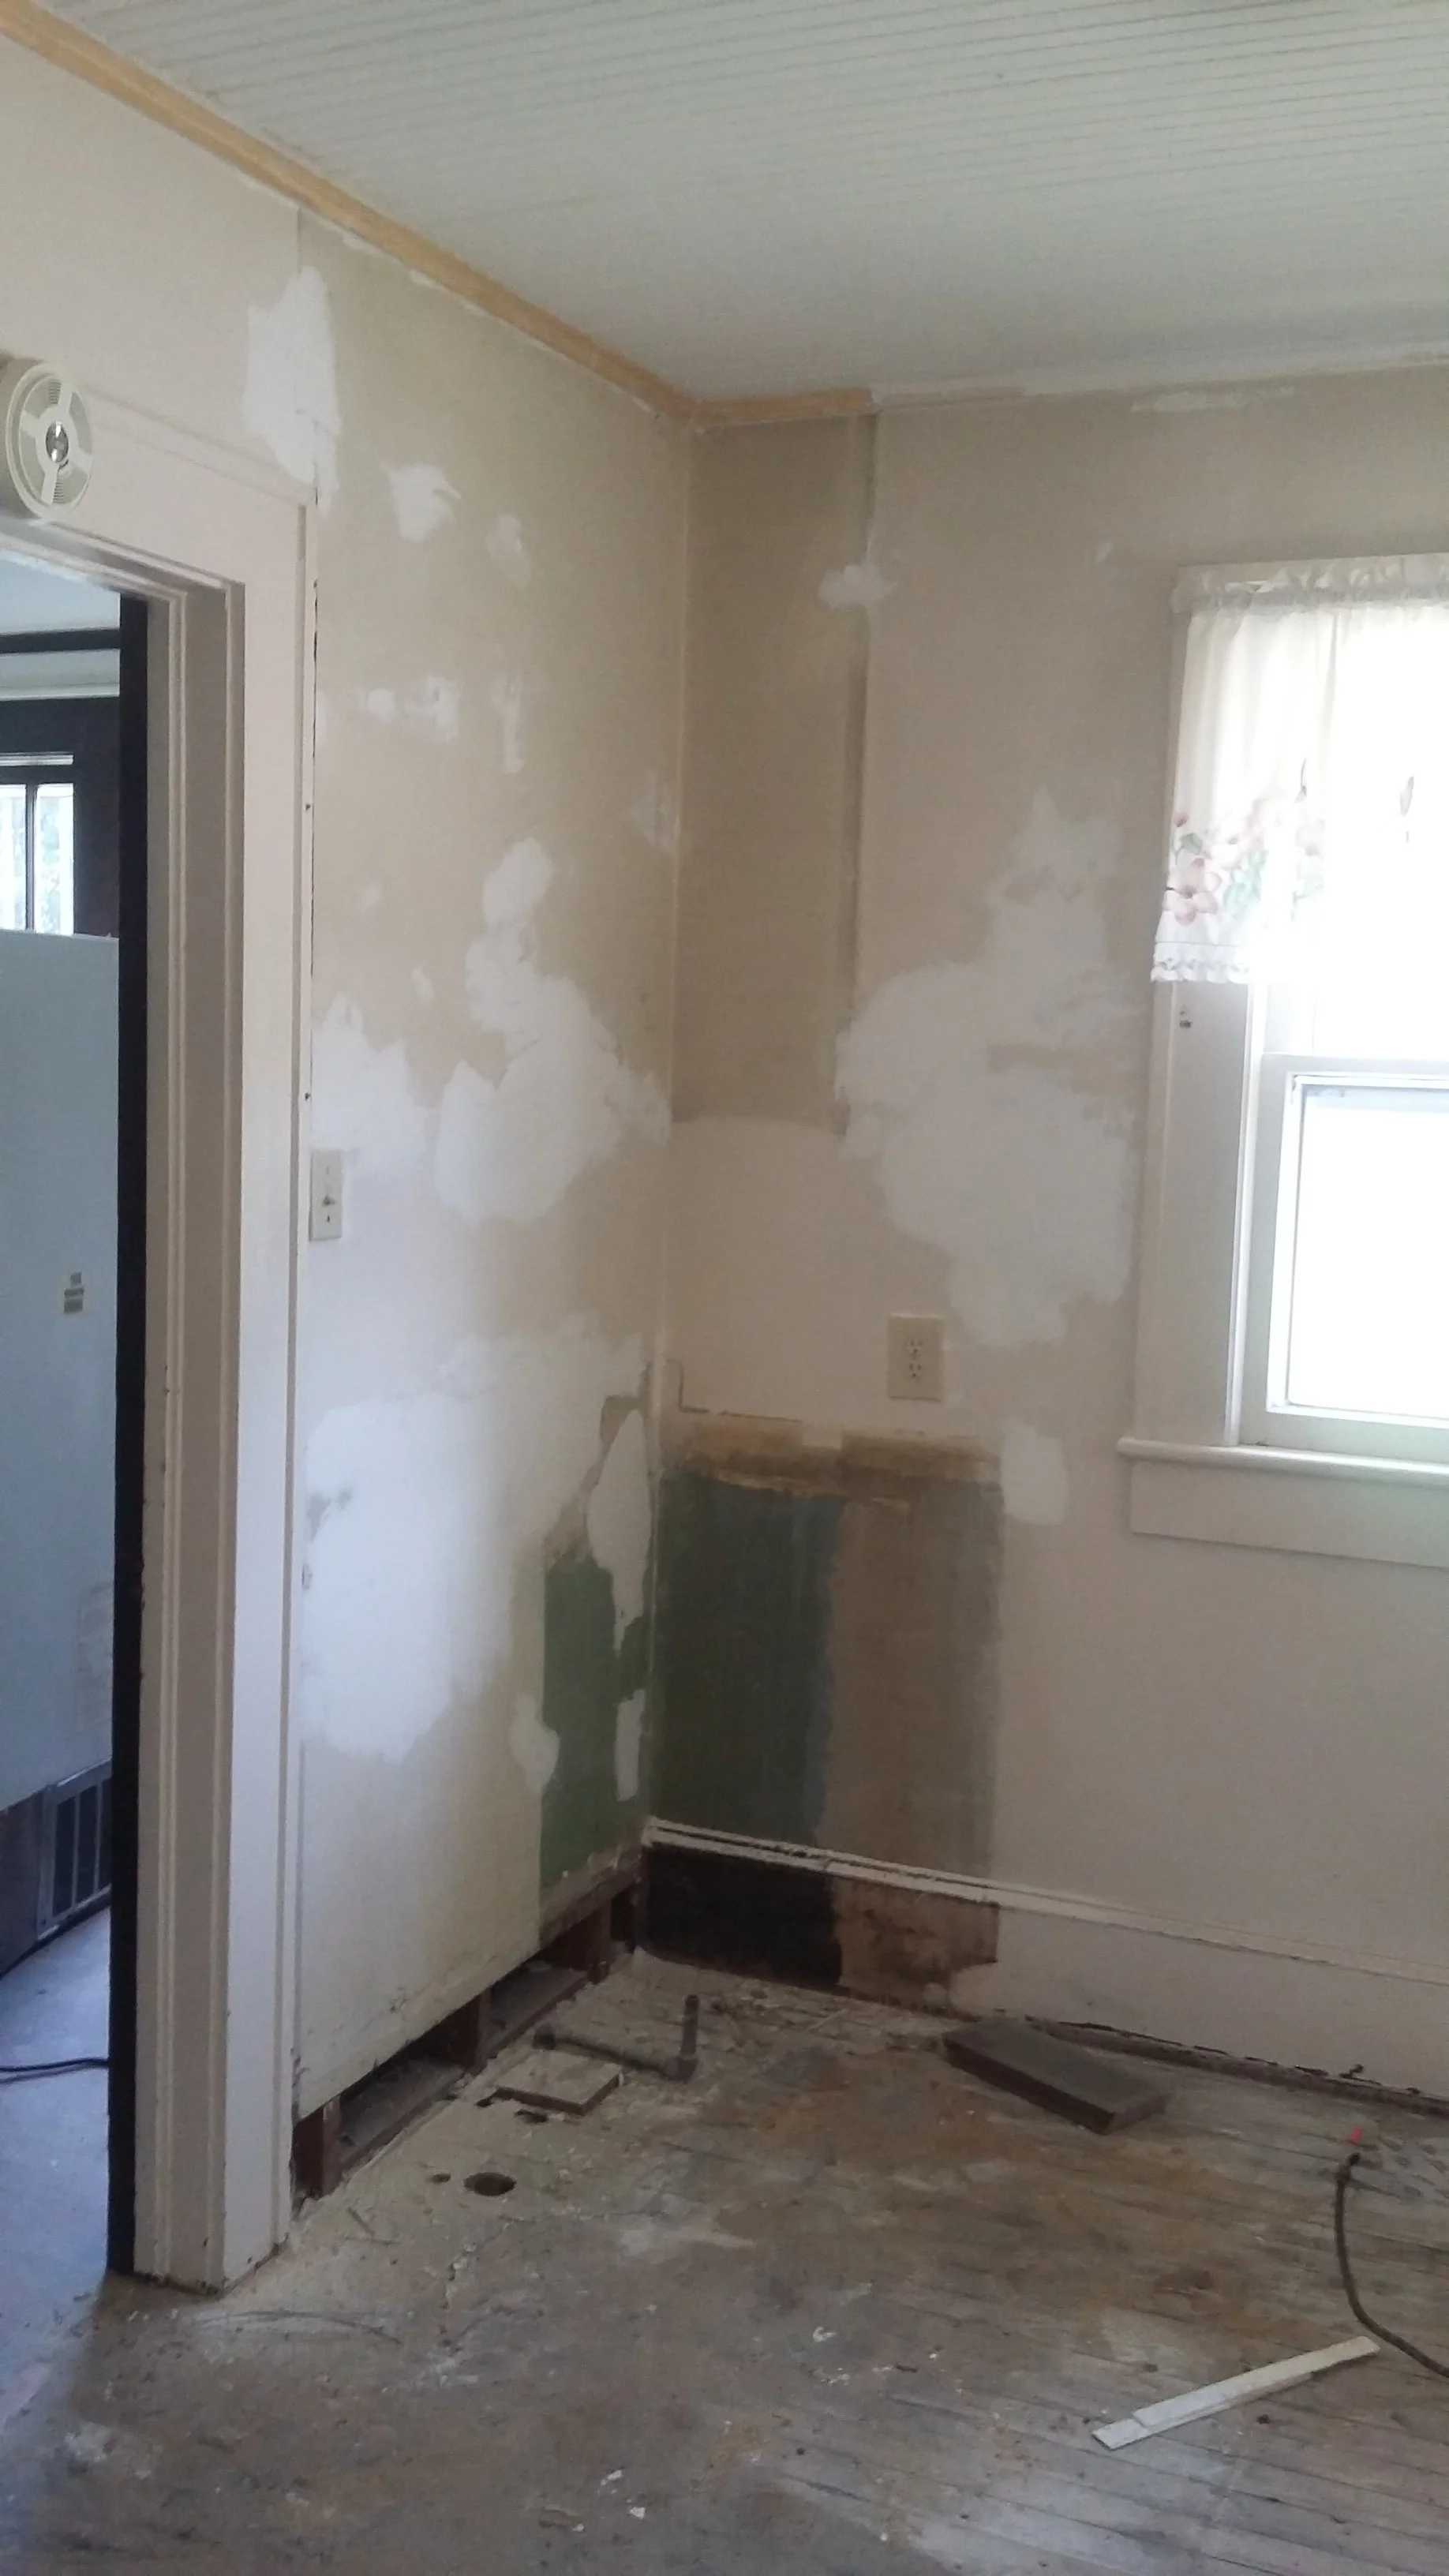
DURING
This was by far the dirtiest room in the whole house once demo was finished. I swear, Brian wasn't the only one working, even though these photos show otherwise...

COST BREAKDOWN
Refinished Floors - $250 (approximately)
Crown Molding - $25
Baseboard - $0
Cabinets (includes fridge cabinet + crown) - $1290
Appliances - $1660
Countertops - $270
Backsplash - $160
Sink + faucet - $0
Hardware - $0 (generously supplied by DLawless Hardware)
Ceiling light - $50
Paint - $60
Reclaimed wood shelves - $40
Chimney Repair - $62
Cup rack - $50
TOTAL = $3,917*
*does not include plumbing electrical or HVAC costs
SOURCES
PAINT/STAIN
Walls - Sherwin Williams Silver Strand
Floors - Minwax Provincial on Pine
DECOR/FINISHES
Cabinets - White Arcadia Line
Fridge Cabinet - Duramine Panels
Shelf Brackets - Black Brackets
Backsplash - 3 x 12 Glass Subway Tile
Countertop - Formica Carrara Bianco
Hardware - Knob, Latch, Pull