Inexpensive Faux Tin Backsplash

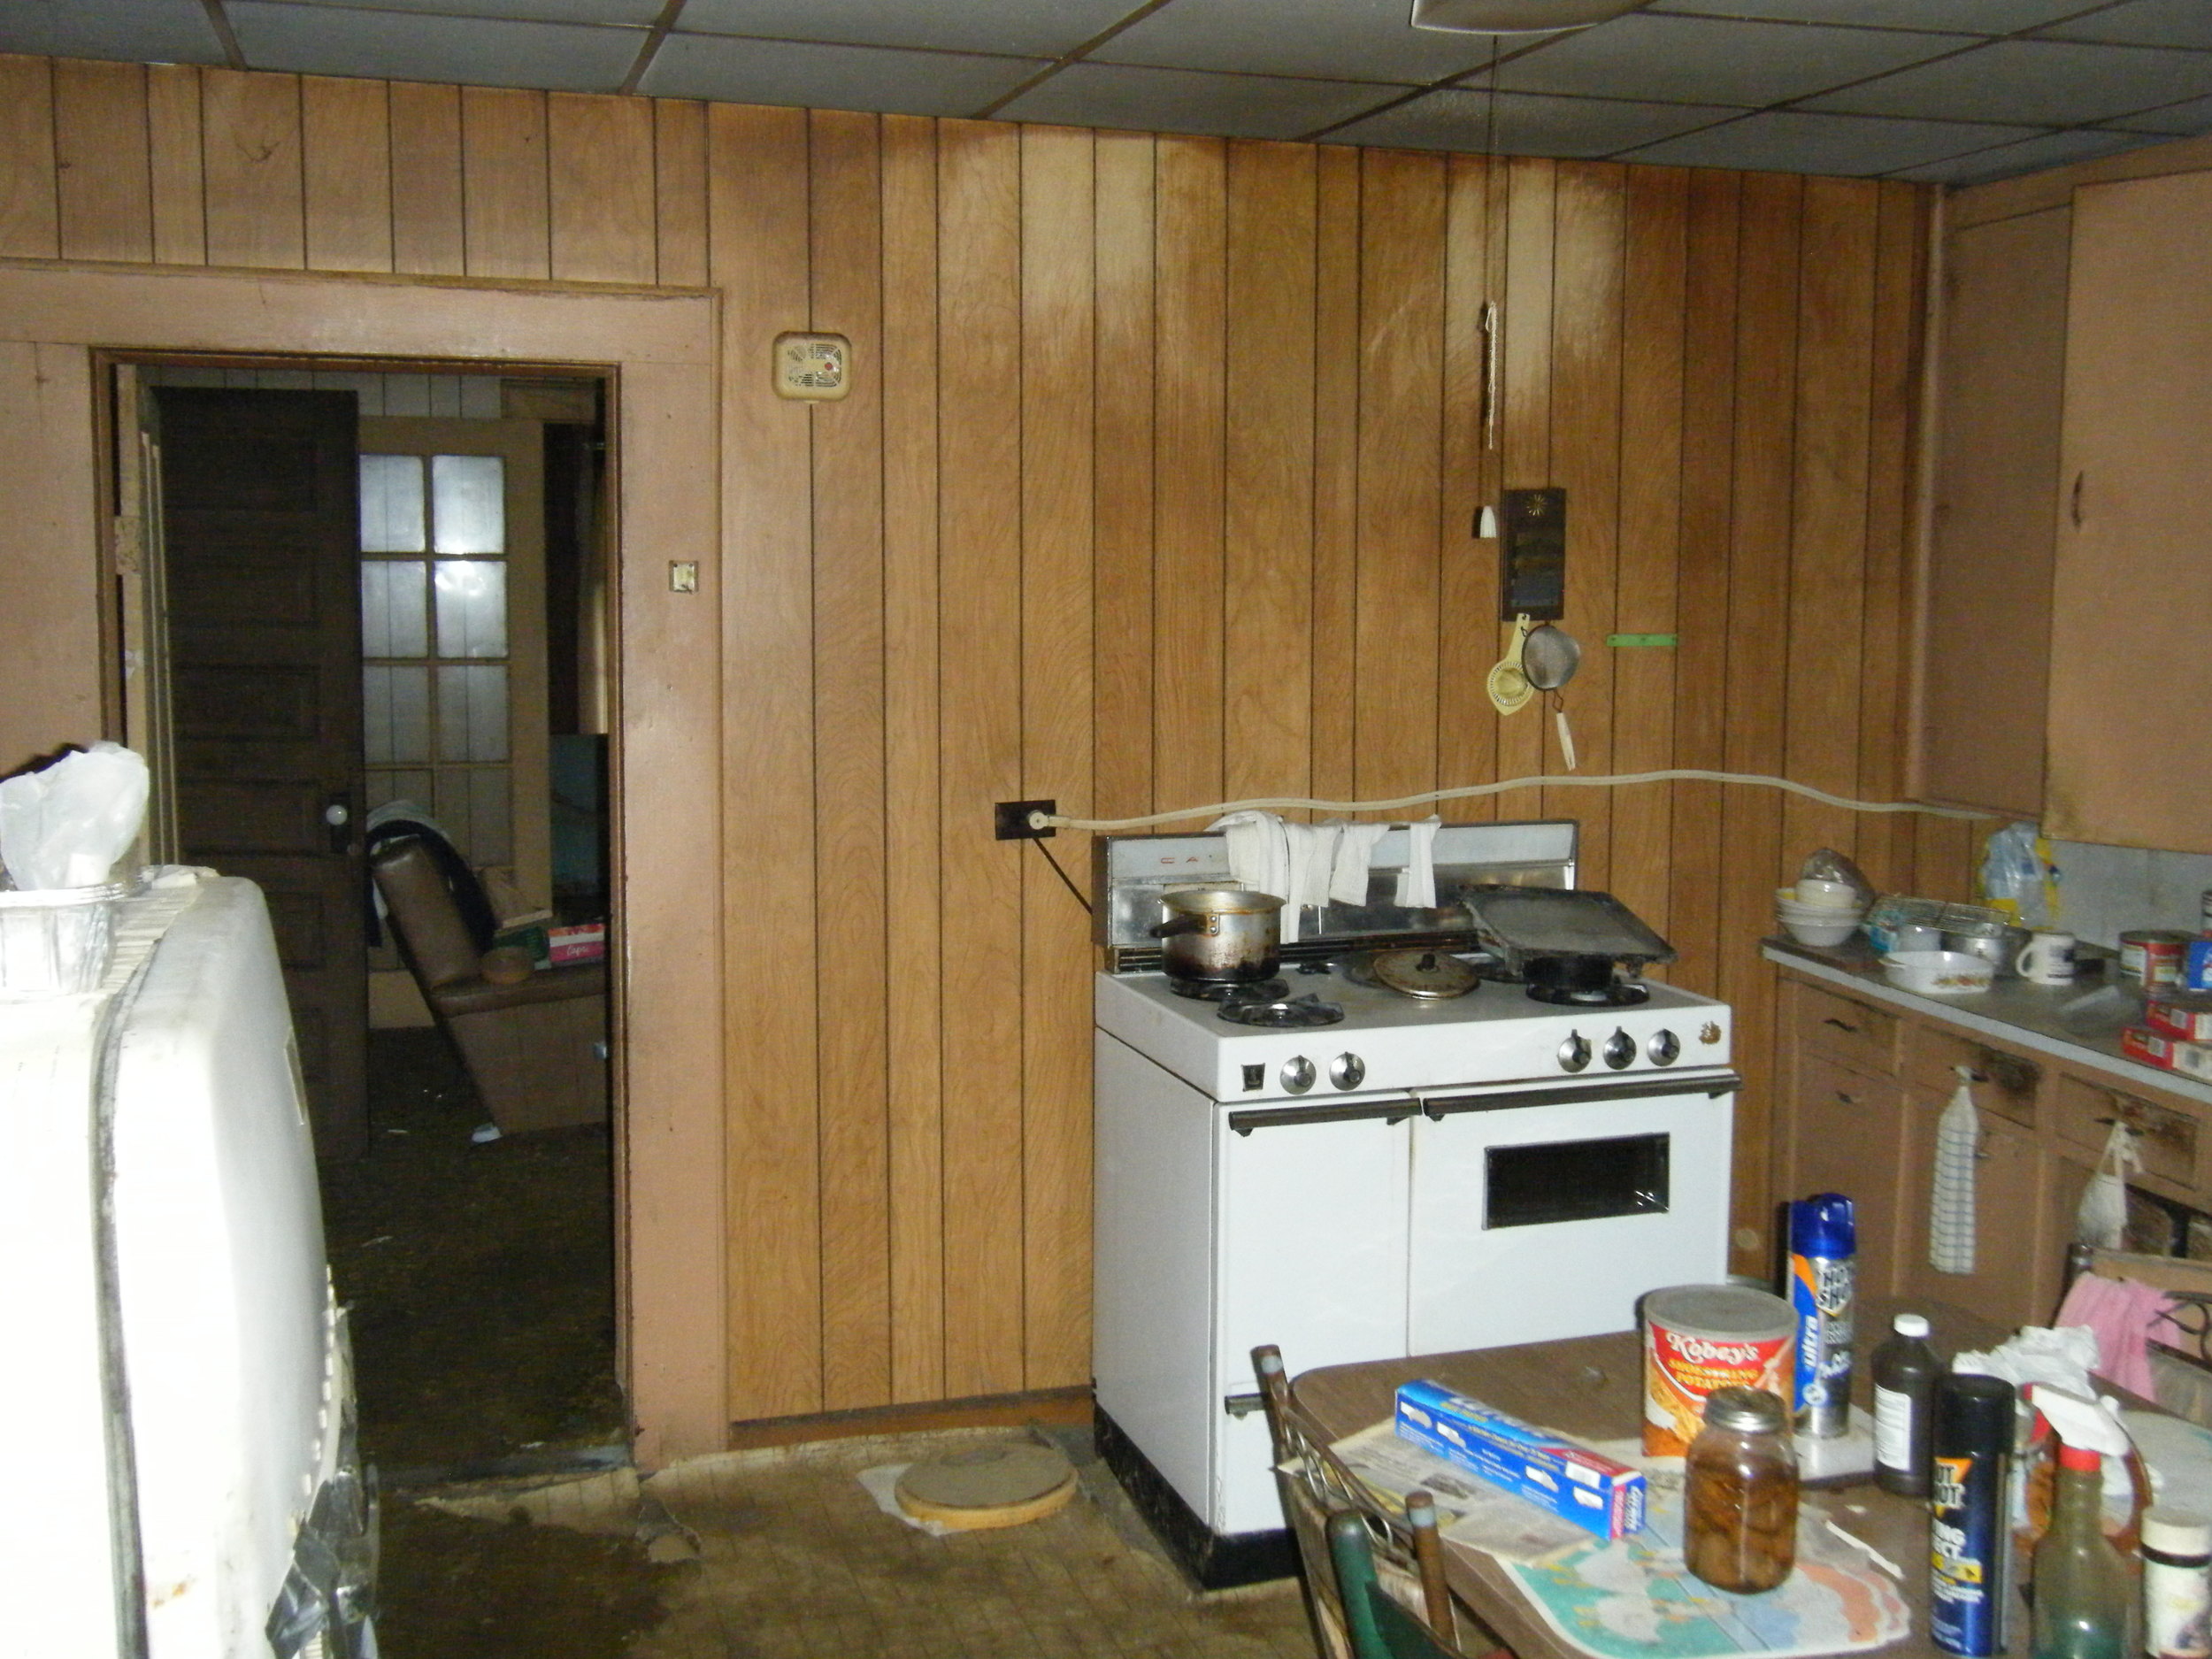
I was organizing photos in my computer recently (something I oddly enjoy very much) and came across a photo of our little Brooklyn Street Kitchen cabinets pre-makeover. I realized what a difference the backsplash really made! Here is the before:

Elizabeth Burns Design | Brooklyn House Faux Tin Backsplash Budget Kitchen Makeover

And the after:

Elizabeth Burns Design | Brooklyn House Faux Tin Backsplash Budget Kitchen Makeover

While I find the mint green appliances charming, some people might not agree with me, and I think the tin backsplash allows the dated fixtures to blend in more. It also adds some character to the kitchen; it looks like it could have been in the house years and years ago.

Elizabeth Burns Design | Brooklyn House Faux Tin Backsplash Budget Kitchen Makeover

Installing the backsplash was a snap. It comes in sheets that you simply cut with a razor, then put in place with a very strong adhesive tape. There is also a matching trim you can buy to make the backsplash seamless with the countertop and under the cabinets. Here is the installation in action.

Elizabeth Burns Design | Brooklyn House Faux Tin Backsplash Budget Kitchen Makeover

We had the sheets up for about a year and a half before we moved out, and it held up very well. I was a little nervous with having it so close to the burner, but it was no problem at all.

Elizabeth Burns Design | Brooklyn House Faux Tin Backsplash Budget Kitchen Makeover

What is your favorite go-to backsplash material? Ever tried something similar to these panels?

Kitchen Finishes | Rental Properties

I apologize for the impromptu blog hiatus! Our personal life was thrown a curveball, and I have been pre-occupied with some of those things. However, I am excited to share this post with you lovely people today! One role Brian and I have found ourselves in lately is that of Landlord, which is both exciting and daunting. On one hand, it is one step further towards creating future retirement income for us. On the other hand, we are responsible for maintaining the shelter for other human beings. This means that if something unexpectedly breaks, it is on us to fix it, no matter what. Sometimes these repairs can be pricey (such as plumbing problems or replacing an A/C unit), so I think it is important to be proactive and prepare your rental home as much as possible for the wear and tear of renters. In most cases, I think renters are respectful and take care of the space they are renting, but there are a select few out there who don't seem to care about getting their deposits back...

The Sea Spray Condo gets a lot of turnover being a seasonal, weekly rental property. In addition, it is on the beach, which means vacationers dragging in lots of moisture and abrasions. We needed some durable finishes for this place, so when helping my parents update, I did a lot of research. I think the perfect rental property is a combination of pretty and durable, especially rentals at a lower price point. You want the design to be inviting in order to entice potential renters to showings, but at the same time, it HAS to be durable. Otherwise, you will spend thousands of dollars each time a renter moves out making repairs. Not fun, and definitely not profitable.

Below are some basic finishes that I think are right on trend, affordable, as well as durable to keep both you and your renter happy!

Elizabeth Burns Design | Rental Property Finishes- income property, real estate investment, house flipping, shaker cabinets, grey wood floors

Cabinets // Kitchen Faucet // Flooring // Sink // Refrigerator // Chandelier // Countertop // Knob // Pull

  • FLOORING: It gets a bad rap, but I have to confess, it is hard to beat vinyl sheet flooring. This product has come leaps and bounds from the days of mustard yellow vinyl flooring. They now have vinyl that looks like marble hex tile, and actual planks that look, feel, and install just like hardwood. Tile is durable and looks great, but the grout inevitably gets dingy, and if a tile cracks, it is difficult to repair. Plus, the upfront cost is pretty hefty. If you need new flooring for a kitchen or bathroom, please consider this super durable option.
  • CABINETS: Everyone loves solid hardwood cabinets, and depending on your location, they may make sense in a rental. In general, I think a cheaper, white cabinet is the way to go. The one pictured above is a trendy Shaker style, which buyers will appreciate, but it is also a laminated cabinet and super easy to clean. Since they are so inexpensive, it would be easy to swap out one cabinet for a new one were it go get dinged.
  • COUNTERS: Granite is great, and marble is even better in my book, but both of these items still require at least yearly maintenance, which can be tricky to take care of when a renter is in the home. If your property rents for $1200 or more, I might splurge for granite, as most renters probably expect it. PLEASE, do not use marble. I am just as obsessed with marble as the next gal, but one red wine ring on unsealed marble and game over. On the Myrtle House counters, we are using this lovely laminate that has the look of Soapstone. It is super cheap, easy to install, and practically indestructible. We once accidentally set my parents' laminate counters on fire (true story) and it didn't even leave a mark. Hard to beat that. Plus, it is virtually maintenance-free.
  • FIXTURES: One thing not to skimp on, in my opinion, are plumbing fixtures. Water can cause so much damage to your home if not fixed immediately, so investing in quality faucets, shower heads, and toilets is worth it in the long run. If you have a leak in a shower, it can cause wood rot and mold behind the tile, which is a costly repair. I would also recommend going with a matte finish on the fixtures to hide fingerprints and signs of use.
  • LIGHTING: I think lighting is definitely a fairly inexpensive way to upgrade your rental and impress tenants, but I would make sure the lighting fixtures are durable. I would not, for example, install your Grandmother's heirloom crystal chandelier in a rental. Sooner or later, it will probably be damaged or (heaven forbid) could be stolen. The chandelier above looks expensive, but is actually made of acrylic, so it is less likely to chip or break.
  • APPLIANCES: While it seems that just above everyone wants stainless appliances, I am not on board with having them in a rental. They scratch and are kind of high-maintenance to keep that shiny finish sparkling. Also, in all honesty, I am kind of over the stainless craze. Why not try something new? Black appliances are sleek, modern, and will show wear and tear much better than stainless or white appliances.
  • HARDWARE: This probably isn't too important, but I always try to select a satin finish on hardware. I don't want anything too shiny that would show fingerprints. I do look for something that has a slightly distressed/antiqued finish to disguise any imperfections the hardware will get while the tenant is in place.
  • SINKS: My first pick for a kitchen sink would be a sprawling farmhouse sink, but at $1000 a pop, it might not be a good option for a rental property. Porcelain and ceramic sinks can also chip and stain. A budget-friendly option is to go with a quality stainless sink.

I hope this is helpful! Any other fellow landlords have any other suggestions? I would love to hear them!

Ā 

Painting | Myrtle House

We were finally able to add a little color to the Myrtle House last weekend. It is finally starting to look like a livable house! With the help of awesome friends (one who also happens to be our contractor) we were able to get the whole house primed and half the house painted in one weekend. Not bad progress! I listed the paint colors here, and so far, I am so happy with our choices. The colors dried almost exactly as I had hoped. I often forget how far we have come, and when I see photos like the ones below, sometimes I wonder "what were we thinking?". We are definitely getting to the point where we can finally see some progress, and for that, I am so grateful. Here are a few before and afters. :)

Below is what used to be the kitchen, which will now be the master bedroom. We moved the doorway to another location, and removed the paneling & dropped ceiling to expose the original beadboard ceilings.

Elizabeth Burns Design | House Flipping

Here is a spare room that is now a guest bedroom. The doorway was moved over slightly to accommodate the en suite bathroom door. We had to remove the beadboard walls due to termite damage, but we salvaged the beadboard ceilings throughout.

Elizabeth Burns Design | House Flipping

Another shot of the master bedroom (painted!!). The one door now leads to the master bathroom which connects to the walk-in closet. The wood stove was removed and we will patch the brick. This room has the prettiest afternoon light and makes the new paint color (Sherwin Williams Magnetic Gray) the most soothing shade of blue.

Elizabeth Burns Design | House Flipping

Even though we had to get rid of the chimney for budget issues, the living room is slowly but surely becoming my favorite room of the house. It has views of the mountains outside of the original windows and is small enough where it feels cozy. Again, in here we removed the wood panelling and the dropped ceiling to take the ceilings back to nine feet high. We used Sherwin Williams Magnetic Gray in this room as well. LOVE this color.

Elizabeth Burns Design | House Flipping

Here is what used to be a storage closet (I think it was part of the back porch at some point) and now it will be the master bathroom. The ceilings in this room were pretty low, so we raised them up as far as we could.

Elizabeth Burns Design | House Flipping

Here is a before and after of the office. This used to be the rather large dining room, but we took about 1/3 of the room to add a closet and full Jack and Jill bathroom that connects to the kitchen.

Elizabeth Burns Design | House Flipping

Lastly, the once bedroom that we made into the dining room that will connect to the kitchen. Starting to get there!

Elizabeth Burns Design | House Flipping

Pantry | Myrtle House

I hate to admit it, but I watch quite a bit of HGTV. Like a lot. Fixer Upper marathon + a glass of wine = heaven. It seems that some house hunting show is usually on during the evenings, and I have picked up on the fact that people searching for a new home love a big 'ol pantry. Honestly, I never quite understood this wishlist item. Maybe it is because we don't have children, or because neither of us really like to cook, so we don't normally have tons of spices and ingredients on hand. Sadly, most of our meals come from the freezer... (don't judge me).

When the Myrtle House budget starting spiraling out of control, Brian and I decided to nix the half bath (who needs 3.5 baths anyways?) and turn that space into a pantry. It was a win-win as it was helpful to our bottom line but also good for resale value. This turned out to be a blessing in disguise because I think I would have hated having four toilets to clean. Two toilets per household member is a little much, I suppose.

While I am no extreme coupon-er needing a stock pile room or doomsday prepper needing a place to stash my years worth of supplies, I was excited about putting one thing in this newly designed pantry: a coffee bar. Yep, basically a separate room for making coffee. It makes sense, I promise. Coffee is something I make almost every day, so it would be a whole lot easier just to leave this small appliance out all of the time. However, I.hate.small.appliances.on.the.counter, especially coffee pots since they are usually pretty ugly, take up a lot of room, and always leave a dirty mess. First world problems, I know.

The space itself is odd as it is basically an angled closet. Here it is before reno (the little door):

Elizabeth Burns Design

And here is a straight on shot after the new door has been framed.

Elizabeth Burns Design

The location is great since it is right off of the kitchen. My plan is to put a sliding re-claimed glass/wood door up instead of a traditional door and then layout some shelves like below.

Elizabeth Burns Design

Yes, those are sconces. The wiring was already there from the room's previous life plan as a bathroom and I had already bought the fixtures, so the sconces stay. I am pretty sure everyone who is working on the house thinks my plan is completely nuts, but hey, it wouldn't be the first. I think it is going to look super cool to be able to peek through the glass door at this pantry. Kind of like this!

Final Paint Colors | Myrtle House

As with all things with this house renovation, the paint colors have changed since I originally posted my ideas last spring. While still very much in the same color families, the final paint colors are more neutral and less pastel-y. How do I know for sure that they are final, you might wonder? Because we bought all of the paint. All 15 gallons of it. We are quite literally pot-committed. :)

All Closed Up | Myrtle House

It had been three months since our last trip to the Myrtle House when we went this weekend. We had purposefully kept away since the progress was slow and there wasn't really a need for us to get in the crew's way. This past trip, however, was vital since this was the last time we will be there before the drywall is up. (!!!) Our contractor has been in overdrive; we recently got the fallen chimney replaced with new siding, all of the original windows repaired, and insulation halfway done. Plus, we passed inspections which is a huge relief all around. It is really starting to take shape and even has that "new house smell" which is a heck of a lot better than the dead possum smell that lingered before...

It is fitting timing as this last visit was exactly one year and two weeks from the first day Brian and I started working on the house. Geez, what a journey it has been, but I literally cannot wait to go back in three weeks when the walls are dry-walled and the original bead-board ceiling painted a clean white. The only clean thing this house has seen in a while. ;) Here is the ceiling in the kitchen patched with salvaged bead-board and ready for paint.

Elizabeth Burns Design | Myrtle House

(You can also see the recessed cans wired! I am super excited for the lighting in this kitchen.) For the ceiling, doors, and trim, we decided to use Benjamin Moore Chantilly Lace. It is an almost pure white (not yellow-ish) but just a tad softer than a bight white.

If you'll remember, this fireplace had fallen during a storm many years ago. As much as we wanted to fix it, the price tag was upwards of $4,000 and just didn't make sense financially (especially with there being two other fireplaces in the house). So, down it went, and we replaced it with siding. Eventually we will replace all of the siding to match, but here is the before and after of the fireplace wall.

Elizabeth Burns Design | Myrtle House

Another big difference is that the windows are all repaired! No more cats climbing in to leave us presents or bees harassing us in the summer while working. The struggle is real. Here is a closeup of the new glazing. Our contractor said the wood is still in really good shape, so that was reassurance we made the right call by fixing them.

Elizabeth Burns Design | Myrtle House

Speaking of windows, we also managed to fit these old monsters in my tiny Toyota to replace the ones in the kitchen. Brian and I drove three hours round trip for the deal of the century on Craigslist and ended up chatting with the seller (a former vintage store owner) for a solid twenty minutes. Those are the kinds of Craigslist adventures I love. :)

Elizabeth Burns Design | Myrtle House

These windows shown below were the only ones left in the house that were not made out of wood and I knew they would bother me if we had left them. The 1970's metal storm windows did nothing to add charm to this house, so they had to go. I can't wait to have three big panes of glass above the kitchen sink!

Elizabeth Burns Design | Myrtle House

I can't wait to share more. The posts from here on out should hopefully start to get a lot more interesting!