Subway Tile | Myrtle House

We just got back from tiling the master bath at the Myrtle House (doesn't everyone spend their three-day weekends doing things like this?) and I wanted to give a quick recap. Since there are so many great tutorials on how to tile (like this post), I won't bore you with the nitty gritty details, but here are a few takeaway points from our experience.

I thought, rather naively, that tiling would be a pretty simple job. We weren't doing a crazy pattern and just had to install a tub surround with basic subway tile. You see people tiling on HGTV and it is usually depicted as a quick, last-minute thing (I'm looking at you, Joanna Gaines). Do not be deceived, tiling is actually quite time-consuming. In all honesty, it is not that difficult once you get the hang of it, but it took two of us 30 straight hours to just LAY the tile. Grout and sealer are still coming.

Elizabeth Burns Design | Installing Tile, Subway Tile DIY

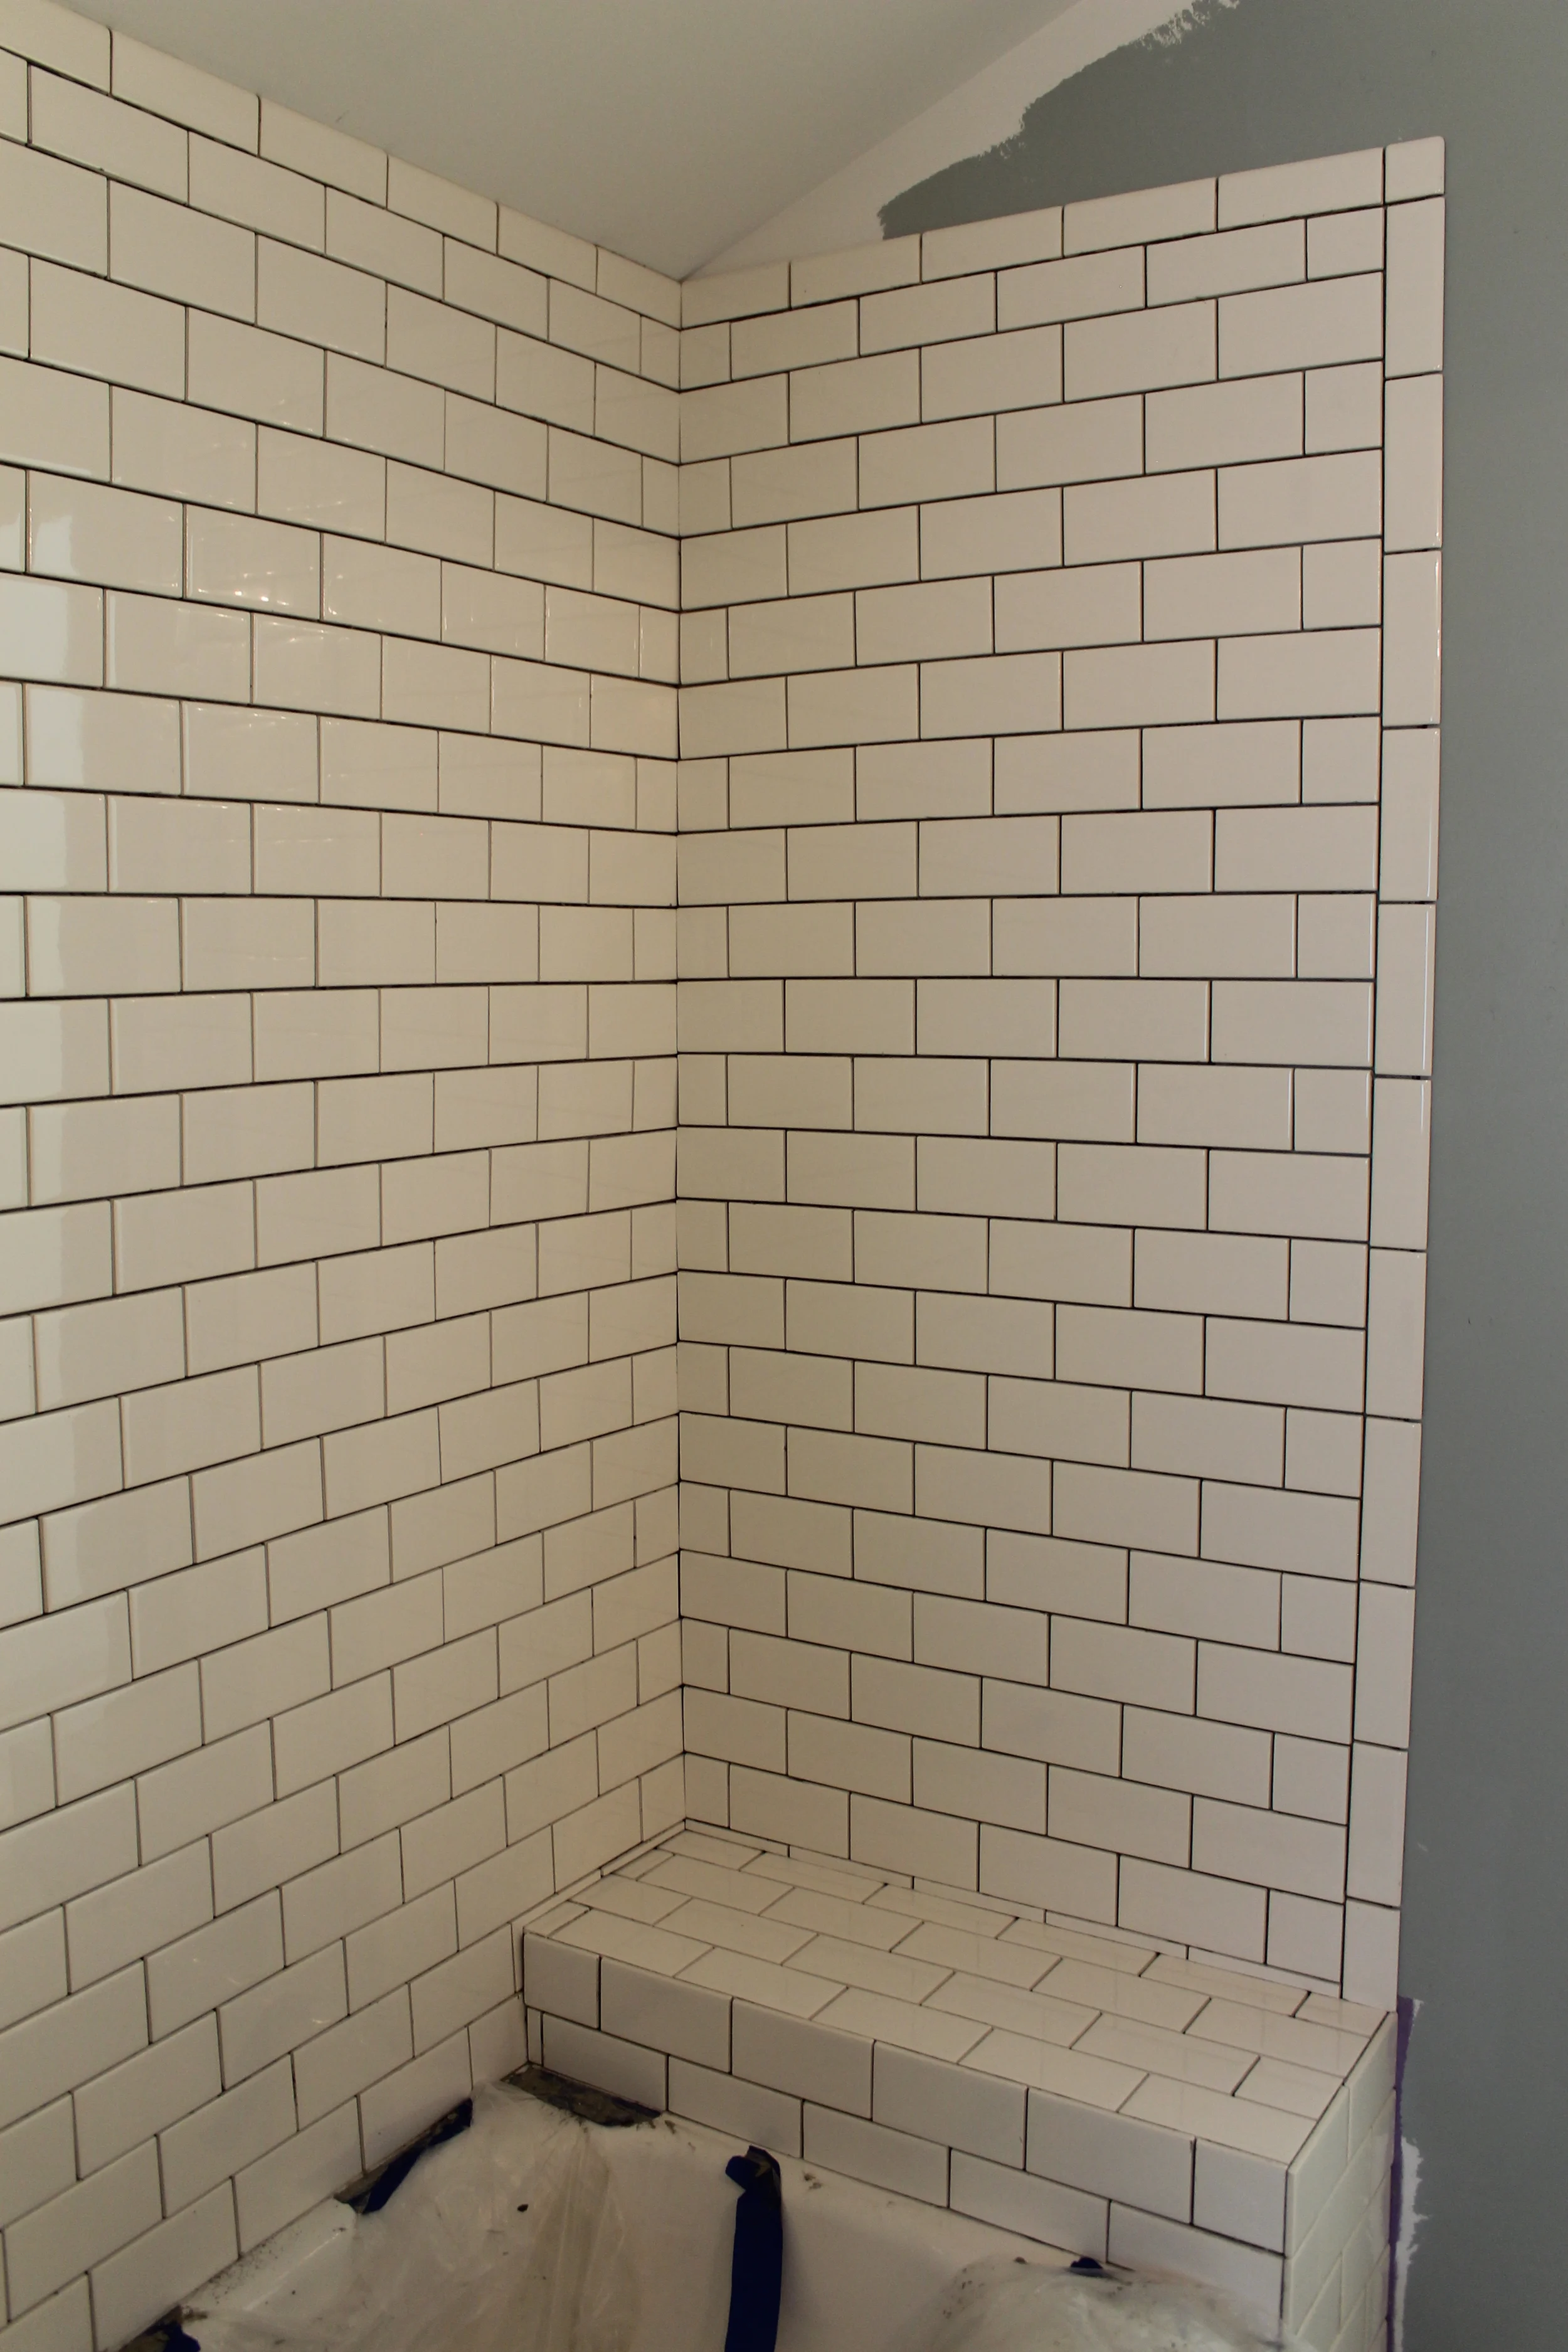
Is it perfect? Heck no. You will see our crooked lines and large gaps. But since we were first-timers, I think we did okay.

You can't extend the longevity of mortar by adding water

In theory this makes sense, but if you try to add water to drying mortar, it will loose it's adhesion. Just save yourself the headache of re-doing tiles (like we had to) and mix a fresh batch. Better safe than sorry.

Plan out the pattern in detail before tiling

You know the phrase "measure twice, cut once"? This theory is totally appropriate for tiling, but I think tiling is more of a puzzle. You have to figure out how the pattern will look on both ends (you don't want to end up with a tiny sliver of tile). Really take your time to plan before getting started.

Buy the wet saw instead of the sliding tile cutter

We went with the cheap little cutter, and it was terrible. The cut edges were jagged and it looked like I had tried to break it with my hands. Luckily, our contractor had let us borrow his wet saw as a back-up and thank goodness he did. The wet saw made such clean lines. We are going to cowboy up and buy the wet saw for our other tiling projects down the road.

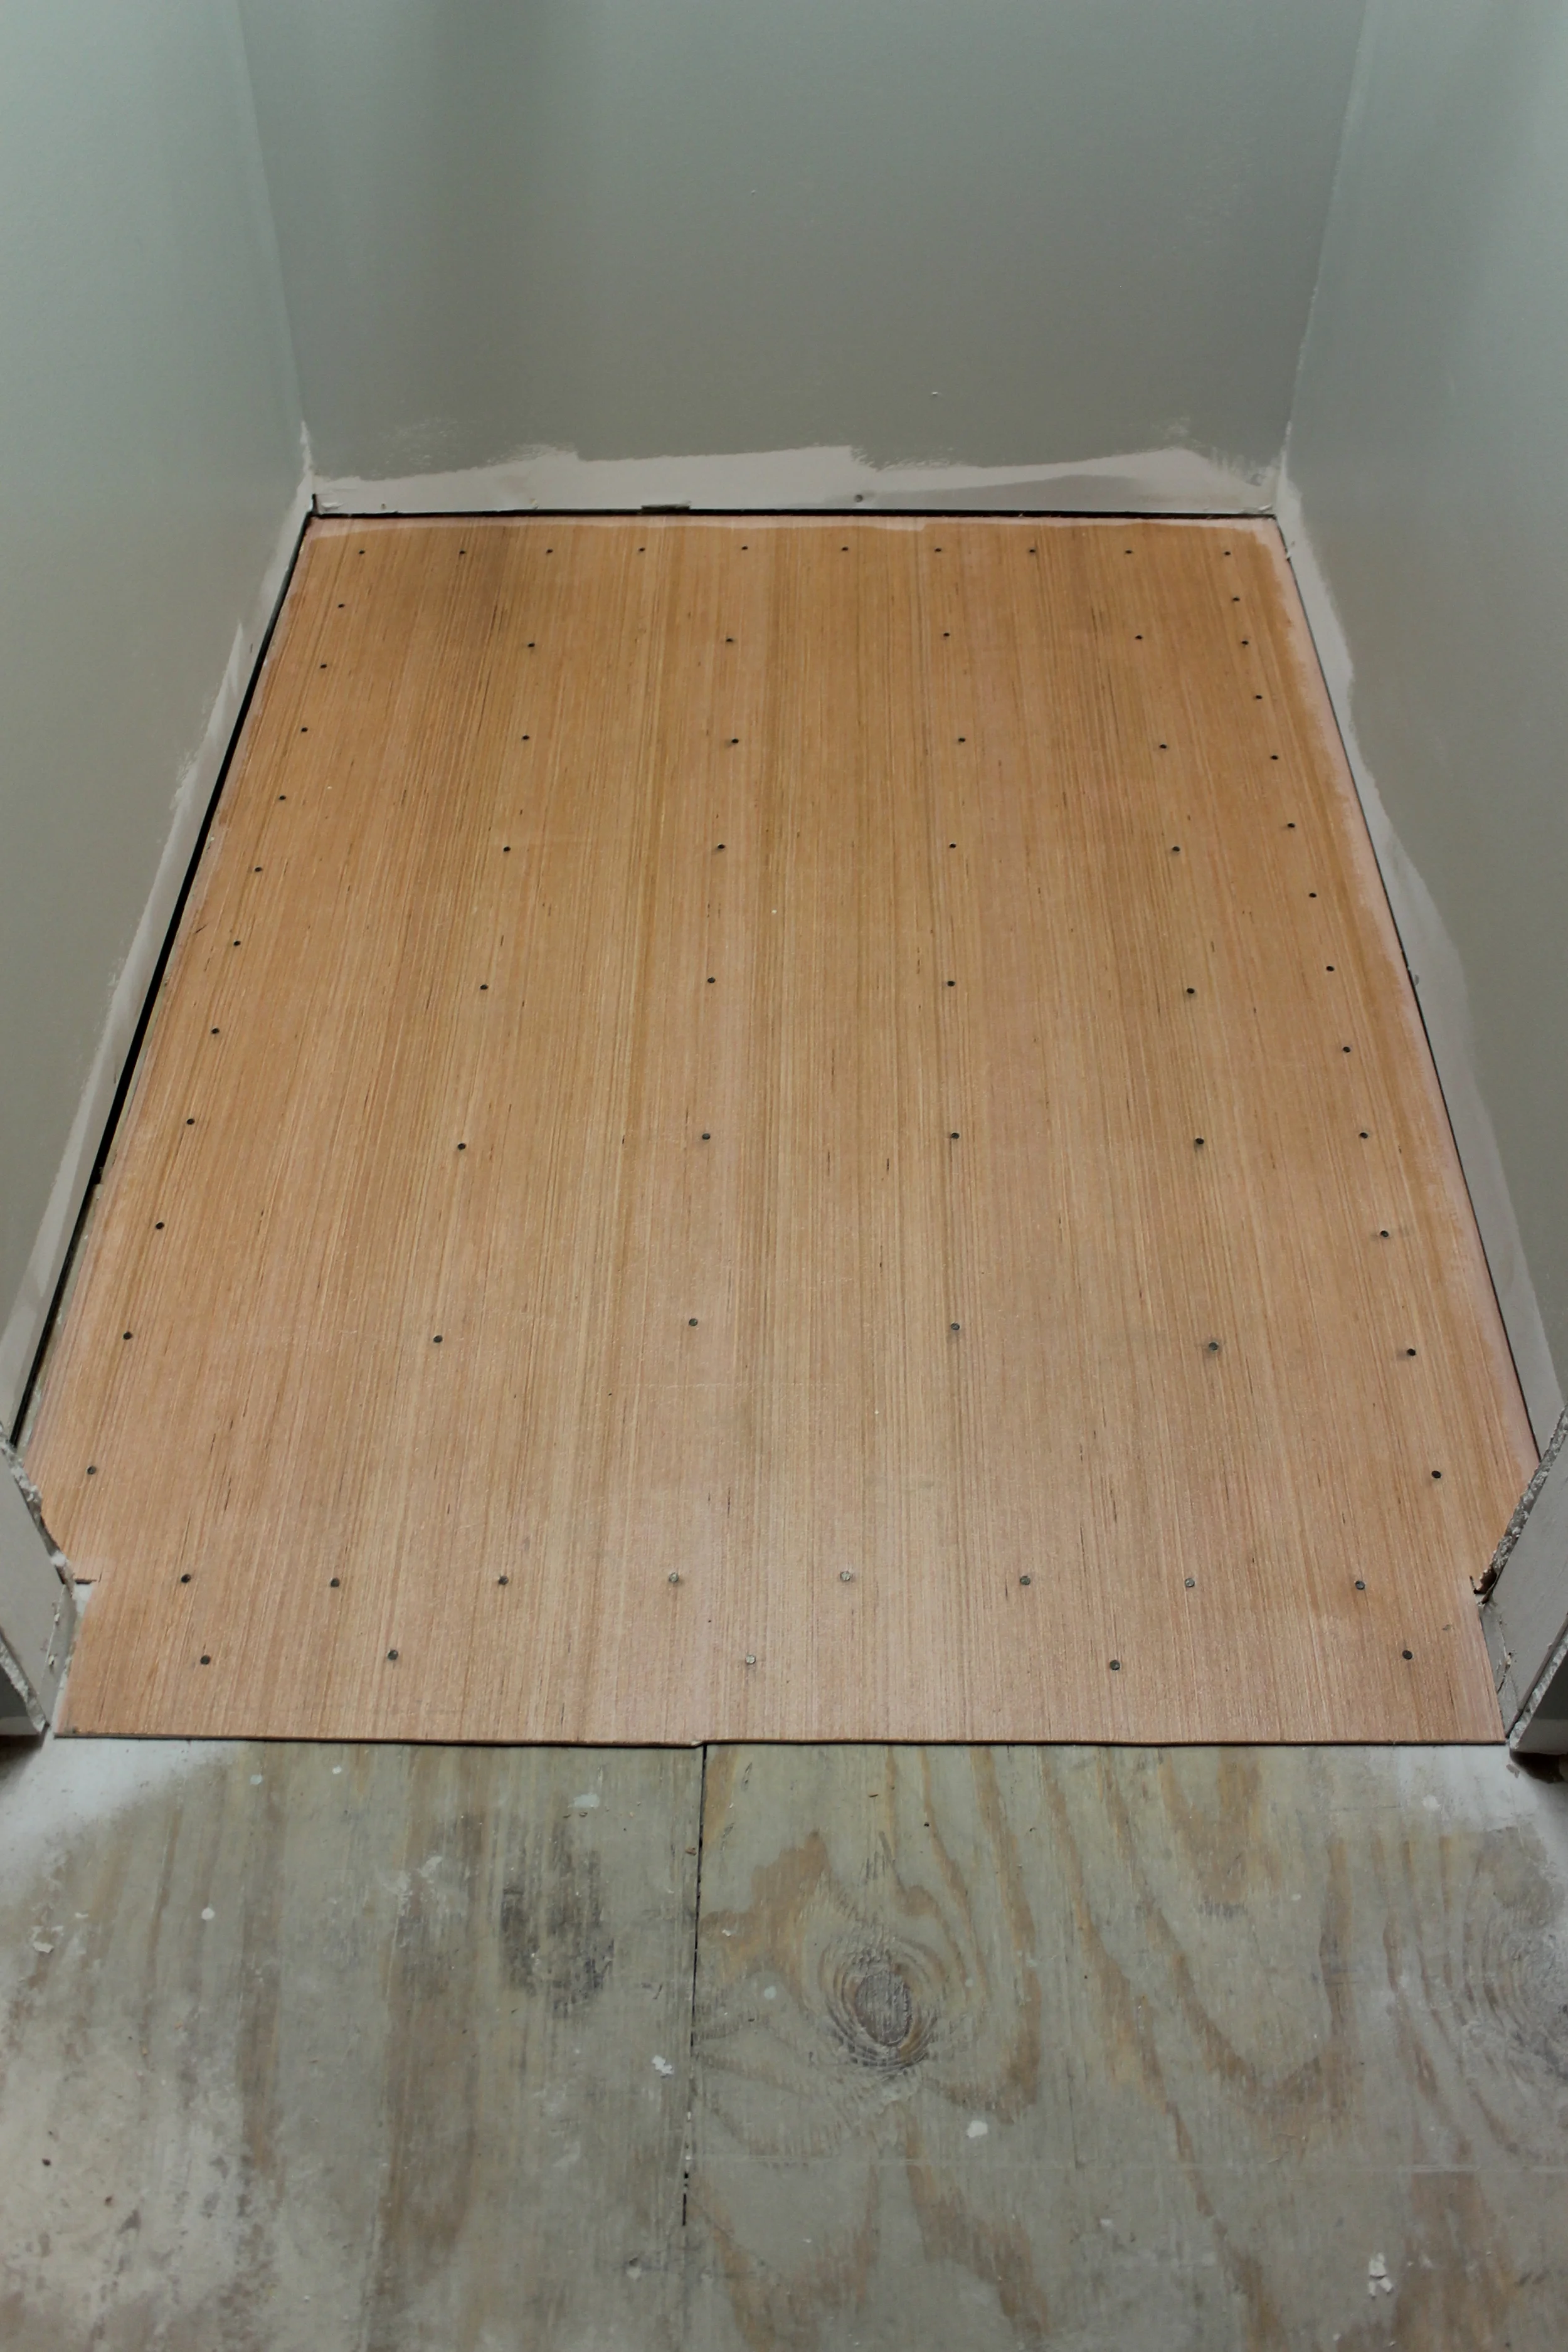
Make sure cement board screws are flat and flush with the board

If you are working with cement board, make sure the surface is completely flat. If you have a screw that isn't flush, make sure to screw it in or else the tile will slightly jut out.

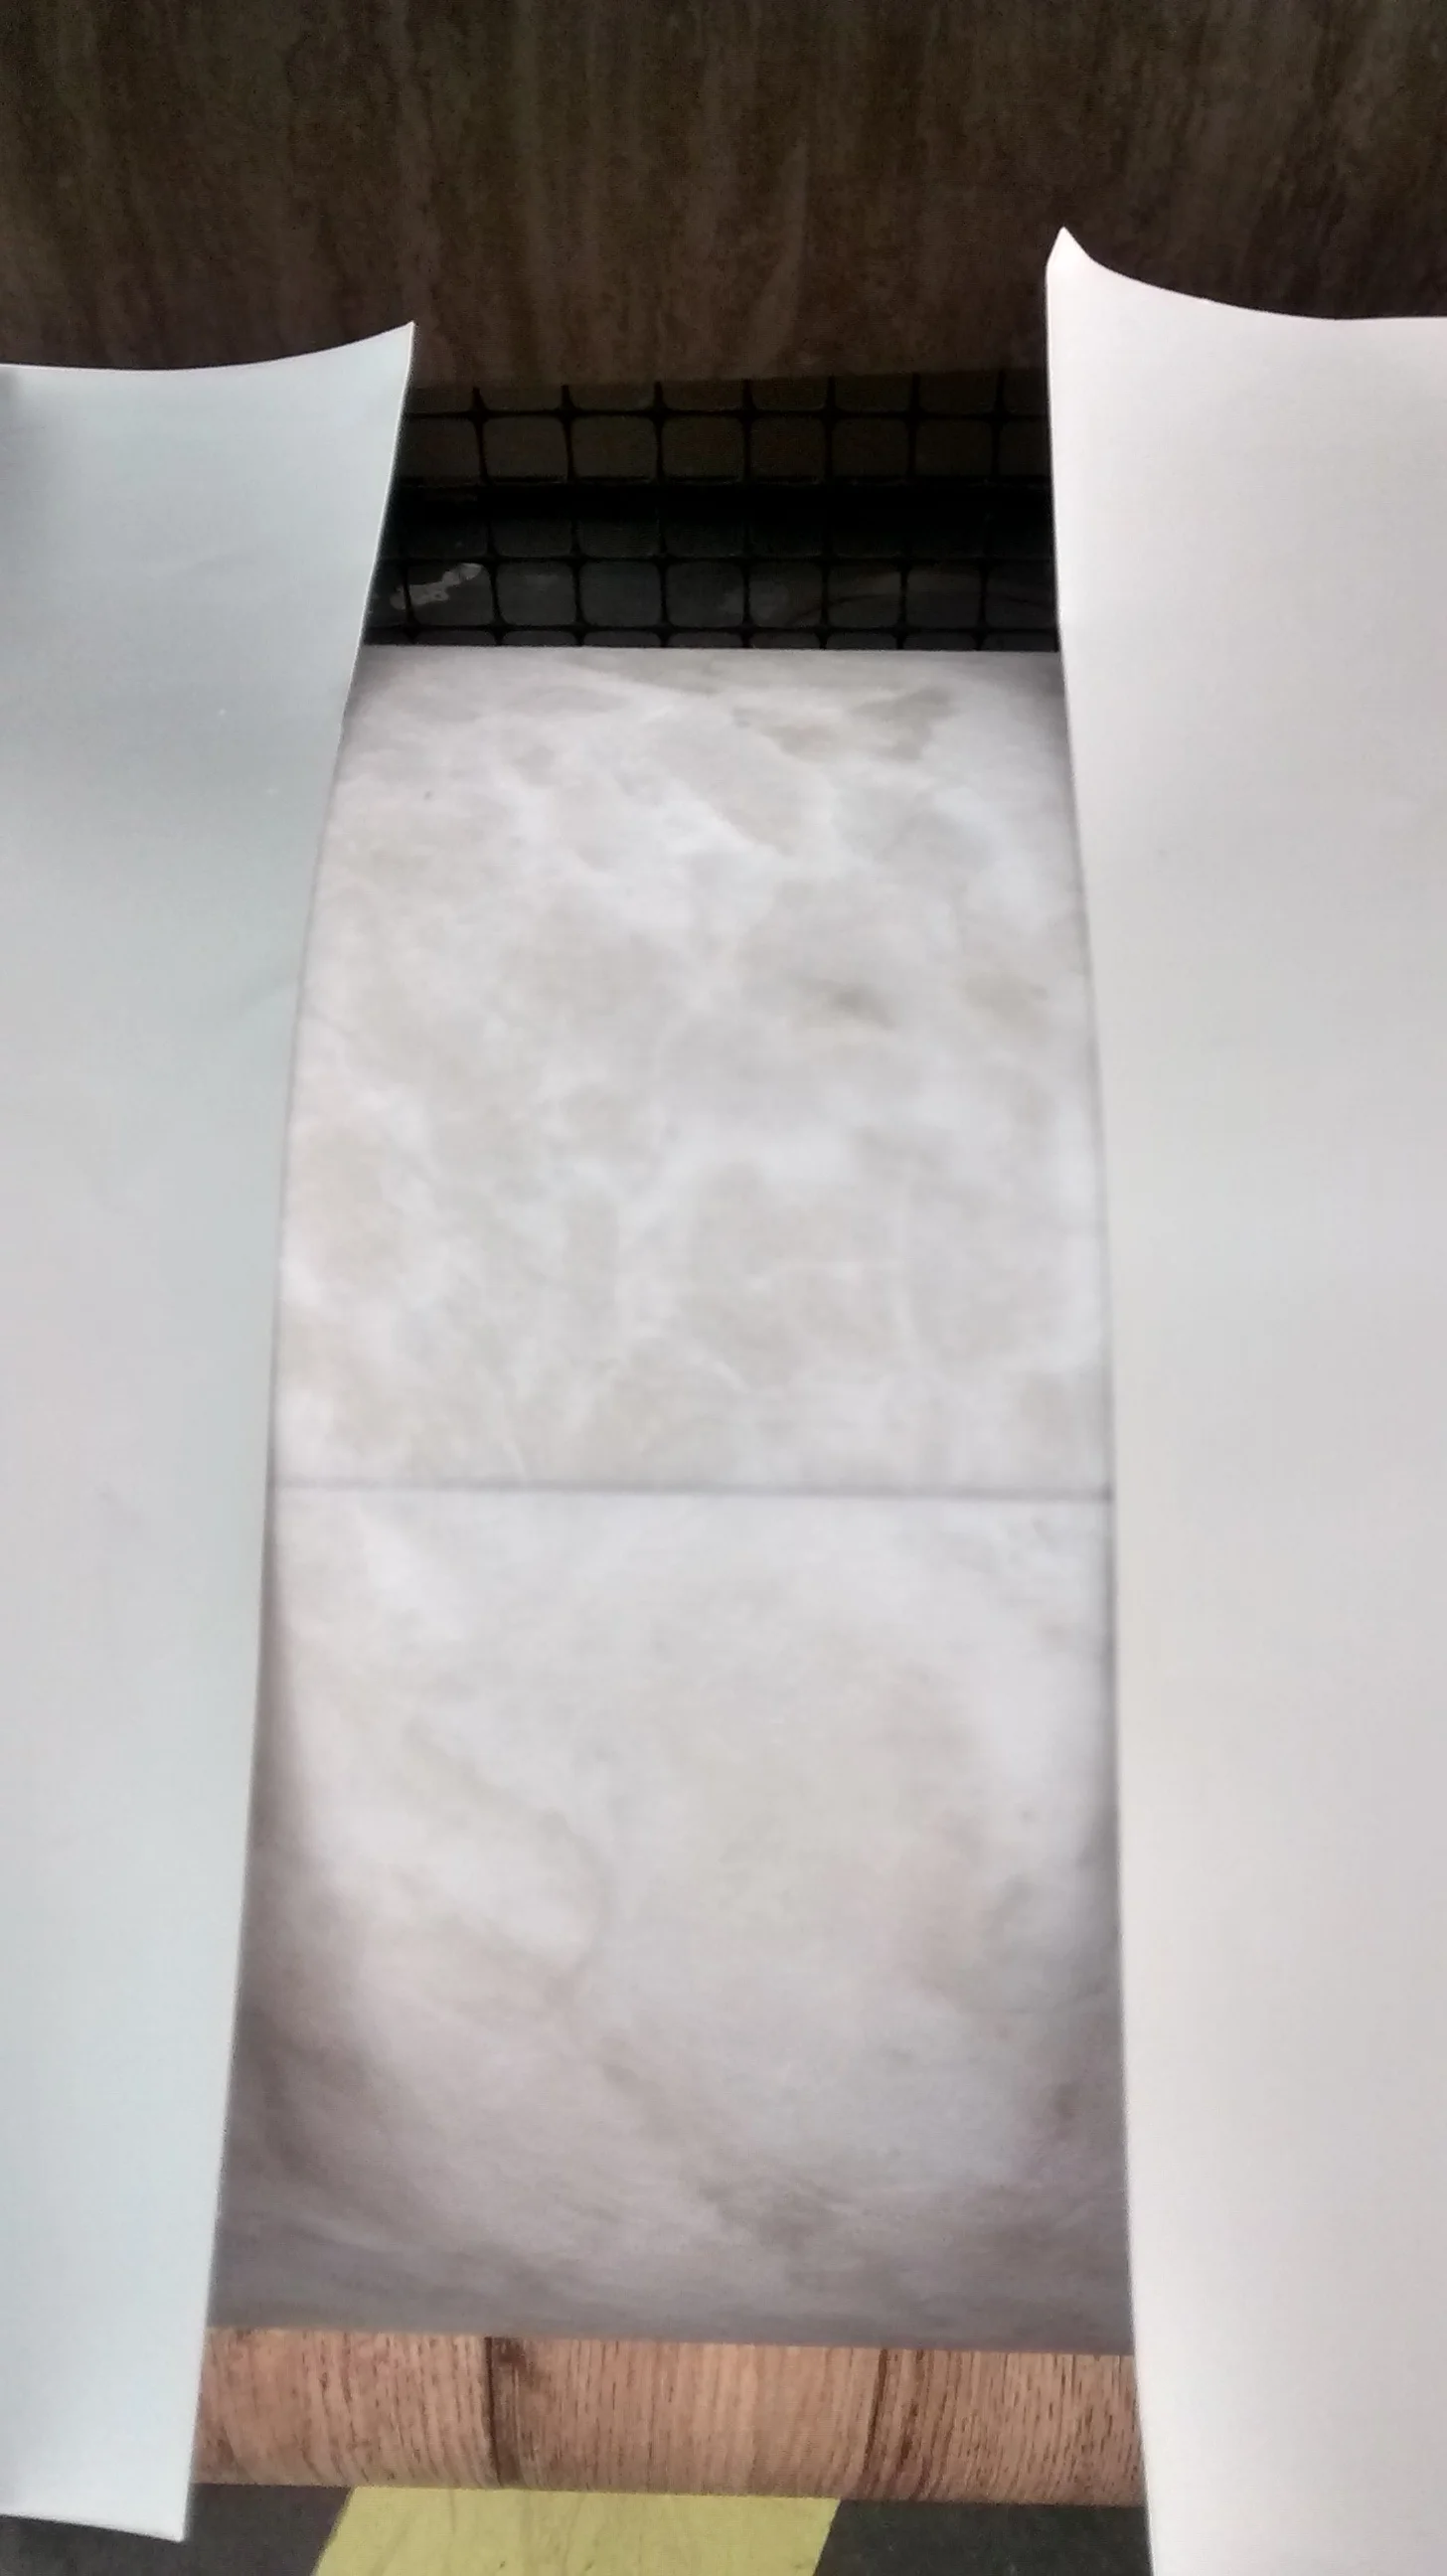
Keep your mortar covered to prolong the wetness

We just threw a piece of plastic over the top when making cuts to prevent it from drying out too quickly.

Check level multiple times

The last thing you want is your tile to be un-level; it will make the whole project exponentially more difficult. We checked level in the center, but our ends sag a bit on both sides because we didn't check all points. Therefore, we had to droop the ends on either side of the tub to meet the corners.

Clean out mortar tools as soon as they are done

Unless you want to be scraping cement off of your tools, wash these out ASAP once you are done for the day.

Make sure to get out excess mortar between tiles before it dries

Same theory as above - you will find yourself with a screwdriver scraping out mortar once it is dried. A very slow and tedious process. Just wipe it out of the gaps when it is wet with a spacer or your finger to make your life easier.

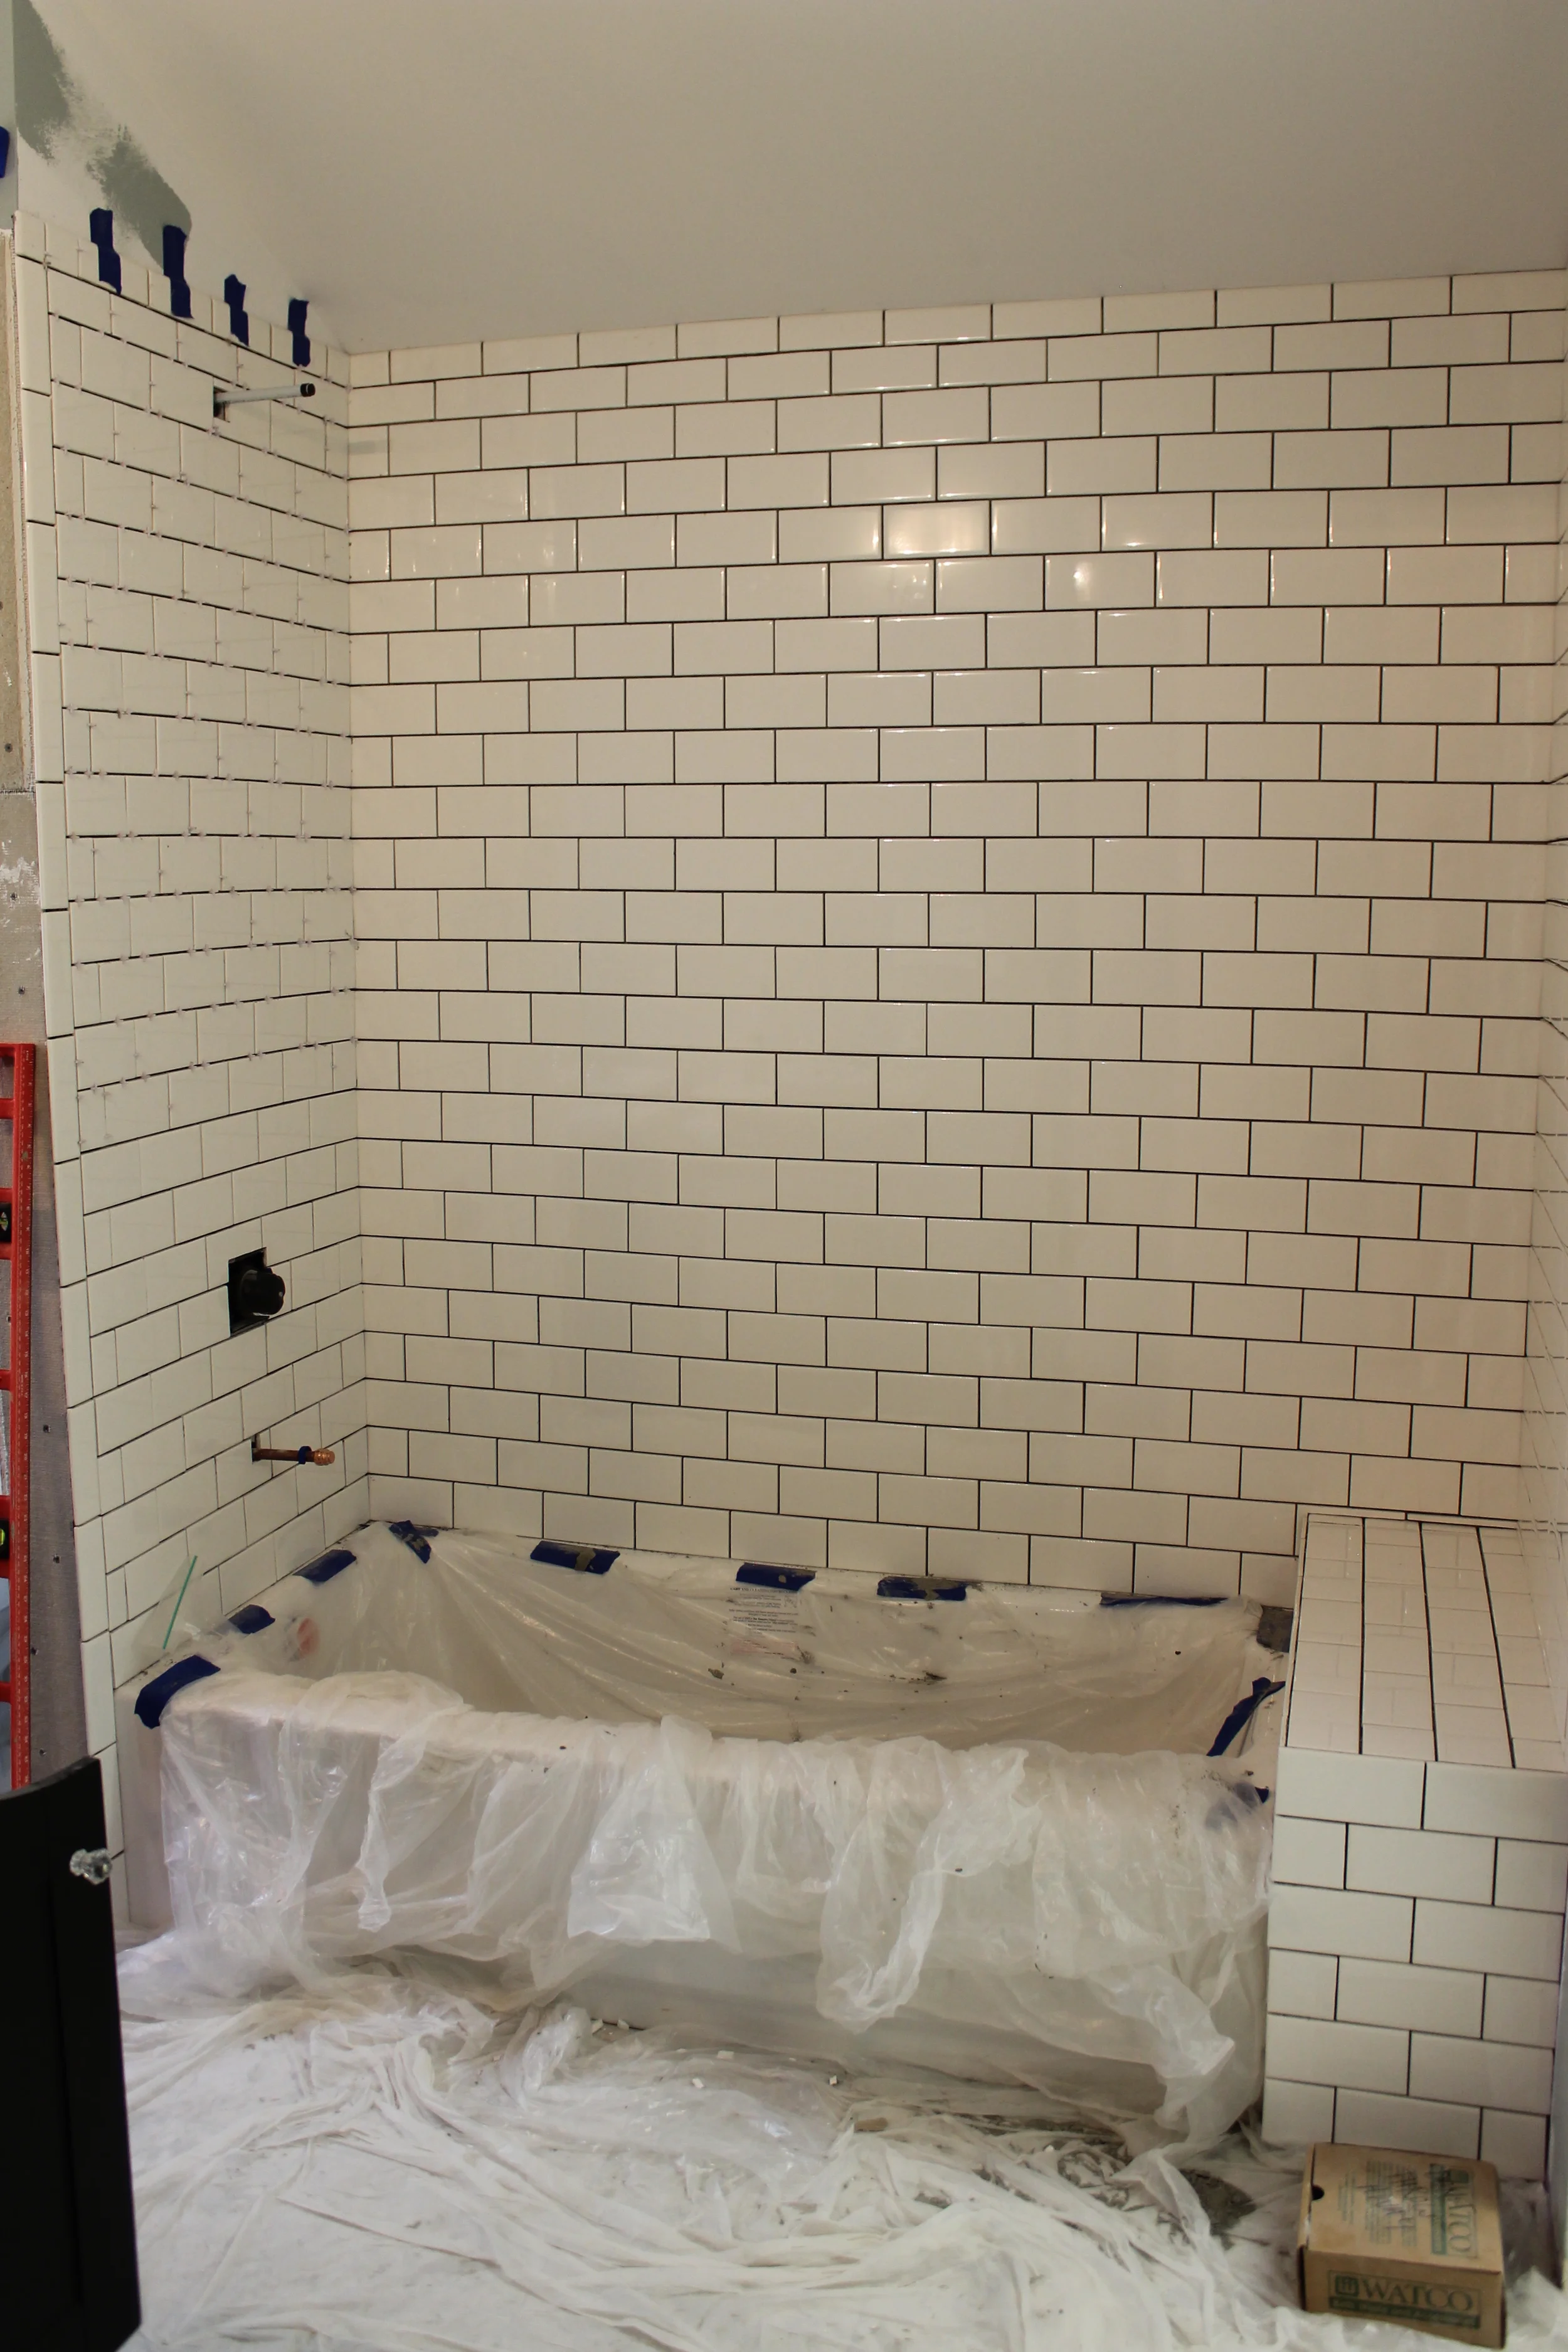
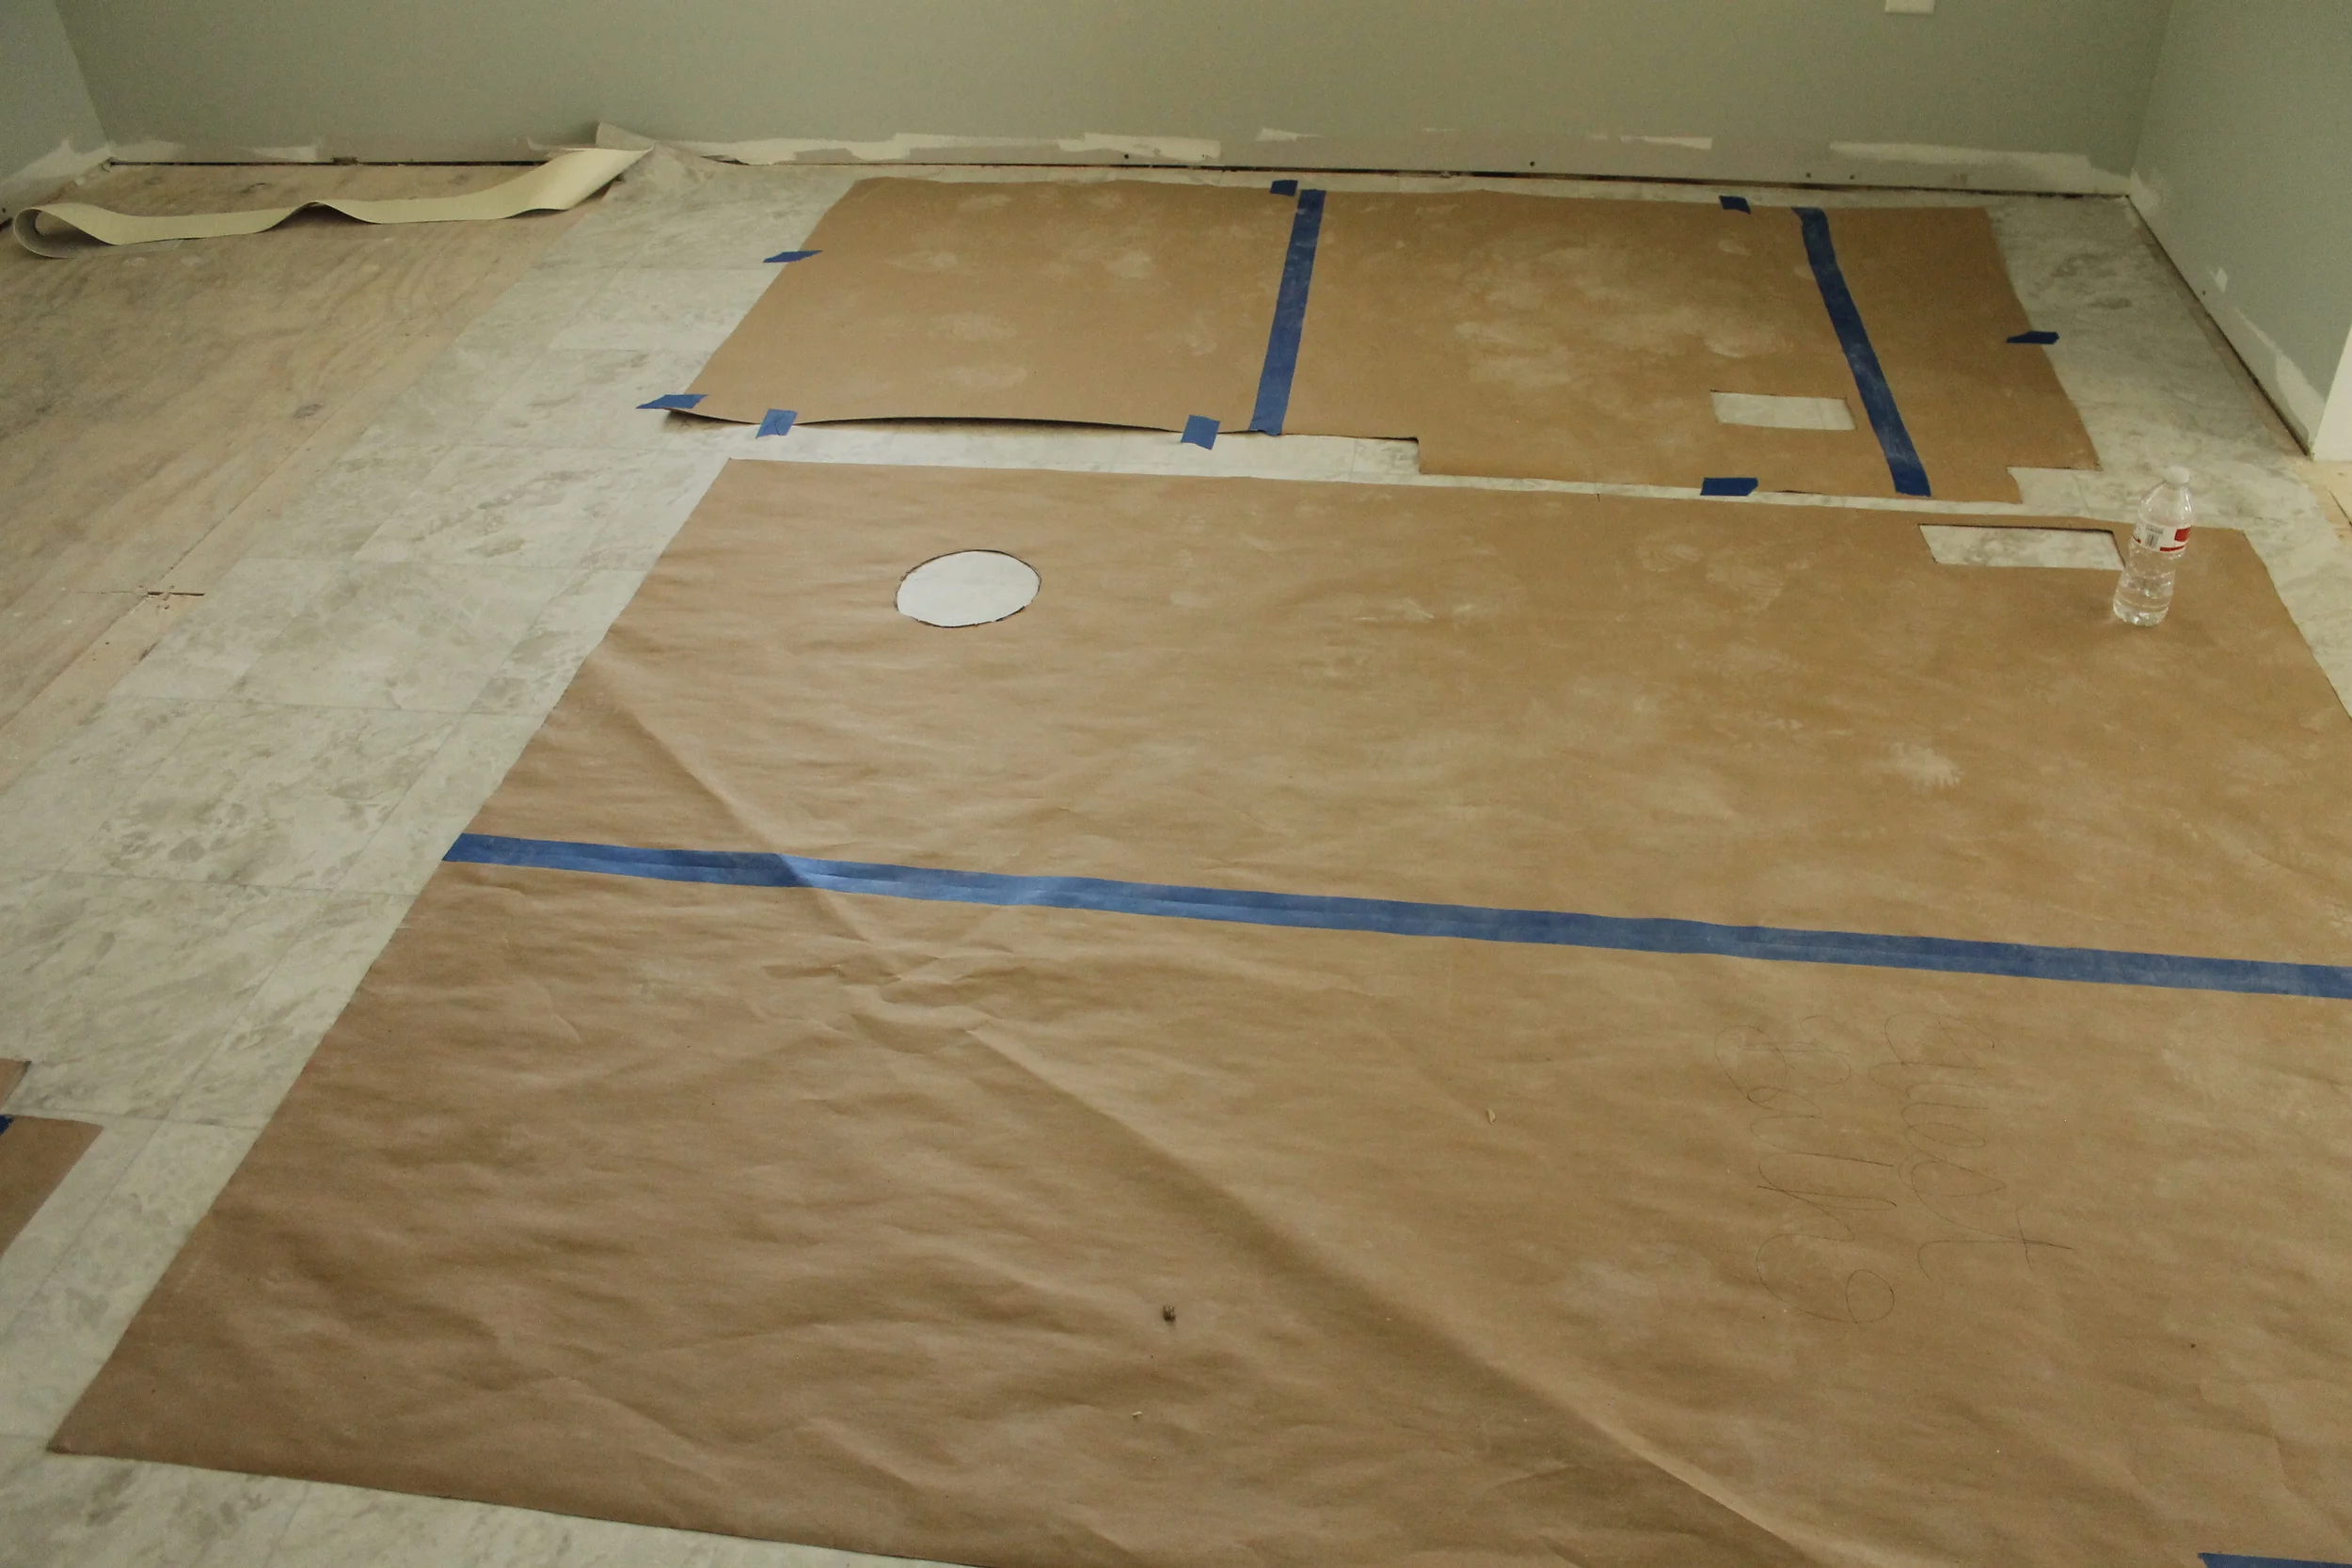
Be sure to lay down plastic in the tub AND on the floor

By the end of the job, our bathroom looked like an archeological dig. The mortar is SUPER messy, and you don't want this anywhere near your white bathroom fixtures. I would keep the protective barrier down during grouting and sealing too.

Elizabeth Burns Design | Installing Tile, Subway Tile DIY

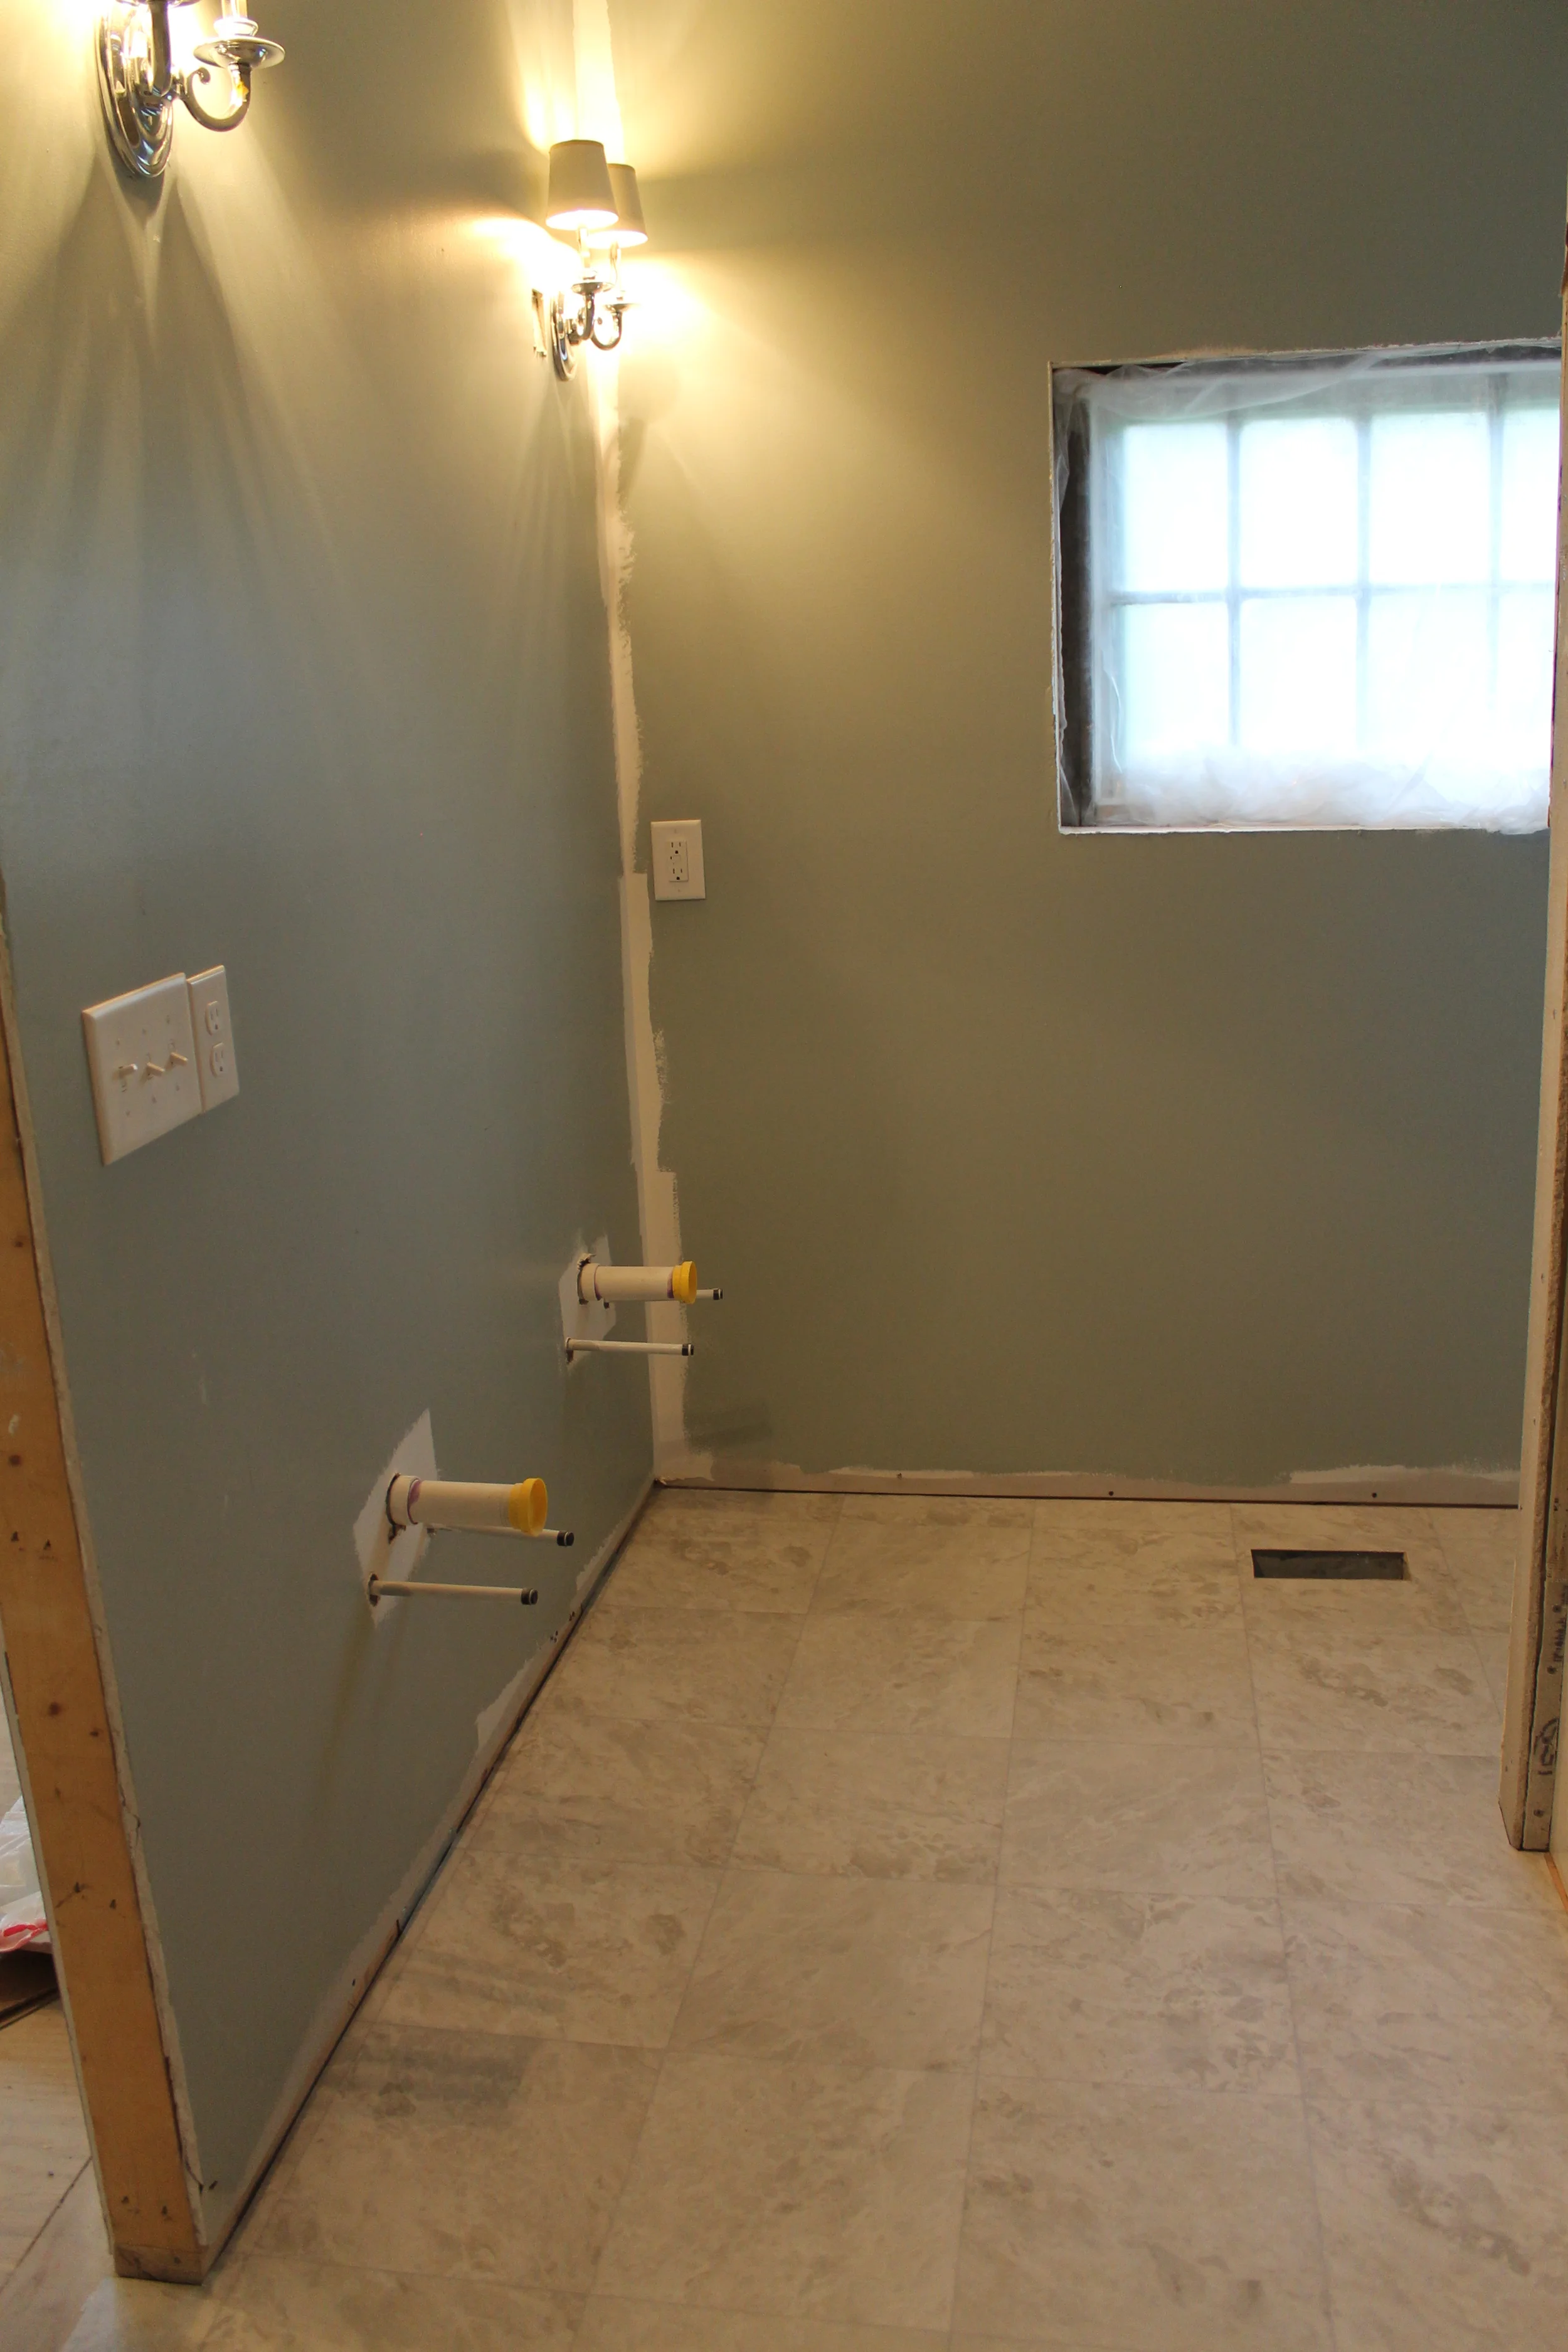
All in all, it was not as scary as I thought it would be. As long as you plan extensively and take your time, I am sure you will do great tiling. And just for fun to conclude this post (basically for my own sake), here is a before and after-ish shot of this bathroom. We're finally starting to get there, guys!

Elizabeth Burns Design | Installing Tile, Subway Tile DIY

Old Cabinets | Myrtle House

There are definitely things you come across while renovating an old house that are worth saving. Solid wood doors, original wide-plank pine floors, and bathtubs are at the top of my list. On the flip side, there are times when you should just cut your losses and replace the item. I really wanted to salvage the Myrtle House Kitchen cabinets. The old flour bins had my heart.

Elizabeth Burns Design | Old Kitchen Cabinets

I made our contractor set them on the front porch during demo (sorry Jake and crew) and there they remained until a few weeks ago. Every time I passed the cabinets by, I said to myself "I will fix those!". This eventually turned into "I think I can fix those..." and most recently "There is no way I can fix those." I can just hear Nicole Curtis screaming in my head: "Those are solid wood cabinets! You can save them!" but quite frankly my friends, I don't have the time, energy, or stomach to get these cabinets back in eat-in-kitchen-worthy condition. Plus, since we are completely re-designing the kitchen layout, we would have to find the exact same cabinets in other odd cabinet sizes to complete the design. Never going to happen. So Brian and I had the happy task of trying to get these cabinets to the dump. Ourselves. Cue head-scratching. Luckily, we have a front porch without railings so we were able to pull the truck bed right up and gracefully slide (hah, yeah right) the cabinets onto our poor little truck. Below is the outcome.

Elizabeth Burns Design | Old Kitchen Cabinets

I think I gained a few gray hairs during the transport to the dump since we couldn't close up the tail-gate. I had visions of the cabinets sliding right off the bed and crashing into someone's car. Luckily we made it without injuring anyone. Phew.

Have you ever desperately wanted to save an item but realized it was a lost cause?

Paying Off My Car | Debt Free Living

This past week, I sent in my very last payment for my car, and it felt pretty amazing. My five year loan was up in July, but it was driving me crazy to have a couple hundred bucks of debt pending for my little Yaris. I bit the bullet, sent in the balance, and was kind of shocked by just how good it felt!

Elizabeth Burns Design | Paying off My Car

I remember when I bought my car and where I was in my life. I had graduated the previous December and just landed my first "big girl job" (full-time with benefits and everything!) the following summer. Since it was 2010 and it was so hard for this interior design degree gal to secure a job in Raleigh, I accepted a position about an hour away in a different field. I didn't completely trust my beloved 1990 Toyota Celica to get me to my new job for much longer, so I decided to buy a "big girl car" to go along with my fancy new job.

As grateful as I am for my now paid off and reliable car, I have a certain nostalgia about my cherry red Celica. I LOVED that car, not necessarily because of the way it looked or drove, but because of the freedom it allowed me. I don't have memories of commuting in it for two hours a day (in order to pay for my new car) like I do for the Yaris. I have memories of driving down to concerts in Charleston with friends on a last minute weekend getaway, just because. I don't think of sitting in bumper to bumper traffic in downtown Raleigh fighting to get home. I think of buckling in the two adorable red headed kiddos I was fortunate enough to nanny for during high school and college (probably still my favorite job to date). While it is nice to have power locks and working AC (it is the little things), there is something about not having the looming car payment and debt that makes your paid-off, crappy car a tad bit sweeter.

Elizabeth Burns Design | Paying off My Car

Now that our vehicles are paid for, our plan is to never (never ever ever) have a car payment again and will instead pay for new cars in full at the time of purchase. Is paying off your vehicle loan(s) something that is important to you?

P.S. I have thought about adding a few more topics of interest to my blog, and becoming debt free is one of them. I hope you enjoy these new posts and I can't wait to hear about your stories as well!

$5 Date Night Ideas

When you are living on a tight budget, date nights often fall to the bottom of the priority list, which I think is quite a shame. If you are working towards a goal of saving or paying off debt, you don't have to sacrifice quality time with your significant other. Some of my favorite dates with Brian have cost little to no money, so I thought it would be fun to list some of our favorite $5-ish dates as we commence the weekend.

Elizabeth Burns Design - Cheap Date Night Ideas for $5 or Les
  1. Enjoy a cheap bottle of wine al fresco - One of my favorite things in the whole world is great conversation. Conversation that is full of belly laughs and chats about life things. I can recall many heart to hearts on our front porch rocking chairs over a bottle of vino. My favorite wine is from Trader Joes and it costs five bucks (plus a bit for tax). I am no wine connoisseur, so I am okay with the cheap stuff, but if you enjoy the finer wines, this might not be the best date idea.
  2. Frozen pizza and Netflix movie night - After a long week of work, sometimes it is nice to just throw on sweat pants, shove a pizza in the oven, and binge watch your favorite Netflix show. We are also big fans of the hot-n-ready pizza from Little Caesars. Don't knock it until you try it.
  3. Go for a long walk - This is especially fun if you have a pooch to walk. We take Lola for walks usually daily, and it is a nice way to talk about the events of the day and spend some time outside excercising. The best part about this date? It's free. :)

What are your favorite inexpensive date nights? I would love to hear them!

Installing Vinyl Flooring

We were able to finally get all of the vinyl flooring down in the bathrooms and laundry room (hip-hip-hooray!), so I wanted to post a full and detailed tutorial on the process we used. Yet again, this project took twice as long and cost twice as much as I originally thought it would, but Brian and I are pretty thrilled with the outcome.

Please note, we followed the instructions from the manufacturer. Your particular flooring may require a different process, so I would be sure to follow those directions. These are just some guidelines. :) Brace yourself - this post turned into a novel.


Here are the supplies we used:


Here is an overview of the steps we took. I would allow at least three hours per room for prep work and installation.

  1. Purchase your vinyl
  2. Acclimate the flooring to the new environment
  3. Create a template of your space
  4. Cut and install the sub-floor
  5. Put down the adhesive
  6. Cut the vinyl to fit the room
  7. Installation

purchase VINYL

Before heading to the store, make sure to measure (and measure again) the footprint of your space(s). If you are changing out the floor in multiple rooms like we did, I recommend drawing out the rooms dimensions to scale on graph paper, and then cutting them out and putting them together like a puzzle to determine the most efficient configuration. Feel free to email me if you have questions about measuring and figuring out how much to buy.

There are SO many options out there for vinyl flooring. We chose this sheet vinyl due to it's ease of installation, low cost, and durability. I also really loved the neutral marble look. A few things to note: most sheet vinyl comes in widths of 12', which is actually quite long when it comes to the logistics of getting it home! Plan ahead for the transportation of your new vinyl; it ain't going to fit in your four door sedan! Even in Brian's truck, we had to stick it through the window and off the tail gate. Also, make sure it is not going to rain during your transport.

Elizabeth Burns Design | How To Install Vinyl Sheet Flooring, DIY

ACCLIMATE flooring

They say you should let your vinyl flooring acclimate to the house for at least 24 hours. It also needs to flatten out from being rolled up. Find the biggest room in your house, and let the flooring flatten out while you go on to the next steps.

Elizabeth Burns Design | How To Install Vinyl Sheet Flooring, DIY

CREATE A TEMPLATE

Next step is to create a template! This will save you so much time and measurement second-guessing. For this process, grab your contractors paper, measuring tape, pen, straight edge, scissors, and tape. If you have baseboards or trim already installed, make sure these are removed or else your cut vinyl will be too small. Measure the length of the area, mark on the paper to that length, and then use your straight edge to draw a line. Cut on this line and lay that paper in place on the floor.

Elizabeth Burns Design | Step by Step Guide on How To Install Vinyl Sheet Flooring, DIY

You may have to cut out obstacles such as air vents or plumbing fixtures. 

Elizabeth Burns Design | Step by Step Guide on How To Install Vinyl Sheet Flooring, DIY

Cut strips for the entire area using the same process, and then attach them all together with the painters tape. We taped the front and back for added stability. Make sure to label the top side so that you don't accidentally cut your vinyl layout upside down.

Elizabeth Burns Design | Step by Step Guide on How To Install Vinyl Sheet Flooring, DIY

create the subfloor

You will want to make sure the subfloor you are putting the new vinyl on is well-prepped. If you are putting vinyl over existing vinyl, then you can skip the new subfloor step. I would, however, recommend cleaning the existing vinyl VERY well (sweep, vacuum, mop, repeat). If you are like us and working with plywood subfloors, you will want to lay down another layer of subfloor (I know, trust me, I fought Brian on this step, too) in order to ensure that the surface the vinyl will lay on is free of imperfections that might show through. Any bumps, dips, or seams surprisingly WILL show through, and after doing all of this work, that is the last thing you want.

Lay your template on top of the 1/4" plywood, then trace around the template. Don't forget to trace those cutouts for the vent, toilets, etc, too. If you are working with a larger room, you may need to use multiple sheets of plywood. Once they are traced, set your plywood on top of the saw horses and use your jig saw to cut them out.

Elizabeth Burns Design | Step by Step Guide on How To Install Vinyl Sheet Flooring, DIY

Once everything is cut out, you will want to fit it into place in the room. When you are happy with how everything fits, grab your hammer and nails. The manufacturer recommended placing nails 3" apart on the perimeter, and then 6" spacing throughout the rest of the sheet. It seems like overkill, but I am glad we followed the instructions as it will prevent squeaking down the road. This process is pretty dang loud.

Elizabeth Burns Design | Step by Step Guide on How To Install Vinyl Sheet Flooring, DIY

Once everything is nailed down and secure, fill in the cracks with wood filler. This will need to cure for at least six hours. Once dry, sand it down very well so that the gap is seamless. Any little hump or bump might show through.


put down adhesive

After everything has dried, it is time to paint on the releasable adhesive! This stuff is pretty cool as it acts like a glue, yet it allows the vinyl to be re-positioned and easily removed in the future. It is great for first-timers like us who are prone to make mistakes. In a weird way, it kind of smells like Egg Nog.

Elizabeth Burns Design | Step by Step Guide on How To Install Vinyl Sheet Flooring, DIY

Roll the adhesive onto the floor just like you would roll paint on the walls. I would try to get as close to the edges as possible. Let this set for 45-60 minutes until it is tacky.

Elizabeth Burns Design | Step by Step Guide on How To Install Vinyl Sheet Flooring, DIY

cut the vinyl

Now we can move on to the fun part! While the adhesive is drying, take the same templates from earlier and place them onto the large vinyl sheet. Make sure they are the right side up! Lightly tape them down to prevent sliding.

Elizabeth Burns Design | Step by Step Guide on How To Install Vinyl Sheet Flooring, DIY

Using the box cutter, carefully cut around the template through the vinyl. I would leave about 1/4" extra on all sides. You can always trim down, but you can't add more vinyl back!


install the vinyl

Once everything is cut out, roll your vinyl up to make installation a bit easier. Starting in the corner, place the flap of the vinyl that is not rolled in place on the adhesive, and then slowly start rolling out. If the vinyl becomes unaligned, simply peel it back up, and start again. We used a scrap PVC pipe like a rolling pin to smooth out any air bubbles.

Elizabeth Burns Design | Step by Step Guide on How To Install Vinyl Sheet Flooring, DIY

That's about it, friends! The last steps will be to install baseboards and quarter-round, and then caulk everything to make sure it is water tight. I will say, we had an unexpected flood of water while we were installing faucets, and this floor held up like a champ. :)

I hope this was helpful, and if you are reading this part, thanks for making it through with me to the end! Feel free to email me with any questions at all.

Kitchen and Dining Lighting | Myrtle House

We had another productive weekend at the Myrtle House! I am convinced that renovating a house might be the best workout out there, because man, am I sore today! This is mostly due to the fact that we started installing the vinyl floors in the bathrooms (lots of squats, y'all!), and I will post about that process later on this week. For now, I am so excited to show you guys how the lighting turned out in the kitchen and dining room. The amount of lighting in this space is on point, and I think this area is going to be so lovely when it is all wrapped up... whenever that might be!

This first photo is of the kitchen. The oil-rubbed bronze and crystal chandelier will be above a small eating area, and the gold and crystal chandelier on the other side of the fireplace will be the dining room. Please excuse my husband's derriere! :)

Elizabeth Burns Design | Kitchen Lighting - Old House Renovation/Flipping

In the kitchen, we did a mix of recessed lights with a couple of oil-rubbed bronze fixtures (one chandelier and one flush-mount). I love the contrast between the dark oil-rubbed bronze and crisp, white-ish beadboard ceilings.

Elizabeth Burns Design | Kitchen Lighting - Old House Renovation/Flipping

And here are a few shots at night!

Elizabeth Burns Design | Kitchen Lighting - Old House Renovation/Flipping

In the little nook beyond the beadboard arch will house some base cabinets and the kitchen sink. The flushmount will be right over the sink.

Elizabeth Burns Design | Kitchen Lighting - Old House Renovation/Flipping

And here is the chandelier in the dining room. I took off most of the crystals so that they wouldn't be damaged during installation (you can see it all put together here), but I LOVE how this light looks in front of the brick. You can also see a peek at the vinyl flooring flattening out below. No vinyl for this room :) ; we are going to attempt to match the old existing hardwood in here that will continue into the kitchen.

Elizabeth Burns Design | Kitchen Lighting - Old House Renovation/Flipping

We were actually able to sleep in the house for the first time ever since starting this project in January of last year. That felt like quite a milestone! It is really exciting to see it all slowly starting to come together.