Craigslist Luxe for Less - Pink and Gold Dresser

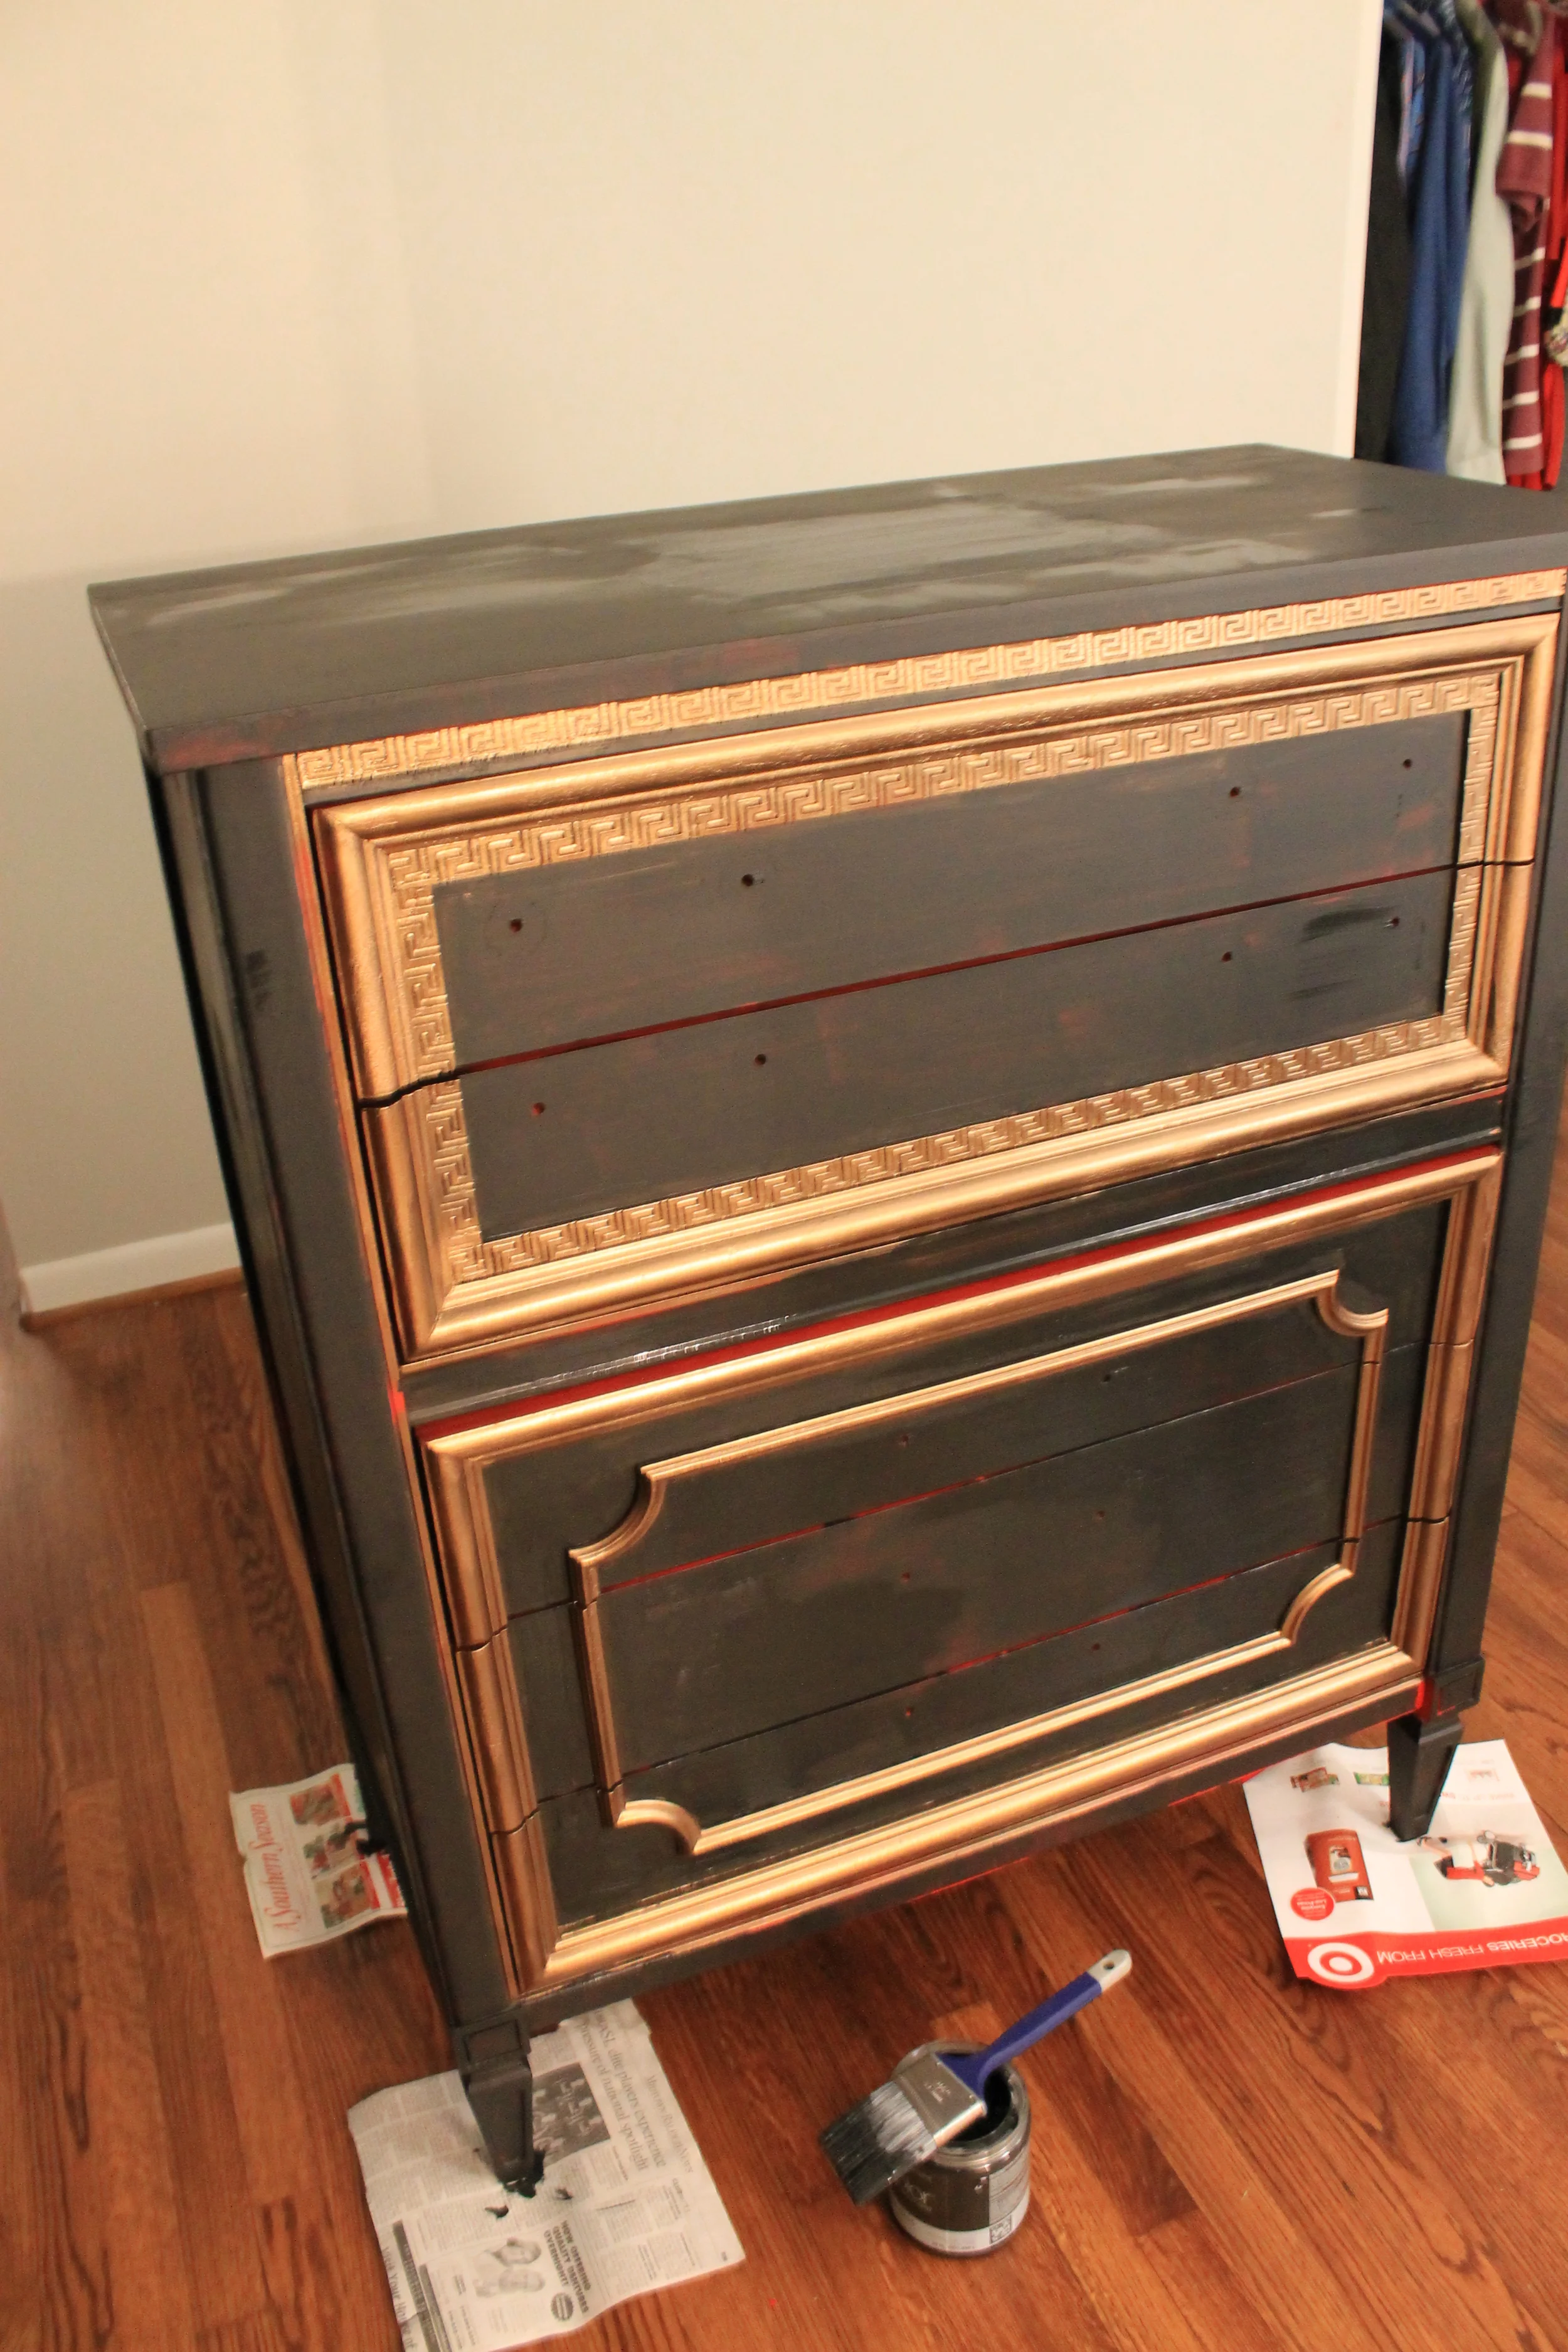
For a while now, I have had my eye on this dresser. I love the design, the big gold pulls, and the soft pink color.

Elizabeth Burns Design | Pink and Gold Dresser

However, the $2000 price tag is something I could do without. While browsing on Craigslist one night, I came across this dresser. It had good lines, ample storage space, and I knew I could re-create the above look for next to nothing. This little gem was a whopping $40.

Elizabeth Burns Design | Pink and Gold Dresser

The existing hardware was okay, but the center pull was broken in half and I knew just the perfect hardware to create the high-end version I had in my head. D. Lawless Hardware was kind enough to send these amazing Solid Brass Ring Pulls for my project. They are just as pretty in person as they look online! If you are ever in the market for furniture or cabinet hardware, I cannot recommend this company enough. They have the best selection and the best prices around. I have ordered hardware for two kitchens and have been totally impressed with each order.

Elizabeth Burns Design | Pink and Gold Dresser

The piece of furniture is laminate, so it ended up taking two coats of primer as well as two coats of paint. I used Sherwin Williams Intimate White. It is a really pretty, soft peachy-pink and is actually the same color of our previous office/guest bedroom.

Sherwin Williams Intimate White - Elizabeth Burns Design
Elizabeth Burns Design | Pink and Gold Dresser

After multiple coats and quite a bit of soreness later, this little Craigslist dresser has a brand new look!

Elizabeth Burns Design | Pink and Gold Dresser

And here is a little side-by-side before and after action.

Elizabeth Burns Design | Pink and Gold Dresser

I am thinking this slightly pink dresser will be great in our future office. With the ample storage space and pink/gold accents, I think it could be pretty fabulous, but Brian may disagree... What do you think - would you have pink furniture if you shared a home with a male significant other? ;)

DIY Backyard Patio | Brooklyn House

When you live in a small home, your outdoor space becomes an important extension of your living area. For us, we barely had an eat-in kitchen big enough for us two, much less my large family, so we knew early on we wanted to create a space where we could host family dinner. The only available space was outside! Our yard is kind of strange. It is a sloping lot that levels out in the backyard, but around the house there are two retaining walls. They are kind of awkward. Here is how it looked before. Sorry about the quality, I am notoriously bad about taking "before" photos.

Elizabeth Burns Design | Backyard Patio DIY

Pretty, right? ;) The peeling paint is what sealed the deal for me. The blue/green artistic effect was a nice touch by the sellers. Oh and since I am so bad at taking photos before we start working on a project, the only other photos I have of this area have our dog, Lola, front and center. Please excuse my dog-mom pictures.

Elizabeth Burns Design | Backyard Patio DIY

And this is how it looked while we thought about what to do with this space. Gosh, I miss that backyard and those big, old Pecan trees!

Elizabeth Burns Design | Backyard Patio DIY

We finally found a table that we knew could accommodate my family of ten from Ikea. After picking it up, we got to work clearing out the area. Most of this involved digging up grass and a multitude of horrendous stumps. Oh gosh, the stumps. I am sure Brian remembers them fondly.

Elizabeth Burns Design | DIY Paver Patio

Here is how to looked once cleared out.

Elizabeth Burns Design | DIY Paver Patio

We used a rake to get all of the grass/weeds up. I HIGHLY recommend also putting down landscaping fabric once you get to this stage. We did not, and have regretted it ever since. In the summer time, you will be pulling weeds each weekend. No fun.

Elizabeth Burns Design | DIY Paver Patio

After you get the area level and clear of grass, it is time to lay the pavers. Make sure to measure the width and figure out exactly what kind of spacing you should have in between each one. Once the pattern is figured out, lay out each paver. We put them directly onto the leveled dirt, but you may want to put down a shallow layer of pea gravel first. My theory was the pavers would stay in place more if directly on the dirt, but it is a personal preference. Once in place. start filling in with pea gravel! Since it was a smallish area, we bought bags of pea gravel, but if you have a larger area, please save your back and have the bulk gravel delivered. You will thank yourself later, I promise. Here is how it came out!

Elizabeth Burns Design | DIY Paver Patio

All of those old bricks we dug were re-purposed as a border dividing the patio and weed/grass area. I love how the brick color ties in the tones in the table.

Elizabeth Burns Design | DIY Paver Patio

The pavers we used are $1.50 at Lowes. I really liked these and will use them again. They are deceivingly heavy, so I would plan accordingly when loading/unloading and transporting. I think this is the pea gravel we used, but it is hard to tell online. I also really loved the colors in this gravel and would use it again. We really got a lot of use out of this area. We threw birthday parties, dinner parties, and even a wedding shower out here. Our property manager actually ended up buying the table and chairs from us when we rented the house. I am glad they are still being used and loved. :) We later filled in the remaining grass with gravel, and added fun patio lights (tutorial here).

Elizabeth Burns Design | DIY Patio

Have you ever attempted an outdoor patio? Any tips or tricks to share? I would love to hear!

Chest Before/After | Vintage Furniture

My poor little blog has been awfully boring these days. Spreadsheets, floor plans, and budgets do not feed the creative mind, so today I thought I would go back in the archives and show a fun before/after of a little vintage chest of drawers we refinished a few years ago while we are waiting for the fun parts on the Myrtle House.

This cute chest was a $50 Craigslist find. A previous co-worker (also an Interior Design major) actually bought the matching dresser. That is Craigslist teamwork right there. It was pretty solid and only needed some paint.

Elizabeth Burns Design | Black and Gold Dresser DIY

Loved that Greek Key detail.

Elizabeth Burns Design | Black and Gold Dresser DIY

So here is the part where I went astray. You see, I was trying to prove to my neutral-loving self that I too can be bold. I can have brightly colored furniture in my house. I am capable. Well, I was wrong. Here is our first attempt. NC State red!

Summer 2011 017.jpg

If red is right, I think I want to be wrong. Fail. This is the part where I look at Brian and say, "Sorry, I know you love red, but this has got to go". With a sigh, we take it back outside for round two. This time around, I went with my gut and stuck to a more neutral palette of black and gold.

Elizabeth Burns Design | Black and Gold Dresser DIY

Red is not easy to cover, my friends.

Elizabeth Burns Design | Black and Gold Dresser DIY

The finish came out with this really neat antique finish with slightly crackled paint. Probably because we had painted the heck out of it.

Elizabeth Burns Design | Black and Gold Dresser DIY

This little guy now has a new home thanks to Craigslist. So in your opinion, would have you kept the red? Or are you a neutral gal like me and prefer the black?

Specification Sheet | Myrtle House

One thing I have learned throughout this whole process is that communication is crucial when renovating a house. There are so many decisions (big and small) to make, there can be big hiccups when the people involved are not on the same page. While getting my degree in Interior Design, we were taught to make a specification sheet to easily communicate with clients and contractors exactly what products will be going into the space. This acts like a little cheat sheet so that contractors can tell plumbers where the drain for the sink should go based on which sink is being purchased. Here is a preview of the one I have created for the Myrtle House.

Elizabeth Burns Design | Kitchen Spec Sheet

I have divided it into two sections. One side has the product listed, where it is to be purchased, a link to the product, as well as the dimensions and any pertinent notes that may be needed for installation. This section is great for passing on to the people working on the house. On the other side of the sheet is my little area that I keep to myself where I can track what has been bought, what I expect the final cost of the item to be, as well as reminders as to where I can get discounts. I have a separate tab for each area/room in the house like the kitchen, bathrooms, exterior. At the bottom of each sheet, I have a summary of what has been purchased and what is left to purchase to keep us on track of our total renovation budget. Having all of these items easily accessible also allows me to check often to see if anything has gone on sale. Turns out today was my lucky day since this kitchen faucet I have been coveting for months went on sale. :)

Elizabeth Burns Design | Chrome Kitchen Faucet


I recently discovered the wonderful world of Ebates, but so often to forget to use it! This spreadsheet helps remind me of this handy website.

How do you all keep track of renovations or home repairs/upgrades?

*Update: as requested, here is a template of the specification sheet for your own project. I hope you find it helpful!

Final Floor Plan (I Promise) | Myrtle House

I am sure you are sick of me talking about the floor plan (I am sick of it myself), but this is the last update, I promise! Framing starts in the next few weeks, so there is no turning back now. I am really excited for how it turned out. We managed to change this originally 2 bed/1 bath house into a 3 bed/3.5 bath, which I am pumped about.

Elizabeth Burns Design | Myrtle House Floor Plan

This one is not nearly as neat (my apologies) but here is a rough idea of what the layout used to be.

Elizabeth Burns Design | Old Floor Plan

As you can see, the previous layout was the epitome of compartmentalized. No flow whatsoever, just like an old house. I think it is a huge blessing in disguise that there was so much termite damage. To keep costs low, we had agreed to try and keep the layout as it was and just deal with the awkwardness. I am so glad we were able to move most of the walls in the end. The long wall going down the middle of house is the load-bearing wall, so we will keep most of this in place.

One thing we discussed with our contractor on our last trip is to remove the back door. It was making the layout impossible and we had to create a long hallway to keep access to it (i.e. lots of wasted space). For about $700 dollars, this door and two windows will be removed and replaced with new siding. We already have access to the back through a door in the new kitchen, and the windows that are going away are 1. ugly, and 2. located where closets will be. No harm, no foul. Here is a photo of what we are getting rid of.

Elizabeth Burns Design | Construction

The door and the two windows flanking it are going away. We will still have a window in the master bath (the short window on the left) and guest bath (out of sight in this photo). Where the door is now is where the new master closet will be. :) P.S. Do you notice the NEW wood going in? It is odd, but even having the new stuff in is starting to brighten up the space.

Elizabeth Burns Design | New Joists

Another joy of working with an old house is retrofitting the old doors. Brian, Jake (our contractor), and I spent Sunday measuring the salvageable doors, taking photos, labeling, and then I had to try and match them to appropriate places in the house. Since all of the doors are different sizes (of course), the crew had to know the dimensions of each for framing. D7 stands for Door #7. :) What is behind Door #7 you may wonder? A closet - exciting, I know. :)

Elizabeth Burns Design | Layout

Now I get to try and find a few "new" doors for the house from a Habitat Store. Any Raleigh people seen a good/affordable selection of antique doors locally?

Boone, NC | Life

Our life as of late has been spent either working in Raleigh, or traveling three hours away to the Myrtle House. Needless to say, we were in need of a little getaway, so we spent last Saturday in Boone, NC for a little R&R.

First stop was the Moses Cone Manor. Brian planned this side-trip as a surprise, but sadly, the fog was SO intense, we could barely even make out the house. I guess they aren't called the Great Smokey Mountains for nothing! We were able to wander around the house and grounds for a few minutes before the rain got us, but we already have decided to go back when the weather is better. This house is stunning.

Elizabeth Burns Design | Boone, NC

Further down the mountains, we found ourselves at the most relaxing vineyard. Grandfather Vineyard Winery is situated at the bottom of a rolling hill right alongside a babbling brook. We went for a tasting, and then purchased a bottle to enjoy by the water in the Adirondack chairs. Hands down, favorite part of the day.

Elizabeth Burns Design | Grandfather Vineyard Winery, Boone NC

It was nice to take a minute to relax and not think about work, floor plans, or budgets. Have you been able to take a relaxing trip recently?